
Hello Stampers and welcome back to our Canada Inks Up! Blog Hop for the month of June. This month’s Blog Hop Theme is Birthday Celebrations. I decided I wanted to make a Cascading Card and use the new In Colour Shimmer Vellum papers and the In Color cardstock. I also used the Poppy Moment dies to create the flowers for my cascading card.

Cascading Poppy Card
Stamps: Peaceful Moments, Forever Evergreen
Dies: Poppy Moments, Hippo and Friends, Stitched Rectangle
Cardstock and DSP: Basic White, Garden Green, Granny Apple Green, In Color Shimmer Vellum and White Vellum
Ink: Mossy Meadow
Other Products: Bumble Bee Trinkets, Dimensionals, liquid glue, glue dots and Stampin Seal
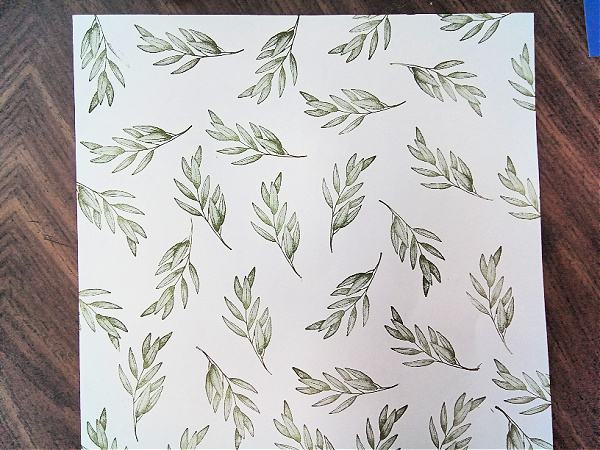
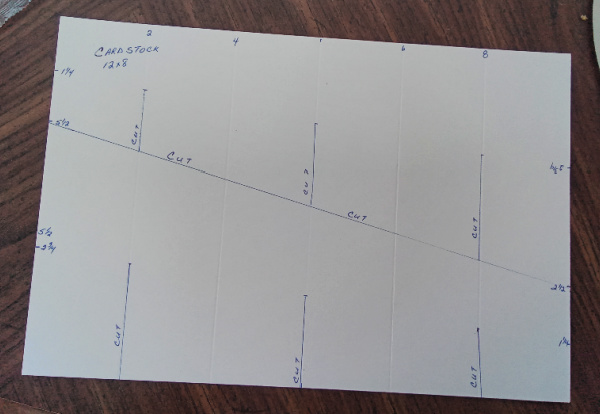
I have stamped both sides of a 12 x 12 piece of cardstock so the leaf pattern shows up properly on both sides of the cascading base. I then cut it down to 12 x 8. This is a template of how the cardstock needs to be cut.
Instructions
- Using a 12 x 12 piece of cardstock cut it down to 12 x 8.
- If you decide to stamp and decorate the cardstock for the cascading vase now is the time as it will stamp without having the score line on the images. You will need to stamp both sides of the cardstock to make it work properly.
- Score it on the long 12″ side at 2, 4, 8 and 10 and at the 6″ mark, make a pencil line at the top and bottom .
- On the 8″ side measure up 5-1/2 ” and make a mark and on the other side of the cardstock make a mark at the 2-1/2″ mark.
- Use your paper trimmer and cut diagonally from the 5-1/2 mark down to the 2-1/2 leaving you with two diagonal pieces.
- On each of the diagonal pieces make a pencil mark at 2-3/4 and 1-1/4 and then use a ruler at these two marks to form another diagonal. Make a pencil mark where the ruler and the score line meet at the 2|”, 6″ and the 10″.
- With scissors and on the one piece that is flat on the bottom cut up score line to the little pencil mark on the 2, 6, 10.
- On the other piece of cardstock cut up on the diagonal edge on the 2, 6 and 10″ pencil marks.
- Now interlock the two pieces of cardstock together and burnish the folds to form the cascade card.
- Cut out several of the poppies from the Poppy Moment die set in the new Pale Papaya Shimmer Vellum and for the top layer of the poppy use Pale Papaya cardstock. The center of the poppy is Daffodil Delight.
- The leaves are cut in Garden Green for the back layer of the leaves and the top layer is Granny Apple Green.
- Place the poppies on the top edges of the cascading card using dimensionals and the leaves with liquid glue.
- Stamp a Happy Birthday sentiment from the Peaceful Moments stamp set on a piece of vellum and attach among the flowers with a glue dot.
- On the back of the card add a piece of cardstock die cut from the Happy Hippo die set. This gives you a place to write and also reinforces your card base.
- Add a Bumblebee trinket to one of the poppies for a little bling.
How hop over and check out the other Demonstrators and their creations:
Powered by Linky Tools
Click here to enter your link and view this Linky Tools list…
Product List









Beautiful card Marilyn
Thank you Diane
Thanks Diane
Really pretty card Marilyn – someone will be very happy when they get it!
Thanks Ginny it was so much fun to make.
Wow! what a great card!
Thank you Melva