Instructions and products used to create this card:
- Card base is Flirty Flamingo card stock, cut at 8 1/2″ x 5 1/2″ scored and folded at 4 1/4″
- Cut a Basic White layer 4″ x 5 1/4″
- Cut a piece of White Tissue Paper 6″ x 4 3/4″
- Crumple the white tissue paper into a tiny ball and then gently unwrap it to create all the wrinkles
- Using the wide end of the Tombow Glue, lightly spread a thin layer of glue all over the Basic White card stock layer
- Carefully lay the tissue paper on the glued Basic White layer, leaving the wrinkles in the tissue paper (see 1st photo)
- Place glue on the edges of back side of the Basic White tissue layer, and wrap the tissue paper over the Basic White layer
- Glue the tissue paper layer to the Flirty Flamingo layer with liquid glue
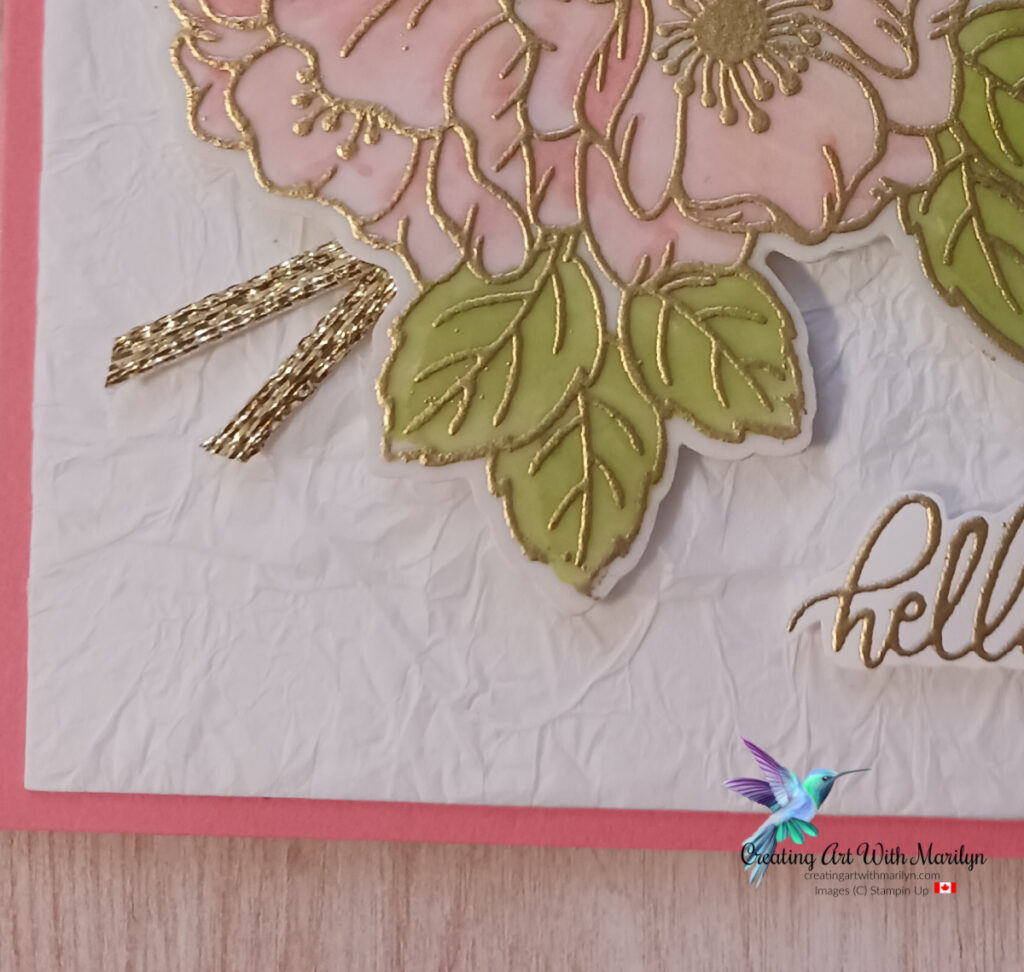
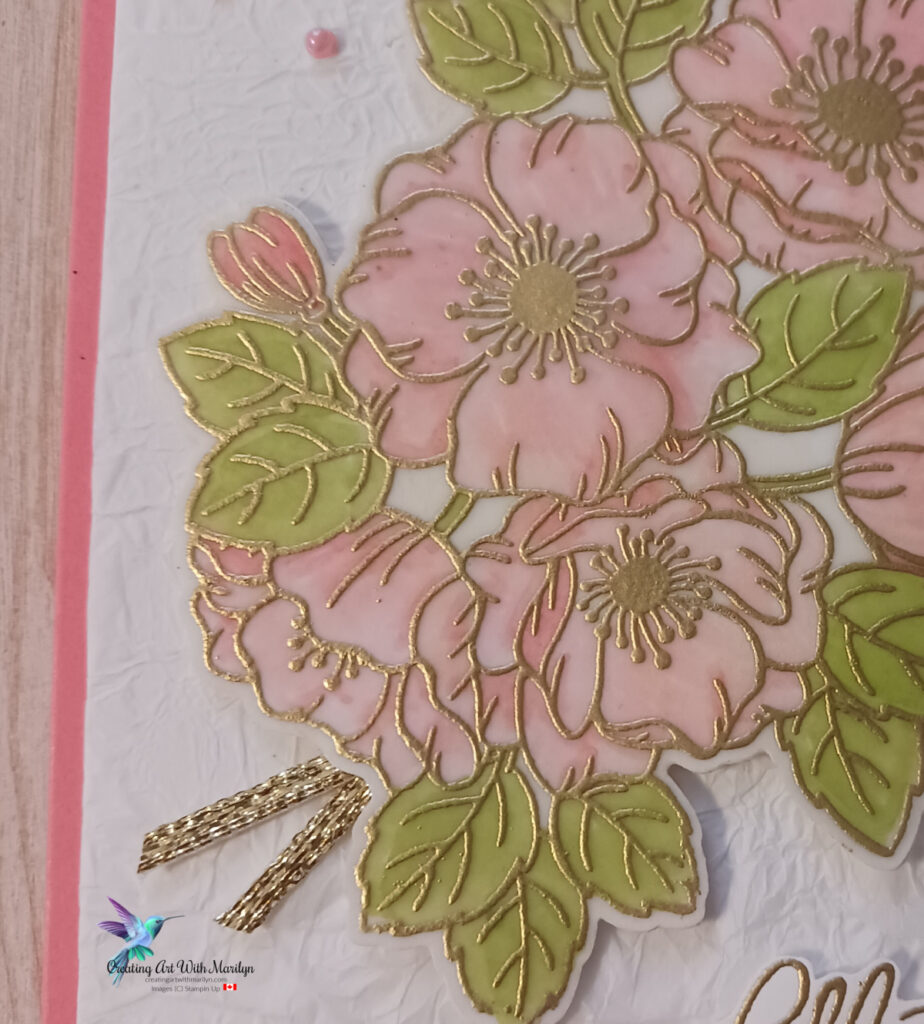
- Stamp the large flower image with Versa Mark ink on a piece of Vellum cut 4″ x 5″
- Heat emboss the image on the Vellum with Gold Embossing Powder
- Use the Enduring Beauty die, cut the gold embossed flower image out
- Flip the gold embossed vellum layer over and color the back side with Flirty Flamingo and Granny Apple Green Stampin Blends(see Photo 2)
- Die cut another large flower from a piece of Basic White (this is to glue the vellum to so dimensionals don’t show)
- Use a sponge or dauber, lightly sponge some Tombow glue to the complete front side of the Basic White card stock layer and lay the colored Vellum ayer onto the Basic White layer
- Use dimensionals to adhere the Basic White and Vellum layer to the card base
- Stamp a sentiment in Gold Embossing powder and fussy cut the sentiment. Attach the sentiment to the card with dimensionals
- Add a piece of the Gold 1/8″ Trim to the card with glue dots
- Place a Brushed Brass Butterfly to the card and add some pink pearls from the Blooming Pearls to finish the card
")


 Trim Combo Pack")


")