
This Gallery Challenge is made up of very talented Demonstrators from all around the world that create amazing cards that you are able to vote on and pick your favourites later on this month.
I’m always up for a good challenge and this month I decided I wanted to play with the New Framed Florets Bundle that will be in the New January to June Mini Catalogue. This comes as a collection with the Framed Florets Bundle, Fitting Floret Designer Series Paper, Gold Adhesive Back Swirl gems and a Christmas stamp set called Framed and Festive. The Designer Series Paper, Gold Adhesive Swirl Gems and the Framed and Festive stamp set will not be in the Mini catalogue and will be only available while supplies last.
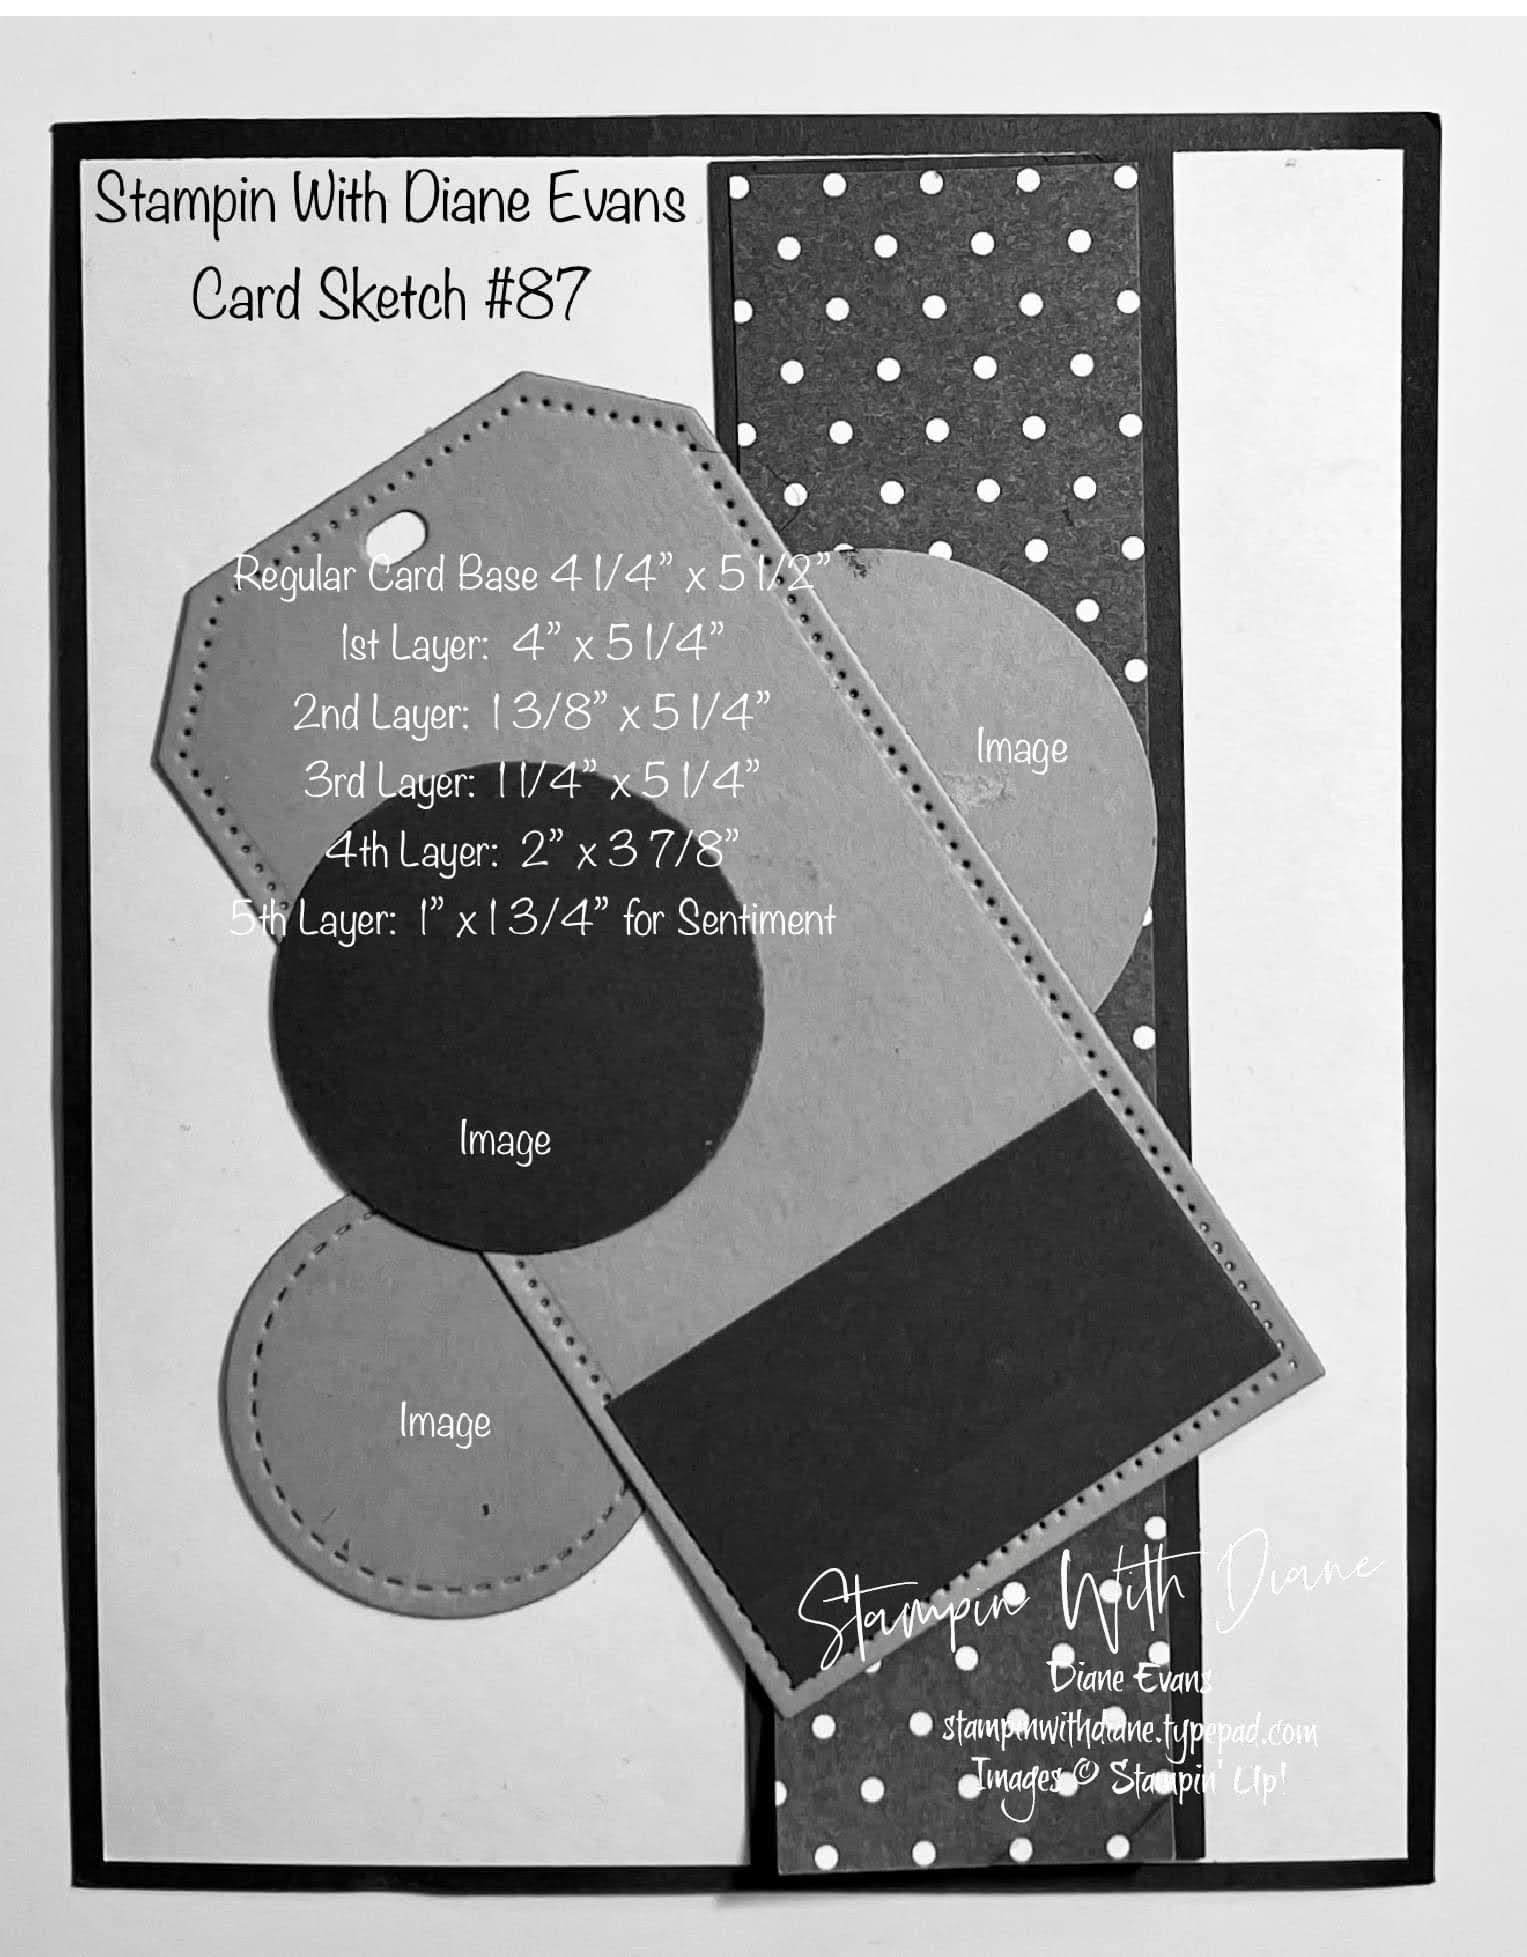
I used a card sketch from Stampin With Diane. I love this card sketch, as it has so many possibilities.
I would really appreciate you taking the time and voting for my card.

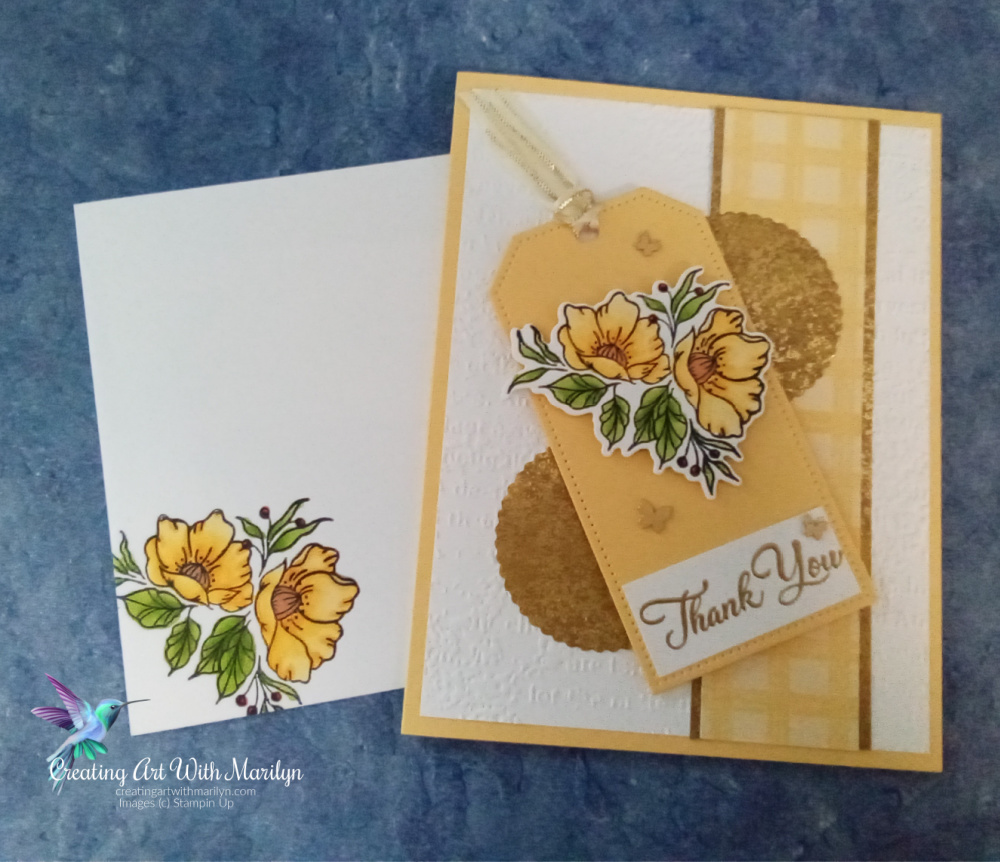
Instructions to create this card:
- Card base is So Saffron card stock cut at 8 1/2″ x 5 1/2″ scored and folded at 4 1/4″
- Basic White layer is 4″ x 5 1/4″ embossed with Timeworn 3D embossing folder and adhered directly to the card base
- Cut a piece from the Gingham Cottage Designer Series Paper in So Saffron that is 1 1/4″ x 5 1/4″
- Cut 2 pieces of Distressed Gold Specialty Paper 1/2″ x 5 1/4″ and glue one strip to each side of the So Saffron piece and attach directly to the card base with liquid glue
- Cut 2 scalloped circles from the Laying Circles dies in the Distressed Specialty Paper
- Die cut a tag from the Tailor Tag dies in So Saffron card stock
- Stamp an flower image from the Framed Floret stamp set in Memento Black ink
- Color the flowers with Stampin Blends. I used Light and Dark So Saffron, Light Pumpkin Pie, SU 400, Light and Dark Granny Apple Green
- Stamp a sentiment from Go To Greeting in Versamark and heat emboss in Gold Powder
- Attach the flower to the tag with dimensionals and the sentiment with liquid glue
- Adhere the tag to the card base with dimensionals
- Tuck the Gold Distressed Scalloped Circles under the tag and attach with liquid glue
- Thread a piece of the Gold and Vanilla 3/8″Satin Edged Ribbon through the tag
- Place some Brushed Brass Butterflies to the tag