Canada Inks Up! Blog Hop June 2022-Sneak Peek 2022 July to December Mini Catalogue

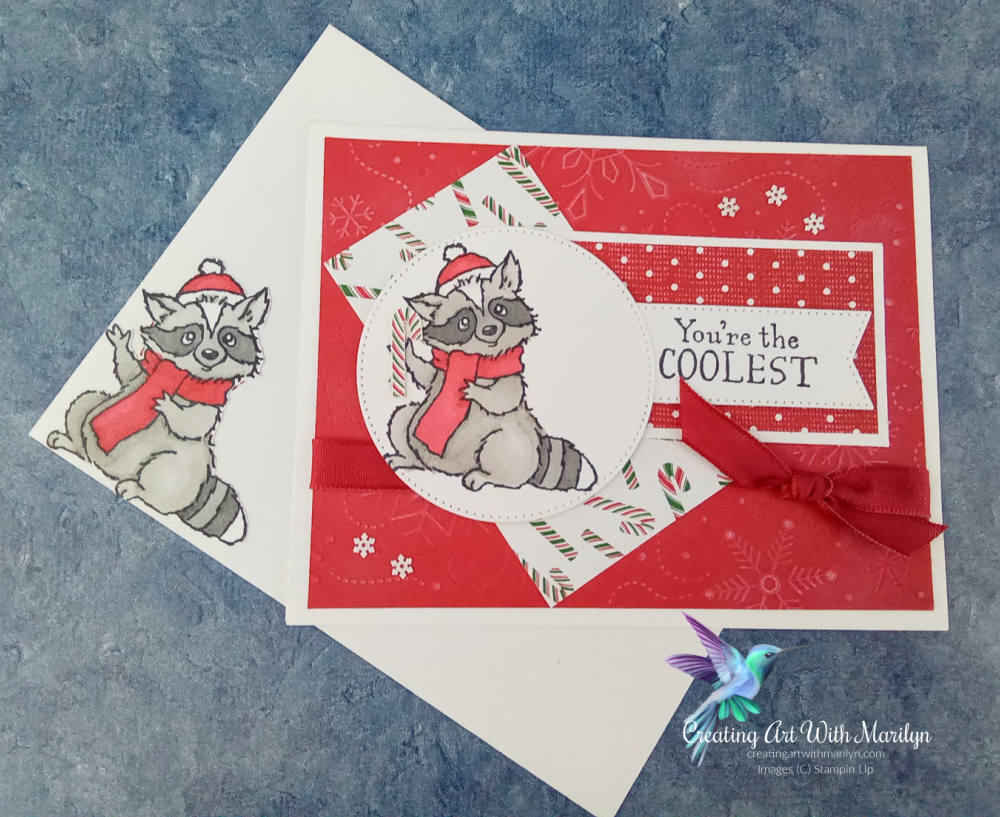
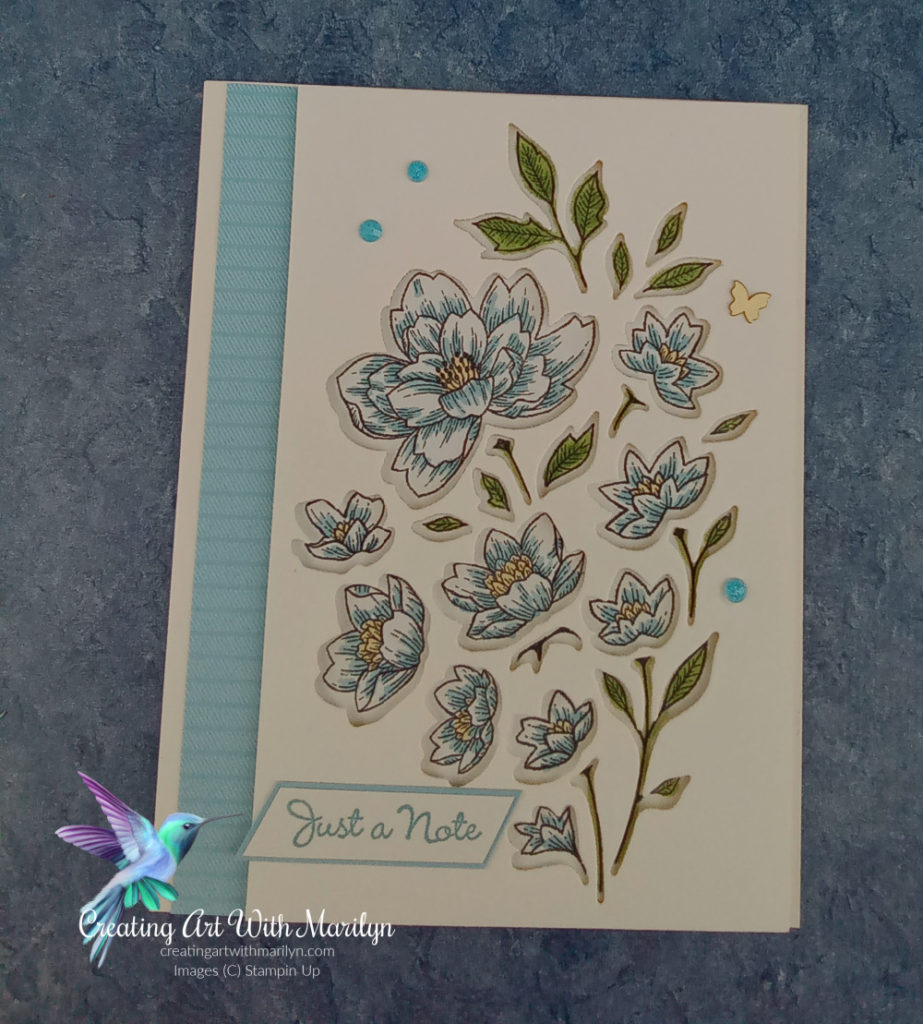
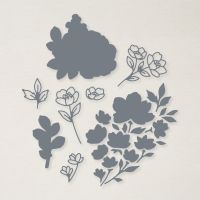
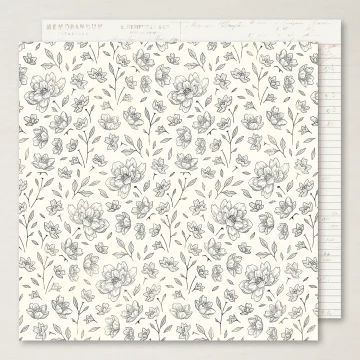
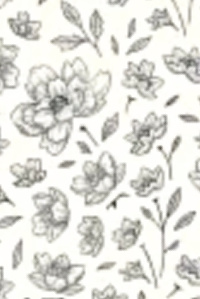
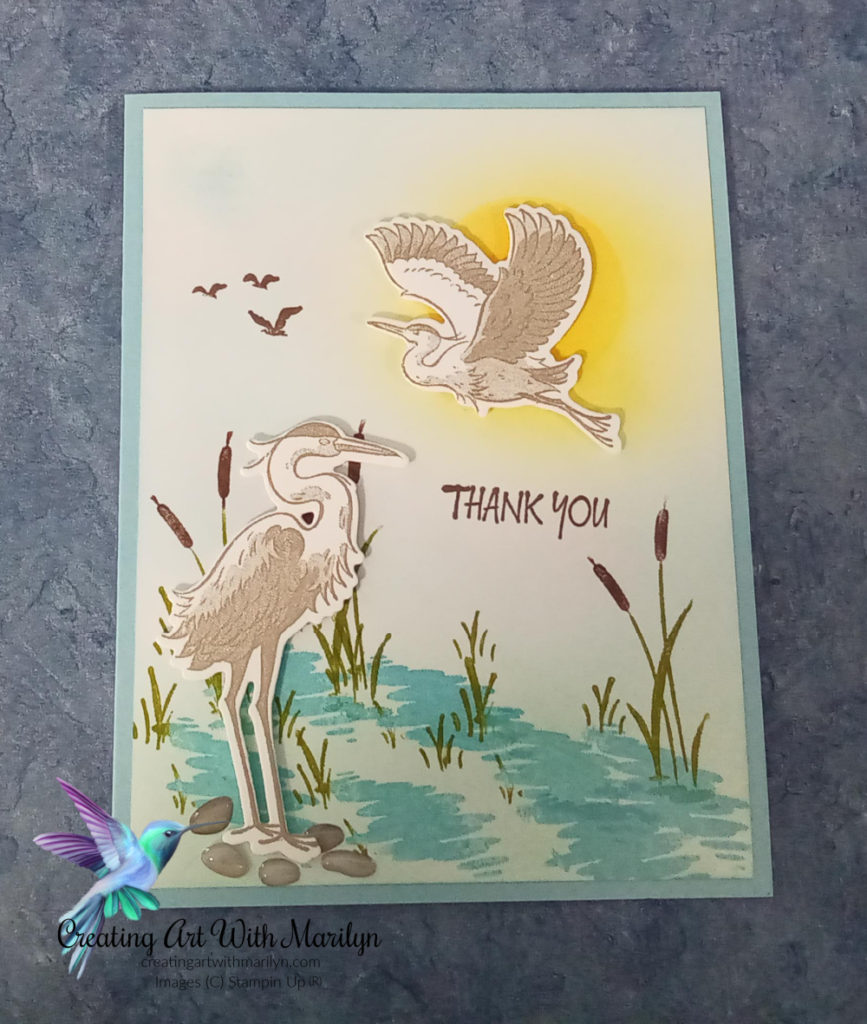
I am so happy to be participating in another Canada Inks Up! Blog Hop for June 2022. The theme for this month’s Blog Hop is a Sneak Peek of the 2022 July to December Mini Catalogue. There are some really great stamps, Bundles and Suites in this Mini Catalogue that it was hard to pick from. The All Bundled Up stamp set was so cute and a must have for me that I decided to use it and create a card using the cute raccoon from the set.

Cutting and details to create this card:

  1. Card base is Basic White card stock cut at 8 1/2″ x 5 1/2″ scored and folded at 4 1/4″
  2. Layer 2 is Real Red card stock cut a 4″ x 5 1/4″
  3. Emboss the Real Red card stock layer with the Wintry 3D Embossing Folder. This folder is only 3″ wide, so run it thought the Large Cut and Embossing machine twice, making the seam in the center so it will be mostly covered up with the other layers
  4. Use the White Craft Ink and a dabber and brush lightly over the embossed images to give them a little highlights
  5. Tie a piece of the red ribbon from the Real Red and Garden Green 3/8″ ribbon combo pack around the Real Red layer
  6. Cut a piece of the Sweetest Christmas 12×12 Designer Series paper at 2 x 3 1/2, attach this layer dircectly to the Real Red Layer on an angle
  7. Cut another piece of the Sweetest Christmas Designer Series Paper at 1 5/8 x 2 3/4 and layer it onto a piece of Basic White that is 1 3/4 x 2 7/8 and apply it to the Real Red layer
  8. Stamp the cute Racoon onto a piece of Basic White in Memento Black and color it using Stampin Blends. I used Light and Dark Gray Granite, Dark Smokey Slate, Light and Dark Real Red
  9. Die cut the image with the Stylish Shaped dies
  10. Pop the Stamped image onto the card with dimensionals
  11. Stamp a sentiment in Memento Black on a scrape of Basic White card stock and die cut it using the die from the Stylish Shape die set
  12. Tuck it under the stamped image and pop it up with dimensionals
  13. Fussy cut one of the tiny candy canes and glue it to the raccoons hand
  14. Add some Sparkle and Shine Sequins to the finished card
Posted in Uncategorized | 3 Comments

Free Shipping One Day Only!

For ONE DAY ONLY! Stampin Up is offering FREE SHIPPING on orders over $100. This is a great time to take advantage of the Last Chance Sale and the BOGO Kit Sale

This is just a sample of what is available in the last Chance Sale

Product List
Product List
Posted in Uncategorized | Comments Off on Free Shipping One Day Only!

Demonstrator Training Blog Hop-June 2022-Elephant Parade 

Thank you for joining us for our Stampin’ Up!® Demonstrator Training Program Monthly Blog Hop! We are so happy that you could join us today for this blog hop for ideas and creative inspiration. We are a group of Stampin’ Up!® Demonstrators from around the world that are taking part in training that is helping us to build a successful Stampin’ Up!® business and reach some goals we have set. We really appreciate your support.

The Elephant Parade in the New Annual Catalogue is such a cute set, I just had to play with it and make a step card.

Cutting and instructions to create this card:

  • Card base is Smokey Slate cut at 8 1/2 x 5 1/2
  • Score and cut card stock as in the template below
  • Cut a piece of DSP from the 6×6 Assortment pack in Balmy Blue at 5 3/8″ x 4 1/8″
  • Cut a section out of the DSP that is 3 1/4″ x 2″
  • Attach to the front of the step card with liquid glue
  • Cut another piece of the DSP that is 1 7/8″ x 1″ and attach it to the step behind the first step
  • Cut the last piece of DSP, 1 7/8″ x 2″ and attach to the back of the last step
  • Stamp and color the Elephants, mouse and the leaves with Stampin Blends
  • The tree trunk is from the Sweet Songbirds stamp set, stamped in Early Espresso ink and fussy cut
  • Die cut the grass in Old Olive and Granny Apple Green card stock, sponge the edges with Old Olive ink
  • Die cut some peanuts in Crumb Cake card stock and lightly sponge with Crumb Cake
  • Die cut the clouds using the Waves dies in the Pearlescent Specialty Paper
  • Arrange the Elephants, tree, leaves, grass, mouse and clouds, popping them up with dimensionals
  • Stamp a sentiment in Memento Black and attach to the card with dimensionals
  • Add some colored Basic Rhinestone to the card for some bling
Product List
Waves Dies
[158840]
$47.00
Posted in Uncategorized | 5 Comments

Festive Friday Challenge-FF#0111 World Music Day

It’s time once again for a great Festive Friday Challenge. This challenge is designed by several talented Demonstrators from all around the world. The designers give us a list of 10 inspiration ideas and we must pick at least 3 items to create our card. This week’s Challenge is World Music Day FF#0111.

For my card I used Black, White, Embossing and Metallic/Foil

Details to create my card:

  1. Card base is Basic Black card stock cut at 8 1/2″ x 5 1/2″ scored and folded at 4 1/4″
  2. Basic White layer is 4″ x 5 1/4″ adhered directly to card base
  3. Basic White layer is 2 1/2″ x 4 3/4″, embossed with the Timeworn Texture 3D folder
  4. Basic White embossed layer is adhered to Basic Black card stock layer cut at 2 5/8″x 4 7/8″
  5. Tie a bow to this layer using the Metallic Mesh Ribbon
  6. Attach the layer directly to card base with liquid glue
  7. Cut a piece of the Perfectly Penciled Designer Series Paper 2″ x 4″
  8. Attach the Designer Series Paper to a Basic Black layer cut at 2 1/8″ x 4 1/8″
  9. Pop up on the card with dimensionals
  10. Heat emboss a sentiment from the Go To Greeting stamp set in Silver Embossing Power on a scrape of Basic White card stock
  11. Die cut the sentiment with the Seasonal Label dies
  12. Die cut the same die in Silver Foil
  13. Cut the silver foil layer in the middle and attach it to the Basic White layer, giving it a layered look
  14. Attach the layer to the card with dimensionals
  15. Place some Basic Rhinestone to the card for some bling
——- Product List
Posted in Uncategorized | 4 Comments

Abigail Rose Suite

I love the Abigail Rose Suite from the New Annual Catalogue. I cut out the die on Very Vanilla card stock and then layered the large die over the matching Designer Series Paper and colored the flowers and leaves on the DSP

Details and cutting directions to create this card:

  • Card base is Very Vanilla cut at 8 1/2″ x 5 1/2″ scored and folded at 4 1/4″
  • Very Vanilla card stock layer is 3″ x 5 1/2″
  • Using the large die from the Cottage Flowers die set, cut out the image in the Very Vanilla card stock layer
  • Layer the die on the matching Designer Series Paper finding the proper flower images that match with the die, then using the Paper trimmer, cut out the image about 3 3/4″ x 5 1/2″ leaving enough edges to apply dimensions later
  • Color the matching flowers with the Light Balmy Blue Stampin Blends and the leaves in Light and Dark Old Olive, the centers of the flowers in Light Daffodil Delight
  • Cut a strip of the Balmy Blue Designer Series Paper from the 6×6 Subtle Assortment pack that is 1″ x 5 1/2″ and glue it to the card base leaving about 1/4″ from the edge
  • Cut away any extra DSP that appears under the die cut layer
  • Place dimensions on the die cut layer, to attach this layer over the colored flower layer, only remove the backings from a few dimensionals at a time so you are able to arrange the two layer together
  • Stamp a sentiment from the Go To Greeting stamp set in Balmy Blue ink onto a scrape of Very Vanilla card stock
  • Layer sentiment onto a scrap of Balmy Blue card stock and attach directly to card with liquid glue
  • Add a Brushed Brass Butterfly and some Fine Sparkle Adhesive Backed Gems to the card for some bling
Product List
Posted in Uncategorized | Comments Off on Abigail Rose Suite

Heron Habitat Bundle-Thank you Card

Once again it’s time to participate in Kylie’s Monthly International Blog Hop for June. This challenge is a gallery of Demonstrators’ projects from all over the world and then our cards are voted on. The theme of this challenge is ‘Thank You’. I decided I wanted to play with a stamp set I hadn’t used yet and the Heron Habitat is a stamp that really caught my eye when the New 2022-2023 Annual Catalogue came out.

I would really appreciate it if you would take the time and vote for my card.

Cutting and details to create this card:

  1. Card base is Balmy Blue card stock cut at 8 1/2″ x 5 1/2″ scored and folded at 4 1/4″
  2. Basic White card stock is cut at 4″ x 5 1/4″
  3. With So Saffron ink and a Blending Brush, brush lightly to create a sun halo
  4. Cut out a mask with the Masking paper and the Layering Circle dies
  5. Brush the sun with Daffodil Delight and Mango Melody, remove the mask and light brush the area with Daffodil Delight to blend the colors together
  6. Lightly brush the sky with Balmy Blue ink and a very light touch of Flirty Flamingo ink, about 1/3 down the card stock use Pool Party ink for the water
  7. Color the water and grass stamp with Stampin Write markers using Balmy Blue and Old Olive, then stamp on the card to create water
  8. Color the cat tails with Old Olive and Early Espresso Stampin Write Markers and stamp them on the edge of the water
  9. Stamp the birds and Sentiment in Early Espresso
  10. On a scrape of Basic White card stock, stamp the Herons in Gray Granite ink and die cut them using the Heron Habitat Die
  11. Position them on the card with dimenstionals
  12. Place some Pebble Enamel Shapes around the water
  13. Adhere card layer to card with liquid glue

Product List

Posted in Uncategorized | 3 Comments

Festive Friday Challenge-#FF0110-World Friends Day

It’s time for another Festive Friday Challenge. This Challenge is designed by several very talented Demonstrators from all over the world. For this challenge we are given an Inspiration list of 10 items. We are to pick at least 3 items from the list to create our project.

For my Challenge I decided to use the Cottage Rose Bundle from the Abigail Rose Suite in the New Annual Catalogue. I choose Feminine, Pink, Sparkle, Swirl.

The Abigail Rose Suite from the New Annual Catalogue is such a beautiful Suite and perfect to color. I stamped the roses from the Cottage Rose Stamp set and colored the flowers with Stampin Blends. I used the swirl from the Painted Labels dies and die cut it in Silver foil and stamped a sentiment from the Cottage Rose Stamp set on Vellum .

Details and Cutting instructions to create this card:

  1. Card base is Basic White card stock cut at 8 1/2″ x 5 1/2″ scored and folded at 4 1/4″
  2. Next layer is Flirty Flamingo card stock cut at 5 3/8″ x 4 1/8″
  3. I used White Craft ink and a Blending Brush to soften the Flirty Flamingo card stock
  4. I stamped the flowers and leaves from the Cottage Rose stamp set in Memento Black ink and colored them with Stampin Blends in Light and Dark Flirty Flamingo for the roses and Light and Dark Old Olive for the Leaves. The centers of the roses were Light Daffodil Delight Blend
  5. Die cut the swirl in Silver foil from the Pained Label Die set
  6. Stamp the sentiment from the Cottage Rose stamp set in Flirty Flamingo Ink
  7. Die cut the vellum out using the Layering Circle dies
  8. Position the vellum on the silver swirl and place a glue dot in places that will be hidden by the roses and leaves
  9. Adhere the silver swirl on the card base with dimensionals
  10. Arrange the roses and leaves on the card around the sentiment and the swirl, attaching them to the card with dimensionals
  11. Tie a piece of the 1/4″ White Crinkle Seam Binding ribbon around the card stock and then attack the layer to the card base with liquid glue
  12. Place some Iridescent Rhinestone to the card for some bling
Product List
Posted in Uncategorized | 2 Comments

Last Chance-Retiring Jan-June Mini Catalogue

The January–June 2022 Mini Catalog will be retiring soon! This is a great time to take advantage to order the products you have on your Wish List. Stock up on your favorite products before they’re gone for good! Save up to 50% on essential craft supplies. What are you waiting for? Start shopping! After all, this selection of Last Chance Products is only available while supplies last.

Here is the list of retiring products

Posted in Uncategorized | Comments Off on Last Chance-Retiring Jan-June Mini Catalogue

Sweet Songbird

I am so pleased to once again be able to participate in Kylie’s International Winners Blog Hop. Thank you everyone so much for voting for my card. For This card I am using the New Sweet Songbird Stamp set. This is such a cute stamp set and it’s so fun to play with.

Cutting and details to create this card:

  1. Card base is Tahitian Tide cut at 8 1/2″ x 5 1/2″ scored and folded at 4 1/4″
  2. Basic White card stock layer is 4″ x 5 1/4″
  3. Stamp the branch twice from the Sweet Songbird stamp set in Early Espresso and the leaves in Old Olive
  4. With the Cloud Punch, punch out some clouds in the new In Color 6 x 6 Glimmer Paper in Tahitian Tide. Arrange the clouds on the Basic White layer and adhere with liquid glue
  5. Stamp the large bird in Tahitian Tide and punch it out with the matching punch
  6. Stamp the smaller bird in Tahitian Tide and fussy cut it out
  7. Stamp the nest in Soft Suede and fussy cut it out
  8. To make the baby birds, stamp the leaf stamp in Tahitian Tide and the birds beak in Mango Melody and fussy cut the babies out
  9. Attach the babies directly to the nest with liquid glue and then attach the nest to the branch with dimensionals
  10. Attach the large bird to the nest with dimensionals
  11. Position the smaller bid on the other branch and stamp the song notes in Memento Black then attach the smaller bird with dimensionals
  12. Place some Loose Flower Flourish Gems on the leaves
  13. Put a drop of Liquid Glue in the center of the flowers and put a Basic Rhinestone in the center of the flowers
Product List
Cloud Punch
[157749]
$24.00
Posted in Uncategorized | 6 Comments

Canada Inks Up! May 2022 Blog Hop-In Colors Blessing of Home

I’m so excited to be participating in the May Canada Inks Up Blog Hop.

We are a group of Canadian Demonstrators, that love sharing our ideas in hope to inspire you. This month’s theme is the 2022-2024 In Colors. I love the New In Colors and I decided to once again try my hand at water coloring. I’m not very good at it, but I was so pleased with how it turned out and how all the New In Colors worked together.

Details on creating this card:

  1. Card base is the New In Color Starry Sky cut at 8 1/2″ x 5 1/2″scored and folded at 4 1/4″
  2. Designers Series Paper layer is the New 6 x 6 In Color Assortment pack in Tahitian Tide
  3. Vellum layer is the 12 x 12 Layering Design, die cut using the Stitched With Whimsy die set (this set does not cut out the image, it just scores, fussy cut around the stitched layer) attach with Stampin Seal in an area that will be covered by the stamped image
  4. Stamp the image from Blessings of Home stamp set on Fluid Water Color paper with Stazon Ink so it can be water colored and not bleed
  5. The image is colored with Orchid Oasis, Sweet Sorbet, Tahitian Tide, Mango Melody and Parakeet Party
  6. Die cut the image out with the Flowers of Home dies
  7. Attach the image to the Vellum layer with dimensionals
  8. On a scrape of Basic White card stock, stamp a sentiment from the Go To Greeting in Versa Mark and heat emboss in Silver embossing powder. Fussy cut the sentiment out and attach to card with dimensionals
  9. Make a couple of loops from the Silver Simply Elegant Trim and attach them to the card with glue dots
  10. Place some Iridescent Rhinestones on the card to add some bling
Product List
Posted in Uncategorized | 4 Comments