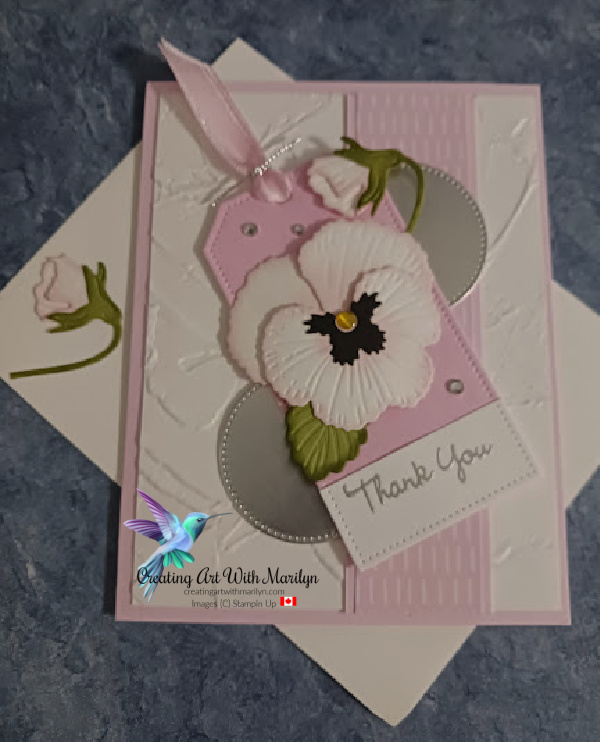
Instructions to create this card:
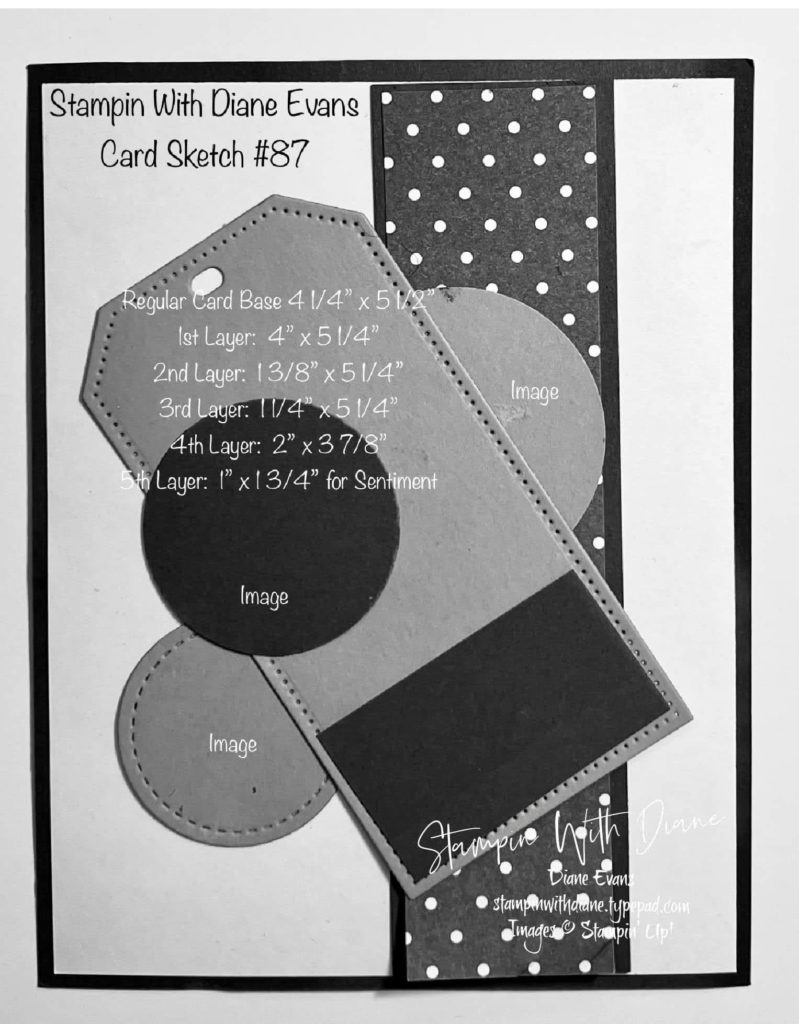
- Card base is Bubble Bath card stock, cut at 8 1/2″ x 5 1/2″ scored and folded at 4 1/4″
- Basic White card stock layer is cut at 4″ x 5 1/4″
- Emboss the Basic White layer with the Painted Texture embossing folder
- Adhere the Basic White layer to the card base with liquid glue
- Bubble Bath card stock cut at 1 3/8″ x 5 1/4″
- Designer Series Paper is Bubble Bath 6×6 Subtle Assortment Pack, cut at 1 1/4″ x 5 1/4″.
- Adhere DSP to card stock and adhere to card base
- Cut the largest Tailored Tag die from the Bright and Beautiful 6×6 Bubble Bath variegated DSP
- Cut another large tag in Basic White card stock and adhere to the Bright and Beautiful tag with liquid glue for a little more stability
- Die cut 2 silver circles with the Stylish Shapes out of the Silver foil 12 x 12 Specialty Paper
- Heat emboss the sentiment from the Pansy Patch Stamp set in Silver Embossing Powder on a piece of Basic White card stock
- Die cut the sentiment with the Largest Tailored Tag die
- Adhere the sentiment to the Bubble Bath tag with liquid glue
- Tie a piece of the Bubble Bath 3/8″ Sheer ribbon to the tag and tie it with the Silver Simply Elegant Trim
- Die cut the petals for the largest pansy and the pansy bud in Basic White card stock
- Lightly sponge the centers of the petals and the edges with a sponge dauber and Bubble Bath ink
- Die cut the leaf and the bud stem in Old Olive card stock and lightly sponge the leaf and bud stem with a dauber and Old Olive ink
- Die cut the pansy face out of Basic Black card stock
- Attach the flower together with glue dots and attach to the tag with dimensionals. Add the leaf and flower bud to the tag with a dimensionals
- Attach the tag to the card with dimensionals
- Place the circles under the tag with liquid glue
- Put a Daffodil Delight gem from the Glossy Dots pack in the center of the pansy
- Add some Basic Rhinestones to the card for some added bling


