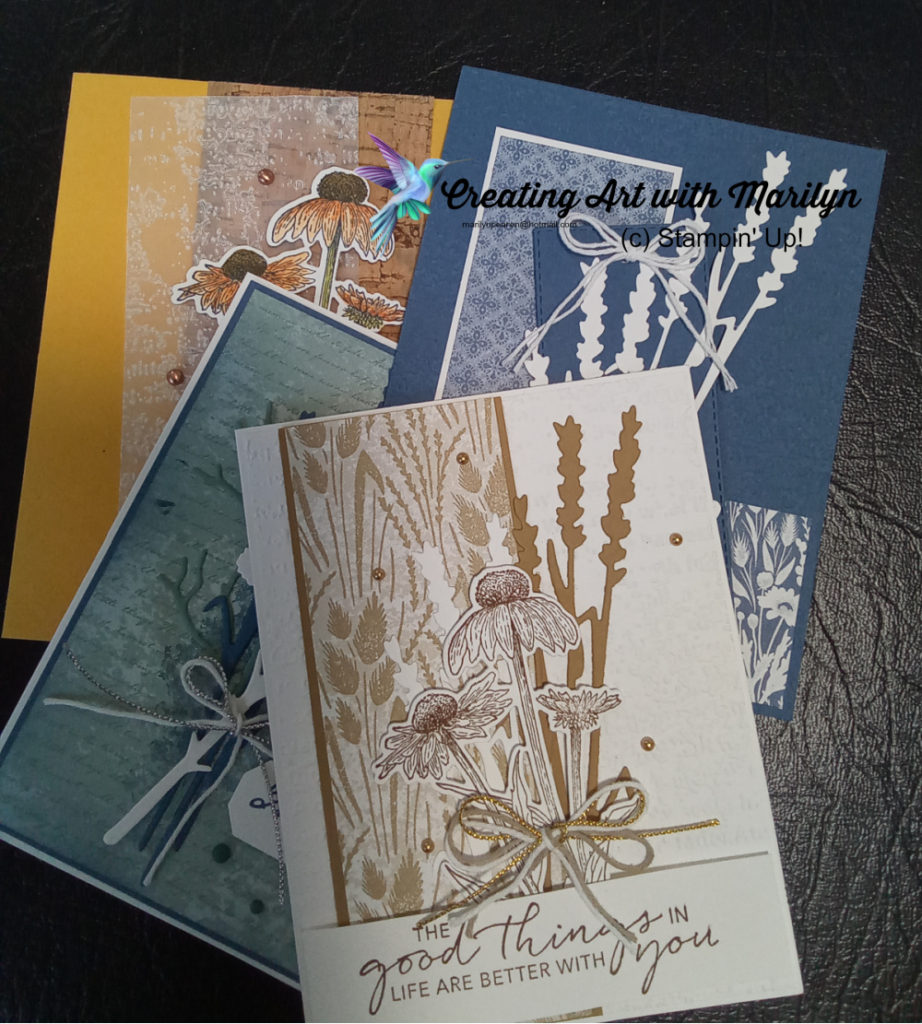
I made is card kit using the wonderful Nature’s Harvest Suite. I love this suite and how versatile it is. Here are the measurements and instructions to made this card. read more
Soft Suede Card
Stamps: Nature’s Harvest and Tasteful Touches
Dies: Harvest dies
Embossing Folder: Timeworn Type 3D embossing folder
Inks: Soft Suede
Paper Products: Basic White, Soft Suede, Harvest Meadow DSP
Other Products: Gold Simply Elegant Trim, White and Crumb Cake Bakers Twine Essentials Pack, Gold Metallic Pearls, Dimensionals
Card Instructions:
- Basic White card stock cut 8-1/2 x 5-1/2 scored at 4-1/4
- Embossed layer 4-1/8 x 5-3/8 embossed with the Timeworn Type 3D embossing folder
- Soft Suede card stock layer is cut at 2-1/4 x 5-3/8
- Cut DSP layer at 2 x 5-3/8 and attach to Soft Suede layer with liquid glue
- Attach this layer to left side of card leaving 1/2″ from the edge
- Die cut the wheat dies in Basic White and Soft Suede and attach them to the card with liquid glue
- Stamp the Cornflower stamp in Soft Suede ink and die cut it out
- Attach it to the card using dimensionals
- Sentiment layer is 1 x 4-1/8 and stamp sentiment in Soft Suede and attack with dimensionals
- Tie a triple bow using the gold trim and the white and crumb cake bakers twine
- Attach the bow with glue dots
- Place some of the gold metallic pearls on the card
For instructions on the other cards continue reading
For instruction on the other cards continue reading
Misty Moonlight with White Wheat Card
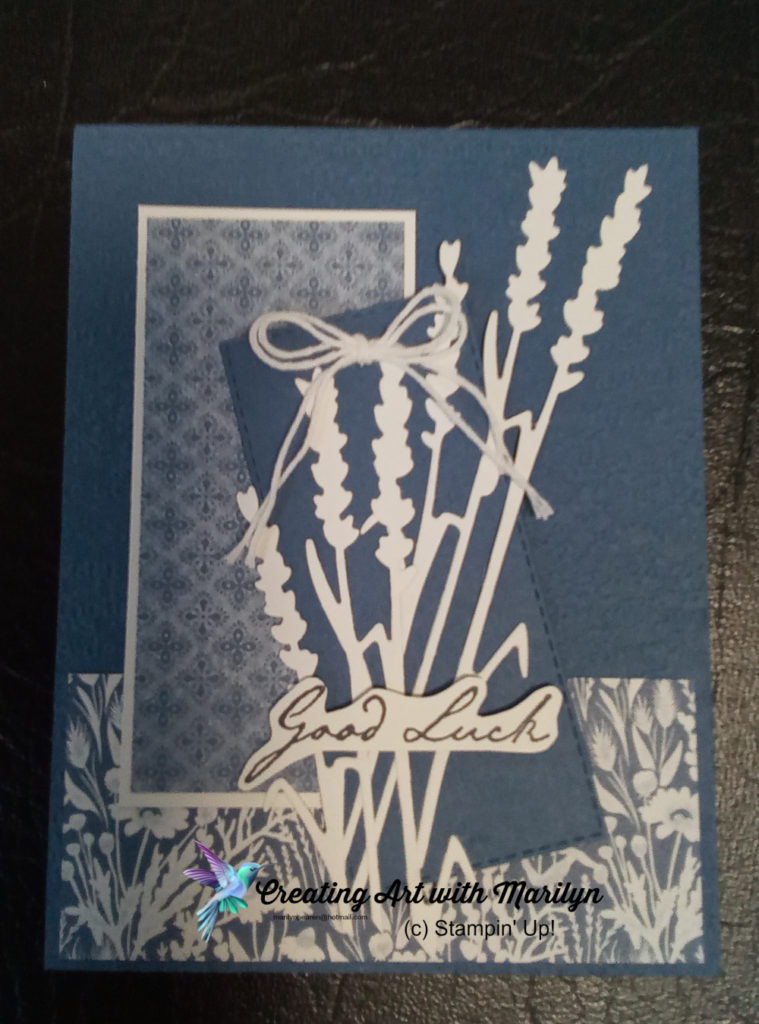
Stamps: Nature’s Harvest
Embossing Folder: Timeworn Type 3D folder
Dies: Stitched rectangle dies
Card stock: Misty Moonlight, Basic White card stock and Nature’s Meadow DSP
Inks: Misty Moonlight
Other products: White Bakers Twine, dimentionals, glue dots
Card Instructions
- Misty Moonlight card stock cut at 8-1/2 x 5-1/2 scored at 4-1/4
- Emboss the card base with the embossing folder
- Attack a piece of DSP cut at 4-1/8 x 2 to the bottom of the card with liquid glue
- Cut a piece of Basic White cut at 1-7/8 x 3-7/8
- Cut a piece of DSP at 1-3/4 x 3-3/4 attach these two layers together with liquid glue and attach to the card
- Cut a Misty Moonlight layer using the Stitched Rectangle dies and attach it to the card using dimensionals
- Die cut two wheat layers using the Harvest Dies in Basic White card stock. Glue these to the card with liquid glue
- Stamp sentiment in Misty Moonlight and fussy cut it out and attach with dimensionals
- Tie a double bow with white Bakers twine and attach with glue dots
Soft Succulent and Misty Moonlight Card
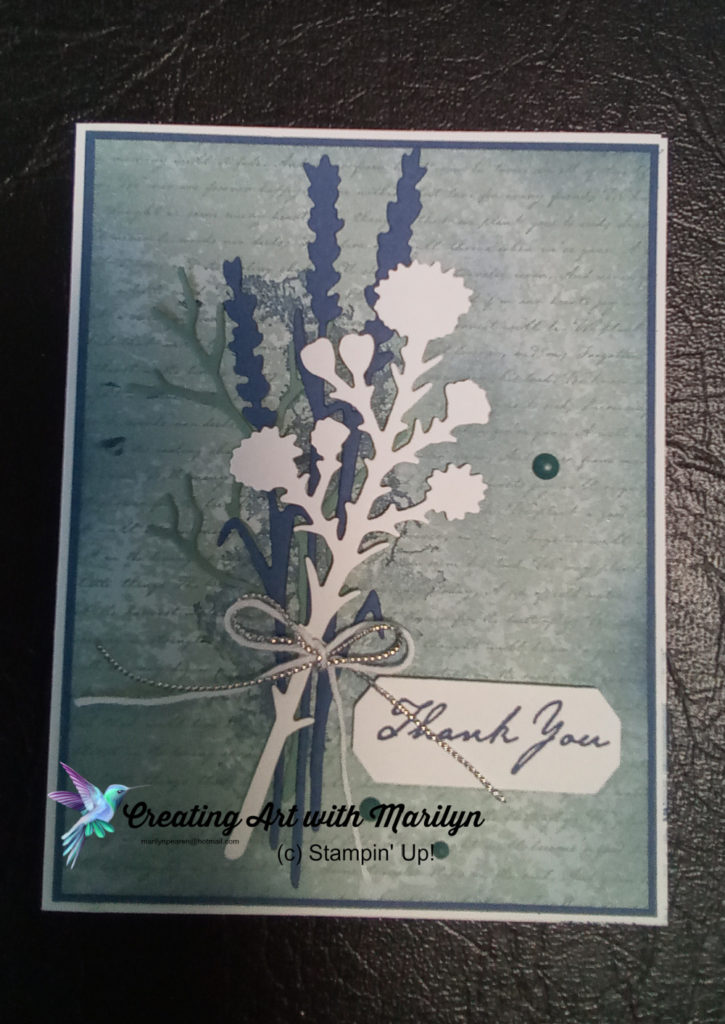
Stamps: Nature’s Harvest
Dies: Harvest Dies
Inks: Misty Moonlight
Paper Products: Basic White, Misty Moonlight, Soft Succulent card stock Nature’s Meadow DSP
Other Products: Silver Elegant Trim, White Bakers twine, Matte Decorative Dots, dimensionals, liquid glue and glue dots
Card Instruction
- Cut a card base of Basic White at 8-1/2 x 5-1/2 scored at 4-1/4
- Misty Moonlight layer is 4-1/8 x 5-3/8 attached to the card base
- Stamp the Harvest Meadow DSP using the smudge image stamp from the Nature’s Harvest stamp set with second generation of Misty Moonlight then cut it at 4 x 5-1/4 and glue this to the card base
- Die cut the branch in Soft Succulent, the wheat in Misty Moonlight and the flower in Basic White
- Glue the branch and the wheat directly to the DSP and pop up the flower with dimensionals
- Tie a double bow using the silver and white twine and attach it to the card with glue dots
- Stamp your sentiment in Misty Moonlight and die cut it out
- Attach three of the Matte Decorative Dots to the card
Cork and the Cornflowers Card
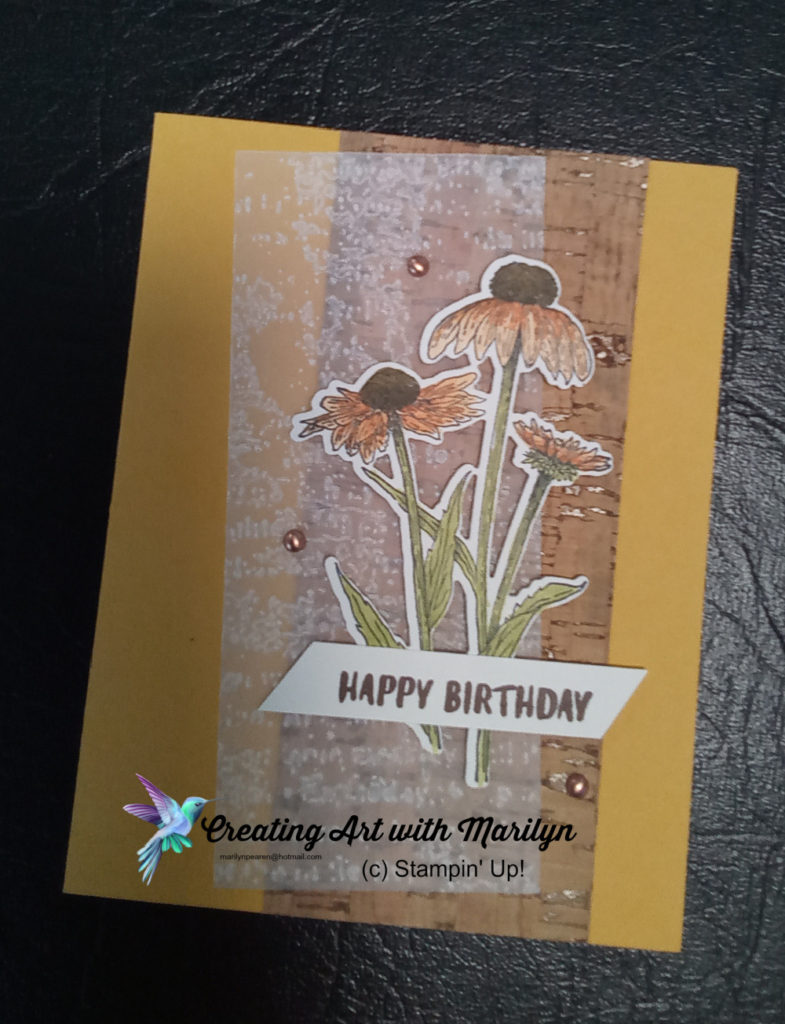
Stamps: Nature’s Harvest
Dies: Harvest Dies
Embossing Folder:Timeworn Type 3D embossing folder
Inks: Soft Suede
Paper Products: Bumblebee and Basic White, Cork DSP, Vellum
Other Products: Light So Saffron, Dark Pumpkin Pie, Dark Soft Suede, Light and Dark Pear Pizzazz Stampin Blends, Decorative Metallic Dots
Card Instructions
- Cut a Bumblebee card base at 8-1/2 x 5-1/2 scored at 4-1/4
- Cut a piece of the Cork DSP at 2-1/4 x 5-1/2 and attach it to the card base with liquid glue
- Cut a piece of vellum at 2-1/4 x 5-1/8 and then emboss it with the Timeworn Type embossing folder
- Sponge some liquid glue on the back side of the vellum and the attach it on an angle to the card base
- Stamp and color the flowers with Stampin Blends an die cut it out with the Harvest die
- Attack the flowers to the card base using dimensional
- Stamp your sentiment in Soft Suede and attach it to the card with dimensionals
- Place some Decorative Metallic Dots to the card