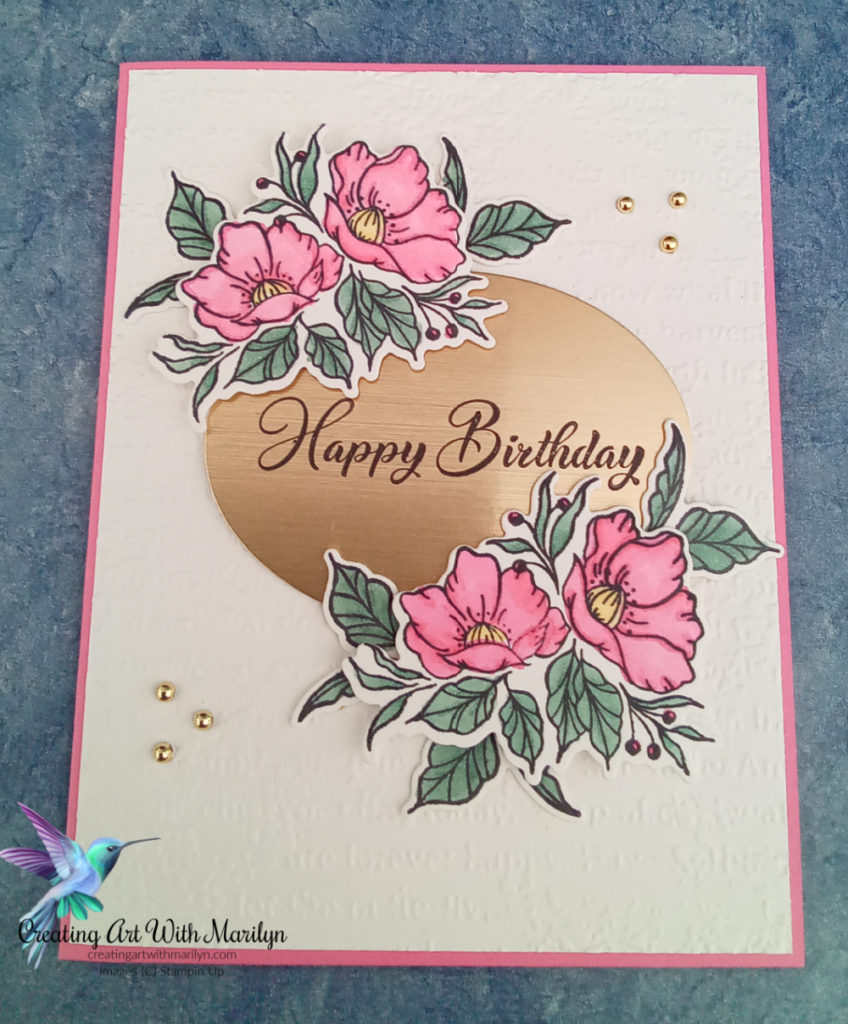
I used the new Fitting Floret Suite to make this Birthday card. This is a sneak peek of a Bundle that will be in the new Jan to June Mini catalogue. This bundle comes with beautiful Designer Series Paper and Gold Adhesive-Backed Swirls gems. This Suite is available for Demonstrators right now and customers will be able to order in November. The Designer Series paper and the gems are only available for a limited time.
I am so excited to be participating in the Festive Friday Challenge once again.
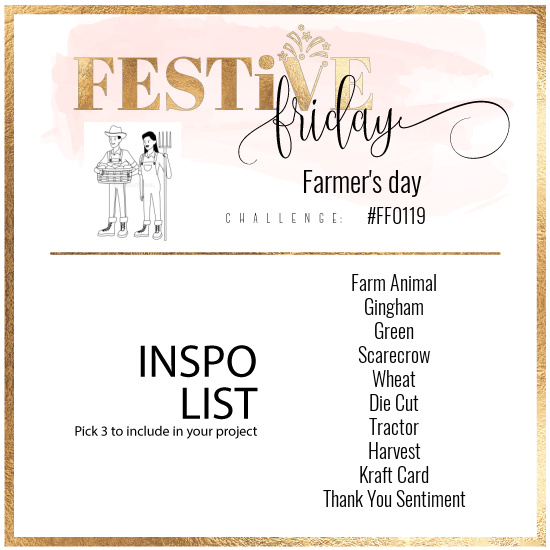
This challenge is designed by several talented Demonstrators from all around the world. We are given a list of 10 inspirational items for pick from and we must use at least 3 to create our card. This weeks challenge is Farmer’s Day FF#0119. I decided to create a card using the Peekaboo Farm stamp set.
The inspirational items I used were Farm Animals, Green, Die Cut and Thank You Sentiment
Here are the details to create my card:
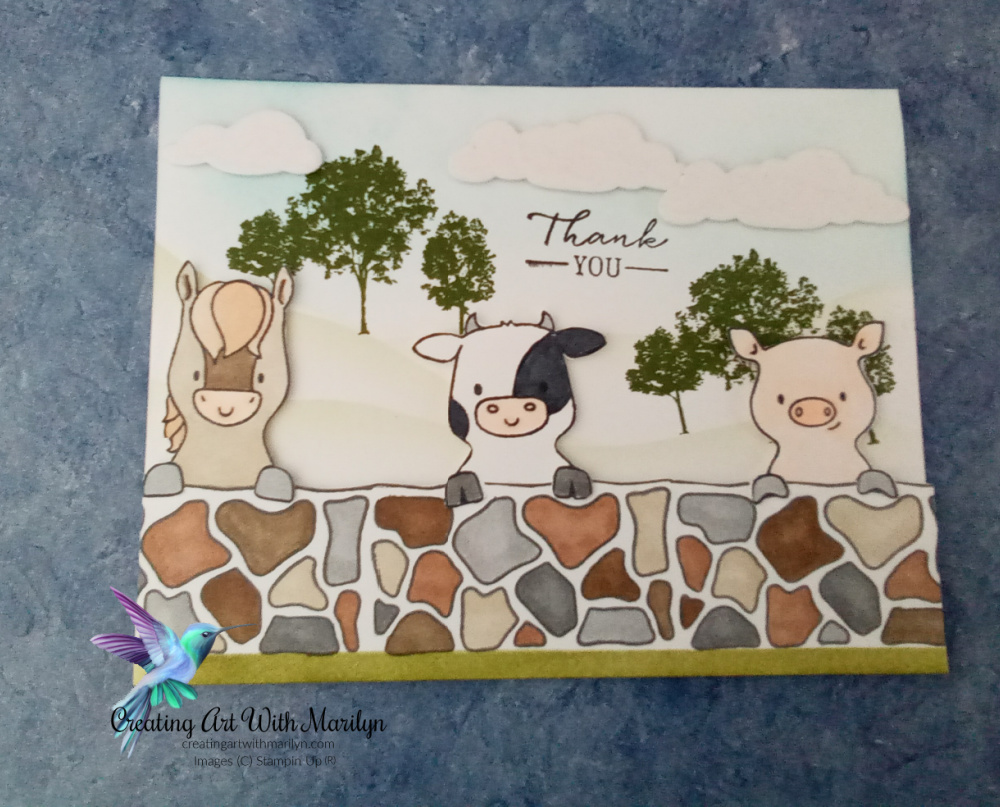
Card base is Basic White card stock cut at 5 1/2″ x 8 1/2″ scored and folded at 4 1/4″ forming a landscape card
Next layer is Basic White card stock 4 1/4″ x 5 1/2″ and this is our focal image
To form the hills, I used a piece of copy paper and cut it to make a template for the hills and used a Blending Brush and lightly sponged it with Old Olive ink
Lightly sponge the sky with Balmy Blue ink
Stamp some trees on the hills from the Grassy Grove stamp set in Mossy Meadow ink
Stamp a sentiment in Memento Ink on the sky
Adhere this layer directly to the card base with liquid glue
The clouds were die cut from the Waves Die in Snowy White 12 x 12 Velvet paper
On a piece of Basic White card stock, stamp the stone wall stamp from the Peekaboo Farm stamp set several times forming the wall. Stamp them close together to make a continuous wall
Stamp three of the farm animals from the stamp set in Memento Black
Color the stones on the wall and the animals with Stampin Blends and fussy cut the animals
Adhere the wall and the animals to the card with dimensionals
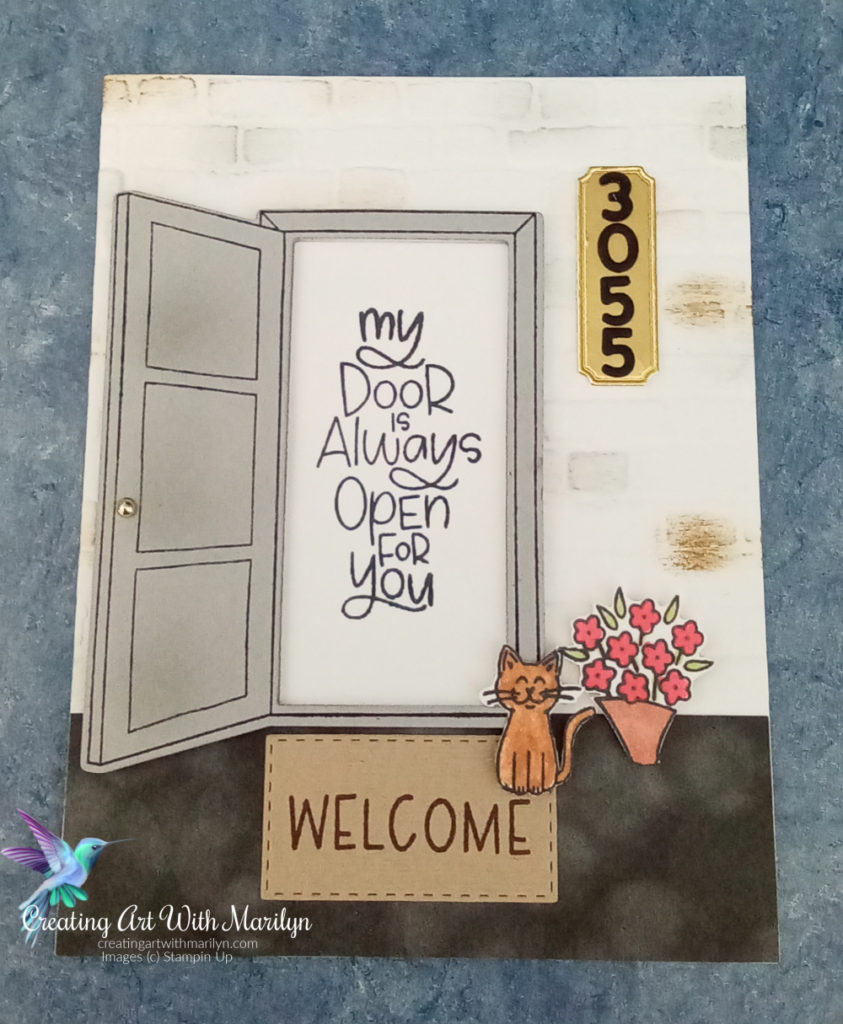
I’m so excited to be able to participate in Kylie’s Monthly International Blog Highlights for October. I’m always up for a good challenge and this month, I decided I wanted to play with the new Warm Welcome stamp set that was featured in Stampin Up’s World Card Making Day on October 1st. This is a sneak peak of a stamp set that will be in the January to July Mini Catalogue.
This gallery challenge is made up of very talented stampers that create amazing cards that you are able to vote on and pick your favorites later on in the month. The top ten winners will get to be part of an International blog hop at the end of the month.
I would really appreciate you taking the time and voting for my card.
Products used in my card:
Stamp set-Warm Welcome
Embossing Folder-Brick And Mortar 3D
Basic White Card stock-5 1/2″ x 4 1/4″ and 2″ 3 1/2″
Lights Aglow 6×6 Designer Series Paper-1 3/8″ x 4 1/4″
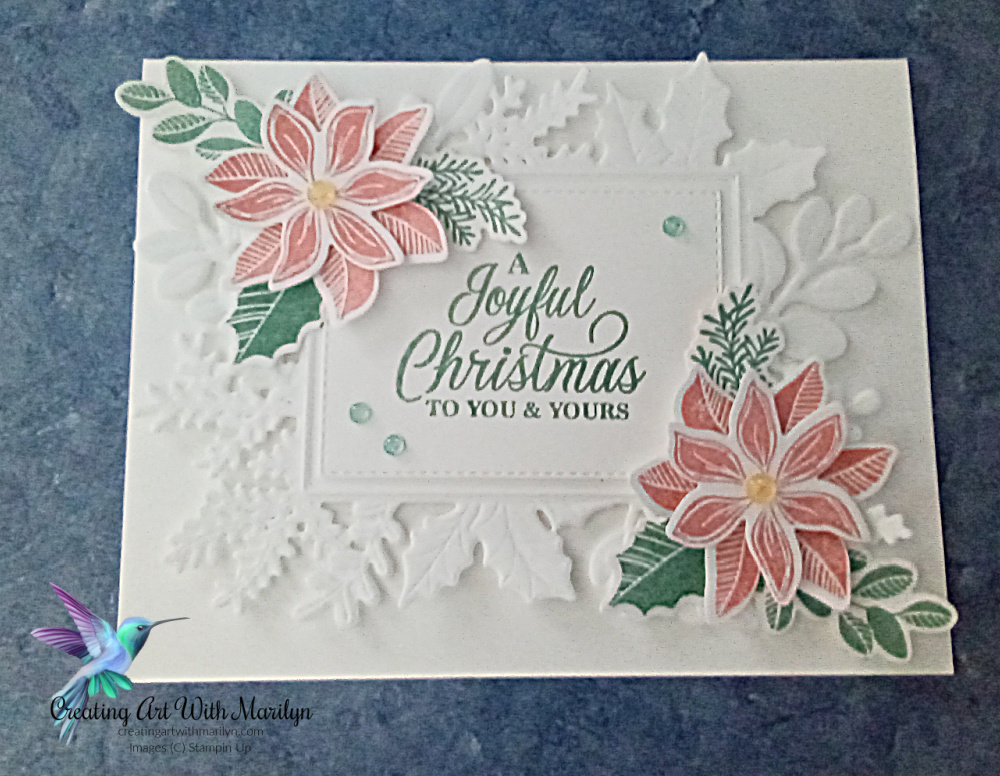
I am happy to once again be participating in the Canada Inks Up Blog Hop for September. We are a group of Canadian Demonstrators that love to share the projects we make and hope you get some ideas and tips from what we share. This month’s Blog Hop is Your pick from the July to December Mini Catalogue. I decided to make a Christmas card using the Merriest of Moments stamp set and the Merriest Frames dies and the Hybrid Embossing Folder.
I used Blushing Bride ink to color the poinsettias and Mint Macaron for the leaves and foliage. I used the Hybrid Embossing folder and embossed the large leaf image in Basic White card stock and then die cut the large image with the matching die.
Here are the cutting and instructions to create my card:
Card base is 8 1/2″ x 5 1/2″ scored and folded at 4 1/4″. I made a landscape card
Using the Merriest Frames Hybrid Embossing folder, emboss a piece of Basic White card stock that is 5 1/2″ x 4 1/4″
Use the large matching die and cut out the embossed image
Die cut the embossed image out once again with the detailed die, giving a much more detailed layer
Stamp a sentiment from the Merriest Moment stamp set in Mint Macaron and die cut using the square die
Stamp the two poinsettias in Blushing Bride ink and the leaves and foliage in Mint Macaron ink and die cut them with the matching dies
Add the embossed layer to the card with dimensionals
Glue the sentiment to the embossed layer with liquid glue
Build the two poinsettia flowers together with a dimensional and add to the corners of the card with a dimensional
Add the leaves and foliage to the card with glue dots
Place a 2021-2023 In Color Opal Round in the centers of the poinsettia and place some on the card
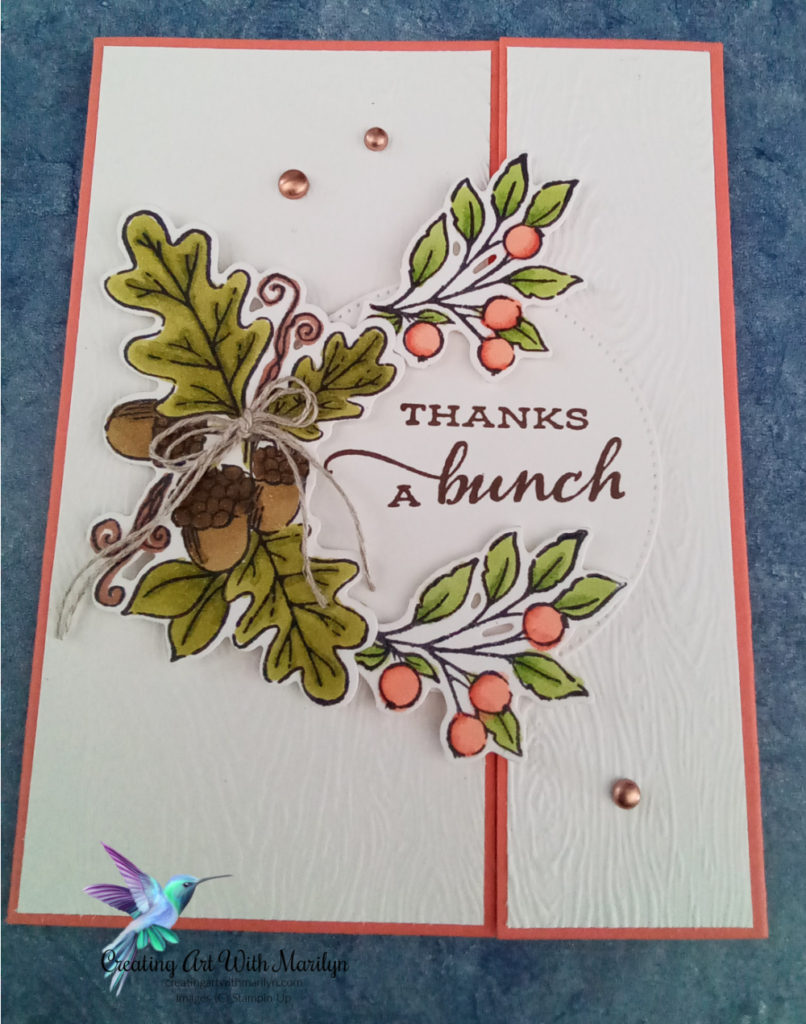
I am so happy to be able to participate in Bruno and Kylie’s Demonstrator Training Program. This is a monthly training program that has so many Talented Stampin Up Demonstrators from all around the world, showing us their talent as well as sharing and learning from each other.
I chose to use the new Fond of Autumn Bundle from the Jan to Dec Mini Catalogue.
Details and cutting instructions to create this card:
Card base is Calypso Coral card stock cut at 8 1/2″ x 5 1/2″, scored and folded at 2 3/4″ and 7″
Fold flaps to the front
Cut a piece of Basic White card stock at 2 5/8″ and 1 3/8″
Emboss the Basic White layers with the Timber 3D embossing folder and adhere to the card front
Stamp the large flower and leaf images from the Fond of Autumn stamp set in Memento Black ink
Die cut the image with the matching die from the Autumn Bouquet die. This die cuts the stamped image into several smaller pieces.
Color the image with Stampin Blends. I used Light and Dark Old Olive for the oak leaves and Light and Dark Crumb Cake for the acorns and Dark Soft Suede for the swirls. The berries are colored in Light and Dark Calypso Coral and the leaves Light and Dark Granny Apple Green
Stamp a sentiment from the stamp set, in Early Espresso ink, on a piece of Basic White card stock and die cut it with the Stylish Shapes
Attach the circle to the left side only of the card with dimensionals
Arrange the oak leaves and the berry sprigs around the circle with dimensionals
Tie a small double bow with Crumb Cake Baker’s Twine and attach with a glue dot to the card
Add some Copper Brushed Metallic Dots on the card to finish it
If you would like to see the products I used for this card read more
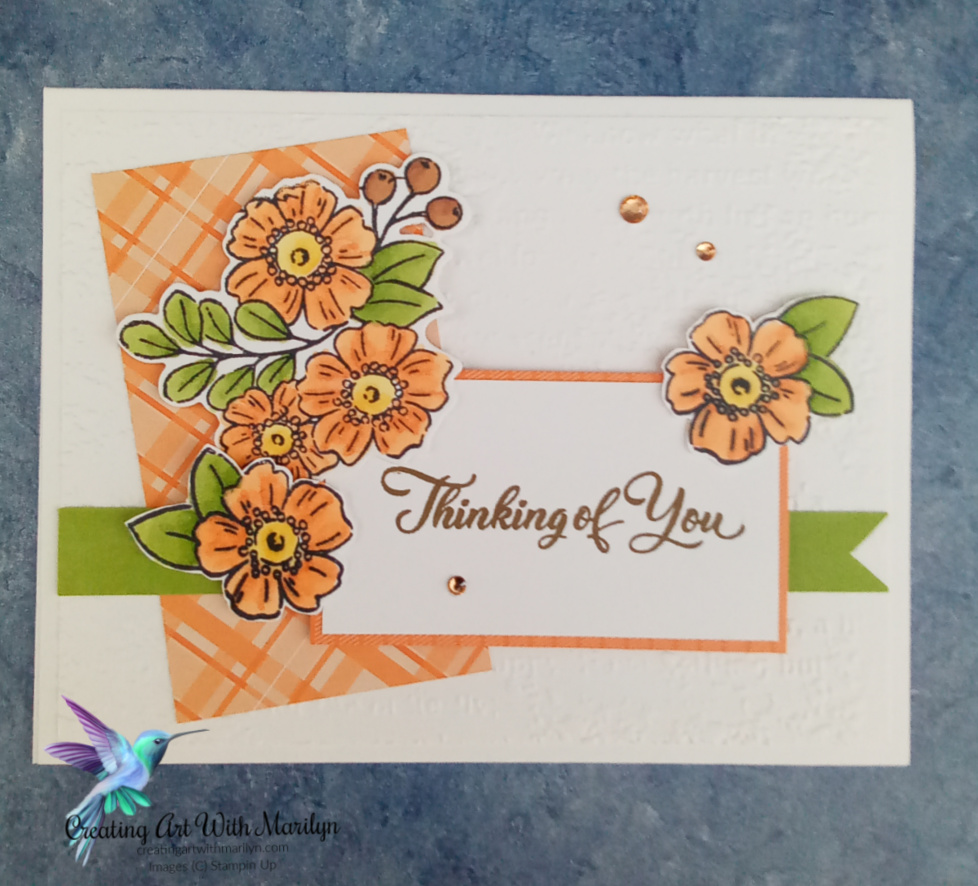
I’m so excited to participate in Kylie’s Monthly International Blog Highlights for September. I’m always up for a good challenge and this month, I decided I wanted to play with the new Fond of Autumn Bundle from the July to December Mini Catalogue. I love to color and wanted to show stampers that coloring with our wonderful Stampin Up Blends make us all look like artists.
This gallery challenge is made up of very talented stampers that create amazing cards that you are able to vote on and pick your favorites later on in the month. The top ten winners will get to be part of an International blog hop at the end of the month.
I would really appreciate you taking the time and voting for my card.
Cutting layers for my card
Card base-8 1/2″ x 5 1/2″
Embossed layer is-4″ x 5 1/4″
Designer Series Paper-2″ x 3 1/2″
2nd Designer Series Paper-1 3/4″ x 3″
Sentiment layer-1 5/8″ x 2 7/8″
Flagged strip-5 1/4″ x 1/2″
Scraps for stamped images
For the complete instructions and details for my card click here
I am so please to be able to participate in Kylie Bertucci’s International Blog Highlight Winners Hop. Thank you everyone that took the time and voted for my card. Your votes made me able to participate in this Blog Hop with the Top 10 Winners from all around the World. My card was voted as #4. I decided to use the Nature’s Harvest stamp set and the Harvest dies to create this card. I also used the Tailored Made Tag dies.
For details to create this card and see the card sketch I used click here
Now be sure to check out all the other Top Ten winners
This is the card I entered in the August International Highlight Blog Hop.
Details and products I used for this card came be found by clicking here.
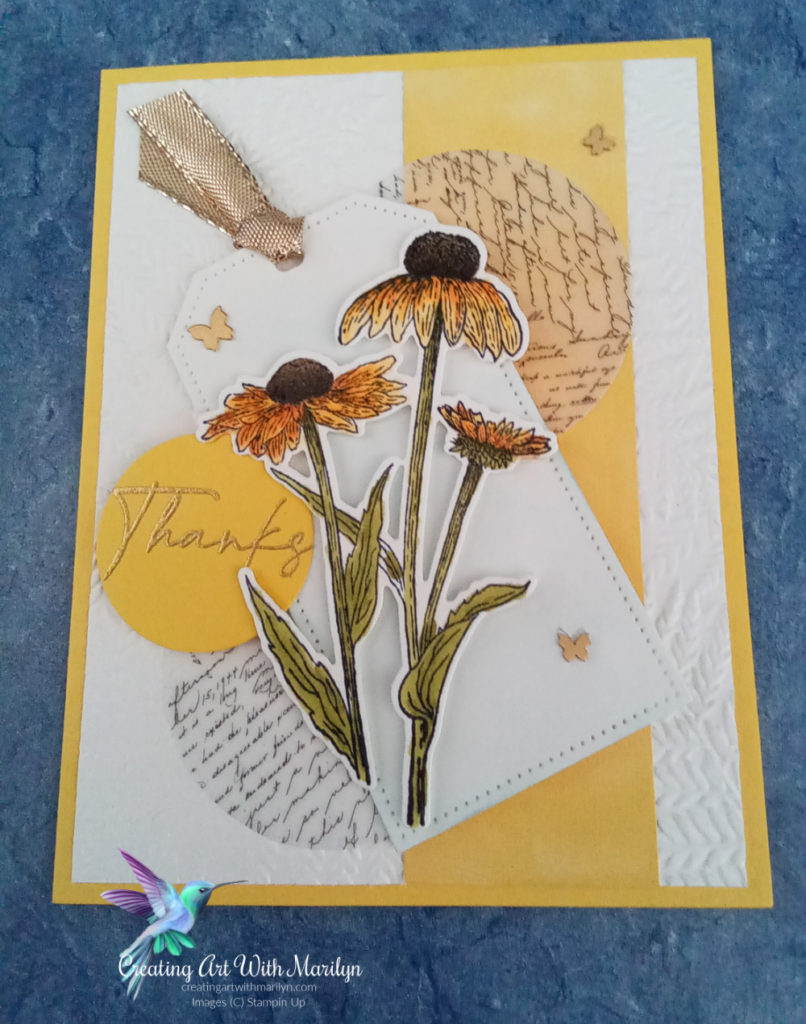
It’s time for another Canada Inks Up! Team Blog Hop. We are a group of Canadian Demonstrators that love to share the projects we make and hope you get some ideas and tips from what we share. This month’s Blog Hop is Thanksgiving or Halloween. I decided to make a Thanksgiving card using the Celebrating Sunflowers stamps set and use the masking technique.
Here are the cutting and details to create my card.
Card base is Early Espresso card stock cut at 8 1/2″ x 5 1/2″ scored and folded at 4 1/4″
Layer 1 is Crushed Curry card stock cut at 4″ x 5 1/4″ adhered to the card base
Make a couple of masks of the large sunflower and leaves from the Celebrating Sunflowers stamp set using the new Masking Paper from the Annual catalogue
Carefully fussy cut the masks out with Paper Snip Scissors, cutting close to the outline of the sunflower and the leaves so as not to create a void around the sunflower and leaves
On a piece of Basic White card stock cut at 3 7/8″ x 5″, stamp one sunflower with Memento Black, off setting it in the middle a little
Carefully place the mask on the sunflower and stamp another sunflower above the middle one and another one below the middle sunflower
While masks are still on the sunflowers, stamp some leaves on the sunflowers
Remove the masks and color the sunflowers and leaves with Stampin Blends. I used Light So Saffron, Dark Daffodil Delight and Dark Pumpkin Pie. For the leaves I used Light and Dark Old Olive
Re-positioned the masks on the sunflowers and leaves, lightly brush around them using a Blending Brush and Balmy Blue ink, giving a soft blue background around the flowers
Stamp the tag sentiment from the Fond of Autumn stamp set in Soft Suede ink, now position the matching sentiment on the sentiment tag and stamp it also in Soft Suede ink.
Die cut the sentiment using the Autumn Bouquet dies
Pop the sentiment up with dimensionals
Add some Brushed Brass Butterflies on the card for some bling
Now that you have seen my card, be sure to check out the other Demonstrators and see what they have created.
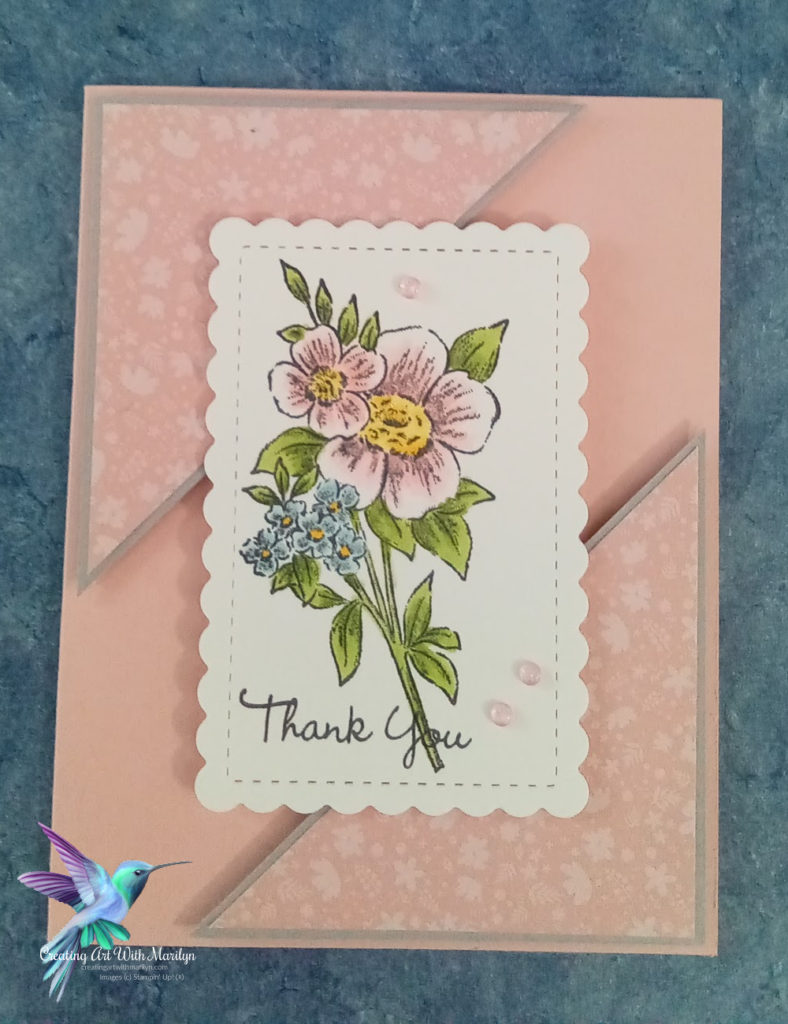
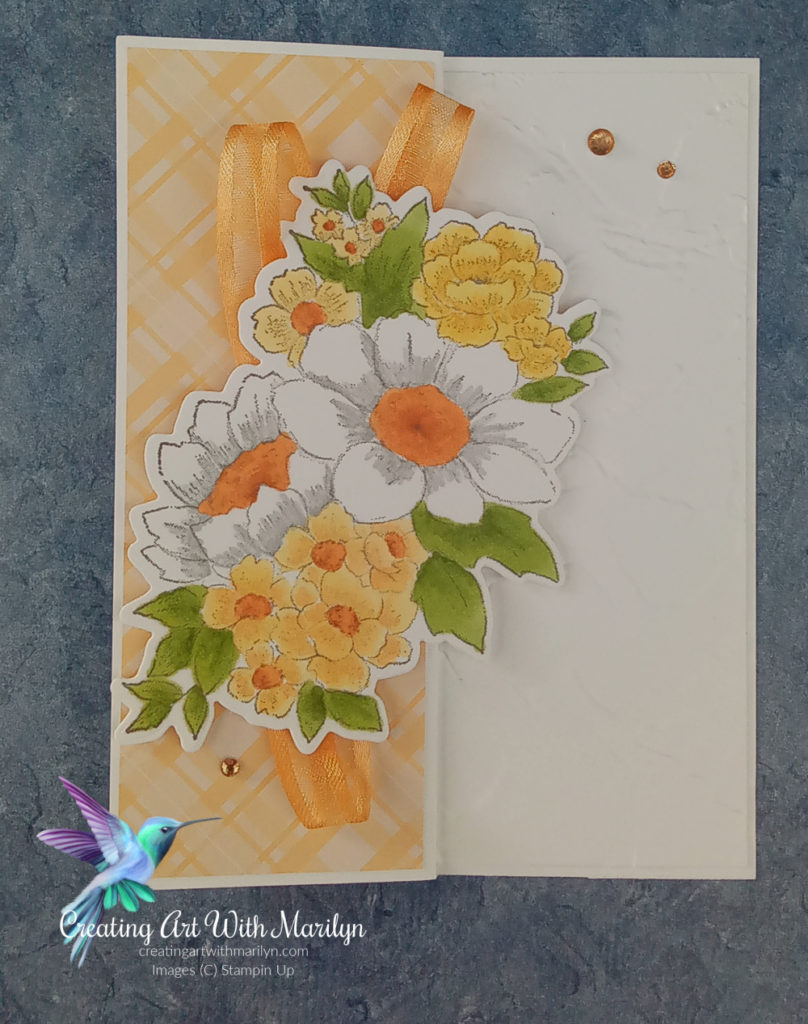
It’s time once again for another Festive Friday Challenge. This challenge is designed by several talented Demonstrators from all around the world. We are given a list of 10 inspirational items for pick from and we must use at least 3 to create our card. This weeks challenge is Grandparents Day FF#0116.
The inspiration items I choose were Fancy Fold, Sweets/Candy, Hearts and Pearls
Here are the details to create my card.
Card base is Basic White cut at 8 1/2″ x 5 1/2″ scored at 2 1/8″ and 4 1/4″
Fold card on the center fold line and the fold it back at the 2 1/8″ fold to for a Z fold
Cut a piece of the New In Color 2022-2024 6×6 Designer Series Paper in Tahitian Tide at 2″ x 5 3/8″ and for inside 4 1/8″ x 5 3/8″ and adhere to the card base
Die cut a frame in Basic White using the Scalloped Contour Dies
Use the Love You More Than dies and die cut the words out in Tahitian Tie card stock and in Early Espresso card stock
Stamp the chocolates from the Nothing’s Better Than stamp set in Basic White
Color the chocolates with Stampin Blends. I used Light and Dark Crumb Cake, Light Soft Suede and 300
Die cut the chocolates using the Love You More Dies
Arrange the die cut words on the Scalloped Contour Basic White layer and glue in place with liquid glue
Pop the Scalloped Layer onto the card flap with dimensionals but only on the left side
Add the chocolates to card with dimensionals
Add some Basic Pearls to the chocolates and color some Heart Pearls with Dark Real Red Stampin Blends and add to the finished card
I think one of my favorite Bundles in the Annual Catalogue is the Blessings of Home. This is such a fun stamp set to color and there are so many different ways you can color it. I used my Stampin Blends. I used the Color and Contour dies and die cut around the image. The Designer Series Paper is the 6×6 Designer Series Paper in Blushing Bride, card stock is Blushing Bride and Smokey Slate. The sentiment is from the Go To Greeting set. The gems are the 2021-2023 In Color Opal Rounds. For details on my card click here.
Hi my name is Marilyn Pearen and I live in Prince George, British Columbia Canada. I have been a Stampin’ Up Demonstrator for 9 years now. Gosh how time flies when you are having fun and enjoying what you do. I decided to become a demonstrator to share my passion and love for card making.
All contents (including text, photographs and images are sole responsibility of Marilyn Pearen as I am an Indepentent Stampin Up! Demonstrator. The use of any contents, services, classes or products offered on this blog are not endorsed by Stampin Up! It is shared for personal use only. No contents may be removed , duplicated or copied for distribution or advertisement without permission.https://festivefridaychallenge.com/


")

 Velvet Sheets")


")


")
")


")


 Designer Series Paper144219")