Stampin Up – Canada Inks Up January Blog Hop – 2022 Jan to Jun Mini Catalogue

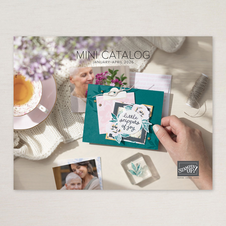
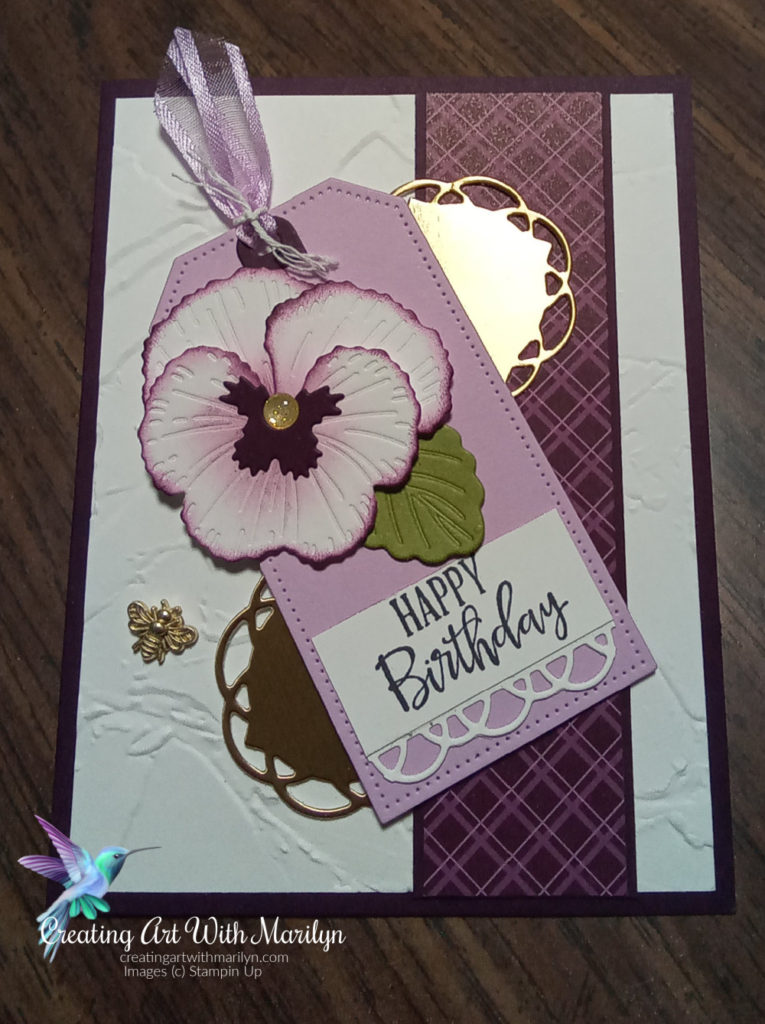
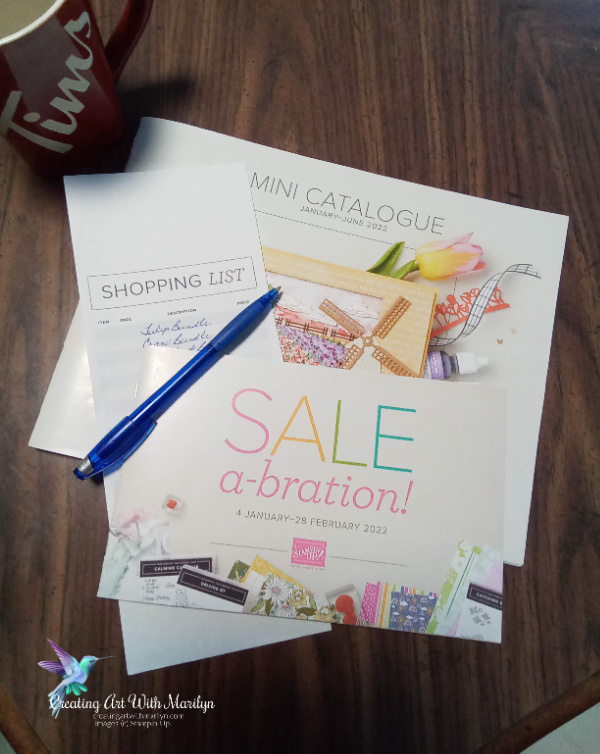
Welcome to Canada Inks Up Blog Hop for January 2022. We are a group of Canadian Demonstrators, that are sharing our ideas in hope to inspire you. This month’s theme is something from the 2022 Jan to Jun Mini Catalogue.This mini catalogue is full of great products so it was hard to pick a favourite. Today I’m using the Ranunculus Romance stamp set and using it in great technique.

This stamp set has some great elements to make a vintage card or an embossed resist card. I am doing an embossed resist technique and also using Misty Moonlight and Balmy Blue for the colors on my card.

This is a closeup of the White Embossed flower, the Misty Moonlight flowers and some of the shading on the card.

Here are the instructions and the products I used to make my card:

  1. I started with a Basic White card stock layer that measured 4″x 5 1/4″
  2. I stamped the Ranunculus flower from the Ranunculus Romance Stamp Set in Versamark and stamped it randomly on my card stock.
  3. I sprinkled White Embossing Powder over the Versamark images and heat set them
  4. I stamped the other flower, the script and the Paris emblem randomly in Misty Moonlight making sure to go off the card stock to give it more appeal to the card
  5. I took a Blending Brush and brushed a little Balmy Blue over the white embossed flowers and the card leaving some white areas
  6. I took another Blending Brush and lightly brushed the white areas with Misty Moonlight. Since this is such a dark color I didn’t add too much Misty Moonlight
  7. When I was happy with the results I took a tissue and wiped off the ink from the White Embossed Flowers, this made them show up whiter
  8. I layered this to a Misty Moonlight card base cut at 8 1/2″ x 5 1/2″ scored and folded at 4 1/4″
  9. On a separate piece of Basic White card stock I stamped the Ranunculus Flower in Misty Moonlight and die cut it using the Ranunculus Dies
  10. I stamped the sentiment Just For You in Misty Moonlight and die cut it using the smallest Tailored Tag Dies
  11. I cut a piece of Misty Moonlight card stock 1″ x 4″ and glued it directly to the card
  12. Attach the sentiment tag to the Misty Moonlight strip with Stampin Seal
  13. Add the die cut flower to the Misty Moonlight strip with dimensionals
  14. Tie a double bow with the White 1/4″ Crinkle Seam Binding Ribbon and attach it with a glue dot to the flower
  15. Add three Silver Metallic Pearls to the Misty Moonlight strip and two other pearls randomly on the card
Product List
Posted in Uncategorized | 7 Comments

Festive Friday Challenge – #FF0100- Our 100th Challenge

WOW! Festive Friday is celebrating their 100th Challenge! Nicole Watt, Ann Schach and Beth McCullough started the Festive Friday Challenge in 2018 and since then there have been some amazing Design Team members added.
This is the Inspiration list and from this list we have to pick at least 3 items to create our cards. I chose Celebration, Gold and Patterned Paper. For cutting and assembly instructions…. read more

Posted in Uncategorized | Comments Off on Festive Friday Challenge – #FF0100- Our 100th Challenge

Stampin Up,SAB-Catching Butterflies

The Sale A Bration Brochure from January 4th to February 28th has some great stamp sets and Designer Series Paper that are free with a $60 order. I decided to make this cute card using the Catching Butterflies stamp set. To get the cutting information and the instructions to make my card …..read more.
Posted in Uncategorized | Comments Off on Stampin Up,SAB-Catching Butterflies

Kylie’s International Blog Highlights-January 2022

Wow! January 2022 is here! I’m so excited to be able to participate in Kylie’s Monthly International Highlight Blog Hop. There are Demonstrators from all over the World participating in this Blog Hop. I decided to play with the New Daffodil Daydream stamp set and the New Sale A- Bration Simply Marbleous 6×6 Designer Series Paper to create my Thank You card.To get the instructions to make my card read more

Posted in Uncategorized | 6 Comments

The New 2022 Mini Catalogue is Here

The New 2022 January to June Mini Catalogue is here and will be available to order from on January 4th. If you would like to get the New Mini Catalogue please fill out this form and I will send you a catalogue right away.

Posted in Uncategorized | Comments Off on The New 2022 Mini Catalogue is Here

International Highlights Winners Blog Hop

I am honoured to have been selected as one of the Top 10 winners in the recent December 2021 International Highlights Blog Hop hosted by Kylie Bertucci. I would like to thank everyone that voted for my card in the December 2021 International Highlights Blog Hop. The theme for the International Blog Hop is Thank You cards. You can check out my entry card for the December Blog Hop at creatingartwithmarilyn.com/stampin-up-in-the-moment/

I decided I wanted to play with some of the new Stampin Up products that will be available to order from the January to June 2022 Mini Catalogue starting on January 4th. My card is using the Blessing At Home (C) Bundle.

Instructions to create my card:

  1. Balmy Blue card base cut at 8 1/2 x 5 1/2 scored and folded at 4 1/4
  2. Basic White layer is 4 x 5 1/4. This has been embossed using the Timeworn Type 3D Embossing folder
  3. Adhere the embossed Basic White layer to the card base using liquid glue
  4. Cut a piece of the Balmy Blue 6 x 6 Designer Series Assorted Paper 1 1/4 x 4 and attach it near the bottom of the card with liquid glue
  5. Stamp the small flower image from the Blessing At Home stamp set in Memento Black and color it using the Stampin Blends in light and dark Balmy Blue for the large flowers, light and dark Petal Pink for the small flowers, light and dark Old Olive for the leaves and light and dark Daffodil Delight for the centers of the flowers
  6. Die cut the image using the Flowers At Home Dies
  7. Cut a piece of Balmy Blue card stock that is 2 1/2 x 3 3/4
  8. Layer another piece of Pale Papaya card stock that is cut at 2 1/4 x 3 5/8 and glue it to the Balmy Blue piece of card stock
  9. Layer a piece of Basic White card stock that is 2 1/8 x 3 1/2 to the Pale Papaya layer with liquid glue
  10. Attach the flowers using dimensionals to the Basic White layer
  11. Color a piece of the White 1/4″ Crinkled Seam Binding ribbon with the dark Balmy Blue Stampin Blends
  12. Tie the ribbon into a small bow and attach it to the flowers using a glue dot
  13. Color 3 of the Basic Pearls with the dark Balmy Blue Stampin Up Blends and place them on your card

Now that you have seen my card hop over to see all the other great Demonstrators and their cards.

Posted in Uncategorized | Comments Off on International Highlights Winners Blog Hop

Canada Inks Up December Blog Hop

Welcome to our Canada Inks Up Blog Hop for December. The theme for this month’s Blog Hop is Birthday Card. I love the Painted Christmas Designer Series Paper from the June – December Mini Catalogue and decided to make a masculine Birthday Card. I paired it with the Nature’s Beauty Stamp set.

Cutting Instructions:

  • Card base Evening Evergreen 8 1/2 x 5 1/2
  • Soft Succulent 4 x 5 1/4
  • Evening Evergreen 2 1/8 x 4 1/8
  • Painted Christmas Designer Series Paper 2 x 4
  • Evening Evergreen 1 5/8 x 3 1/8
  • Basic White layer for stamped image 1 1/2 x 3

Instructions to create card:

  1. Card Base Evening Evergreen 8 1/2 x 5 1/2 scored at 4 1/4
  2. Stamp the Happy Birthday image from the Peaceful Moments stamp set on the Soft Succulent layer in the top corner
  3. Run the Soft Succulent layer through the Wintry 3 D embossing folder (only emboss it on the right side of the card stock)
  4. Attach the Designer Series Paper to the Evening Evergreen card stock layer, then attach it to the card with liquid glue
  5. On the Basic White card stock piece stamp the deer image from the Nature’s Beauty stamp set in Soft Suede and the shrub in Crumb Cake
  6. Attach the stamped image to the Evening Evergreen card stock layer with liquid glue and then pop it up with dimensionals overlapping it on the DSP layer
  7. Place 3 Matte Decorative Dots on the card

Now that you have seen my card, grab a coffee and check out the other Demonstrators and their creative cards.

Product List

Posted in Uncategorized | 5 Comments

Stampin Up Christmas Card with a bit of a twist -Using the Christmas Tree Dies and the Way to Goat Stamp set

My Grand Daughter asked me to make a Card for a friend of hers. She wanted it to be a Christmas Card, Purple and have a goat on it (her friend likes goats). Well I’m always up for a good Challenge and this was going to be a doozy!

I found a card sketch of Diane Evans from stampinwithdiane I really liked and decided to use the Christmas Tree Dies from the Whimsy and Wonder Collection and the Way to Goat stamp set. I was so pleased with the way this card turned up.

Continue reading
Posted in Uncategorized | Comments Off on Stampin Up Christmas Card with a bit of a twist -Using the Christmas Tree Dies and the Way to Goat Stamp set

Festive Friday – New Year’s Day – #FF0099

Welcome stampers, it’s time for another Festive Friday Challenge.

The Challenge for this week is New Year’s Day and for this Festive Friday Challenge we had to create a card using at least 3 items from the Inspiration list. For my card I chose black, silver, sparkle and rhinestones.

Here are the instructions to create my card:

  1. Card base is Basic White cut a 8 1/2 x 5 1/2 scored and folded at 4 1/4 to make a portrait card
  2. Cut a Basic Black card stock layer, 4 x 5 1/4 and glue it onto the Basic White card base
  3. From the Peaceful Place Designer Series Paper cut it 3 3/4 x 5 1/8
  4. Tie a piece of Black 3/8″ Glitter Ribbon around the Designer Series Paper, then glue that layer to the Basic Black layer
  5. Attach a piece of the Adhesive sheet to a piece of the Silver Foil Specialty Pack and a piece of the Basic Black card stock each cut at 2 1/2 x 3 1/2
  6. Die cut the Happy New Year sentiment from the Word Wishes die set in the Silver foil and also the Basic Black to make a shadow effect
  7. Remove the adhesive backing and attack the silver lettering to the black layer, giving it a shadow effect then attack it to the card
  8. Place 5 Rhinestones on the card
Product List
Posted in Uncategorized | 6 Comments

Kylie’s International Highlight Blog Hop for December

I was so pleased to be able to enter one of my cards into Kylie Bertucci’s Monthly International Highlight Blog Hop. There are Demonstrators from all over the World participating in this Blog Hop. I was so excited to find out that my card was picked as #4. Thank you to everyone one that voted for my card and now I get to Hop along again at the end of the month. Thank you, everyone who voted for my card. Here is the link for the instructions on making my card creatingartwithmarilyn.com/stampin-up-in-the-moment/

Posted in Uncategorized | Comments Off on Kylie’s International Highlight Blog Hop for December