")

Stampin Up is offering for one day only FREE Shipping on Wednesday Dec 8th for orders over $65. This is a great time to take advantage of the Last Chance Items from the July to December Mini Catalogue that will soon be retiring and also the Clearance Rack Items.


Oh my goodness it’s December all ready! Where has the time gone?
December means the July to December Mini Catalogue is coming to an end. There are some great projects in this catalogue and if you have been holding off to buy them now is your chance. Stampin Up has released their Last Chance list. There are some products that will be carrying over but most of the stamps, dies, Designer Series Paper and embellishment are retiring and they will be selling out fast.

Here is the link to the Last Chance list:
https://su-media.s3.amazonaws.com/media/Promotions/2021/12_Last-Chance-Sale/Retiring-List/July-December-2021-Mini-Catalogue-Last-Chance-Products_CA.pdff
Stampin Up has also updated the Clearance rack. There are some really great deals on it but they are selling out fast and once they are gone they will no longer be available.

The New January to July Mini catalogues will be available in January to order and also Sale-a – bration will also be starting up. For every $60 you spend out of the New Mini Catalogue or the Annual Catalogue you will qualify for a free stamp set or Designer Series Paper for the Sale – a – Bration brochure. If you would like a catalogue, contact me by email at: marilynpearen@hotmail.com and I will get one to you as soon as I can.
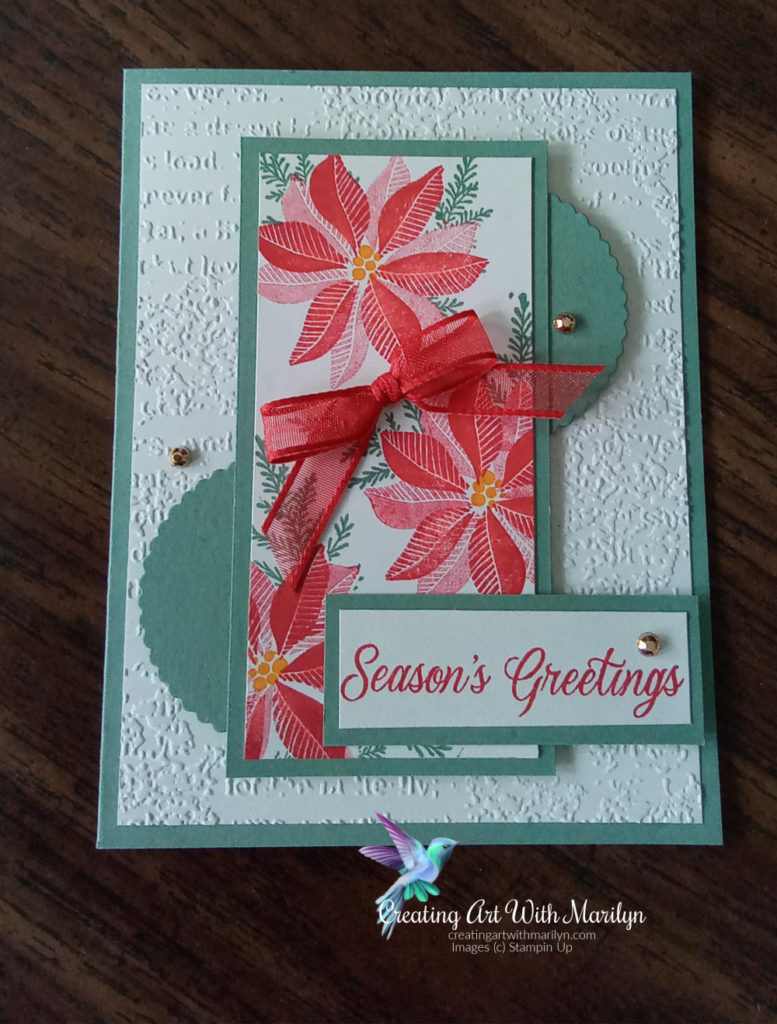
This card was created using a card sketch. I really like this sketch and how versatile it is.
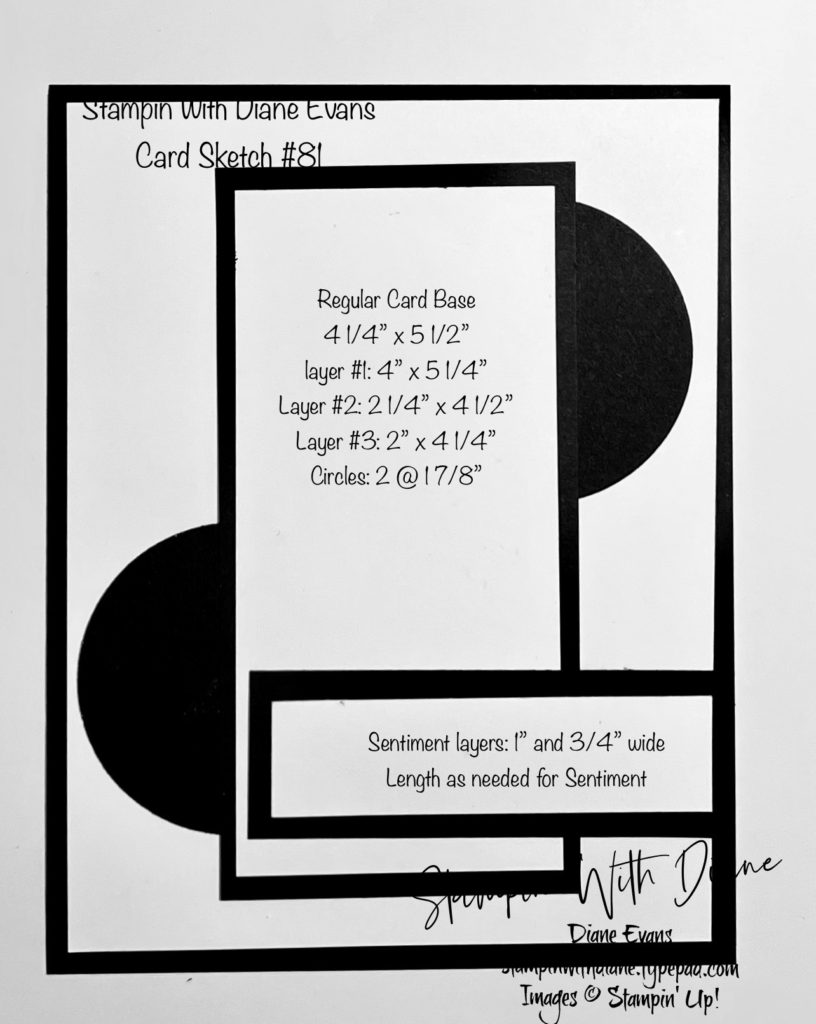
Instructions to create card:


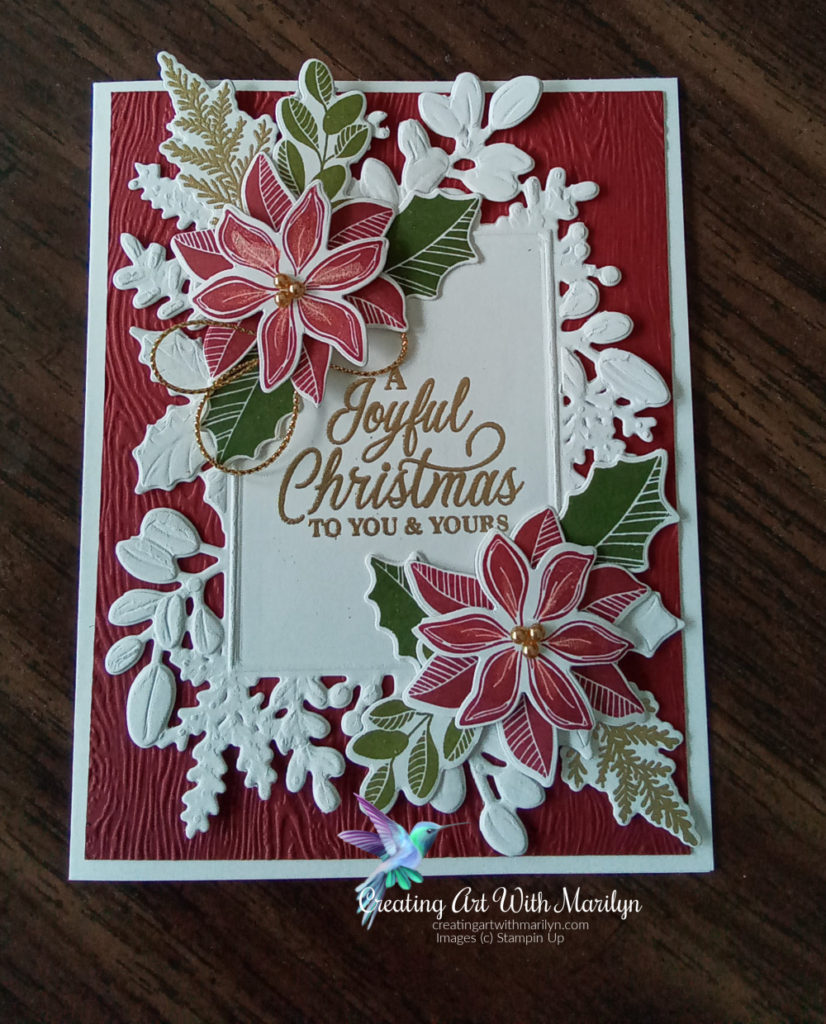
Welcome stampers. I am so happy to be able to participate in the Festive Friday Challenge once again. This weeks challenge is Christmas Jumper Day #FF0098 . We had to create a project or card using at least 3 items from the inspiration list. I have made my card using the Merriest Moments Bundle and for my inspiration I picked red, green, gold and ribbon.

Products Used:
Instructions to create card:

Welcome to Canada Inks Up Blog Hop for November 2021. We are a group of Canadian Demonstrators, that are sharing our ideas in hope to inspire you. This month’s theme is a Fancy Fold Card. I love making fancy fold and fun fold cards. Today I’m using the new In the Moments stamp set that will be available in the new January to June Mini Catalogue.
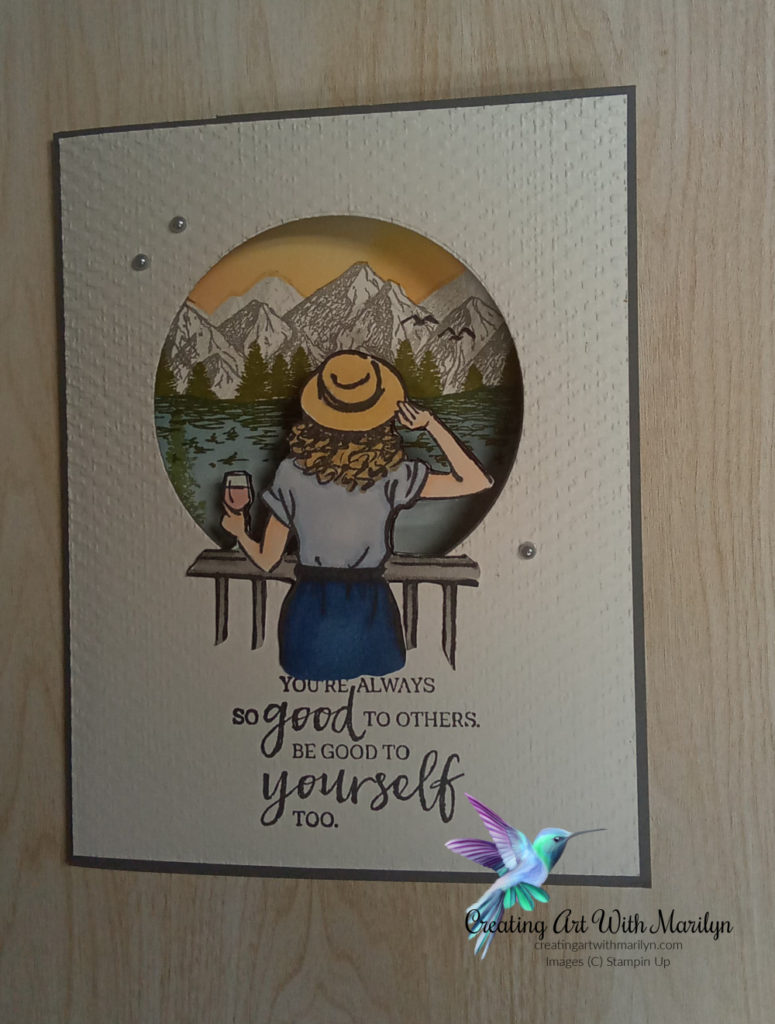
I love to color using my Blends and this card was perfect for that. I stamped the lady on a piece of Basic White and colored her with my Blends and then fussy cut her out. I also did a reverse image of her because the blends bleed though the card stock and I wanted to hide the back of the image. I then stamped the sentiment on the card front and die cut a circle out and then ran the layer though the Tasteful Textile embossing folder. I also cut out the circle in the Basic Gray layer matching the placement on the white layer. I attached the Basic White layer to the front of the Basic Gray with liquid glue.

To make the card base I cut 2 pieces of Basic Gray card stock cut 8 1/2 x 5 1/2 scored at 4 1/4. I glued the two pieces so that one opens to the right and the other opens to the left, gluing them in the center of the card.

For the inside flap of my card I used the Mountain Air stamp set and stamped the mountains in Smokey Slate and then moved the stamp over a little and stamped it again giving the look of background mountains as well. I stamped the trees on the base of the mountains in Old Olive. I make a mask of the mountains, then brushed a sun set using Pumpkin Pie, Daffodil Delight and finished the sky in Misty Moonlight. I was quite please with the way the sky turned out. I lightly brushed the shore line in Misty Moonlight to give it a darker shore line and then brushed the water in Balmy Blue. I stamped the sail boat from the Sailing Home stamp set and colored it. I then stamped the trees in Mossy Meadow from the Mountain Air Stamp set. The island that the trees are on is from the Evergreen Elegance stamp set and stamped in Early Espresso. I used a white gel pen for the ripples in the water.
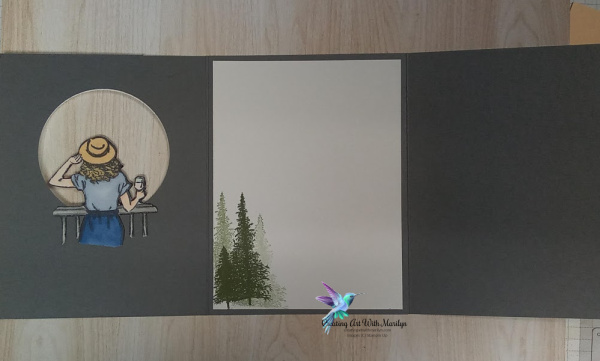
For the signing area of the card I cut a piece of Basic White at 4 x 5 1/4 and stamped the trees from the Mountain Air stamp set in Mossy Meadow.
To finished the front of the card with some bling, I placed 3 of the silver metallic pearls.
I hope you enjoyed my card and not hop over and see the great creations from the other Demonstrators.

Cutting Instructions:

Now is a great time to join the Stampin’ Up community and join my team. Your Starter Kit will consist of $165 worth of products of your choice for only $100. That’s right $100. and today is the last day to be able to take advantage of the Seasonal Sale. Stampin’ Up is offering card stock, ink pads and the dies from the Annual Catalogue at 10, 15 and 20% off. You will also get a free Paper Pumpkin Kit. If you join the Stamping Community this month your will not be charged for shipping and taxes.