

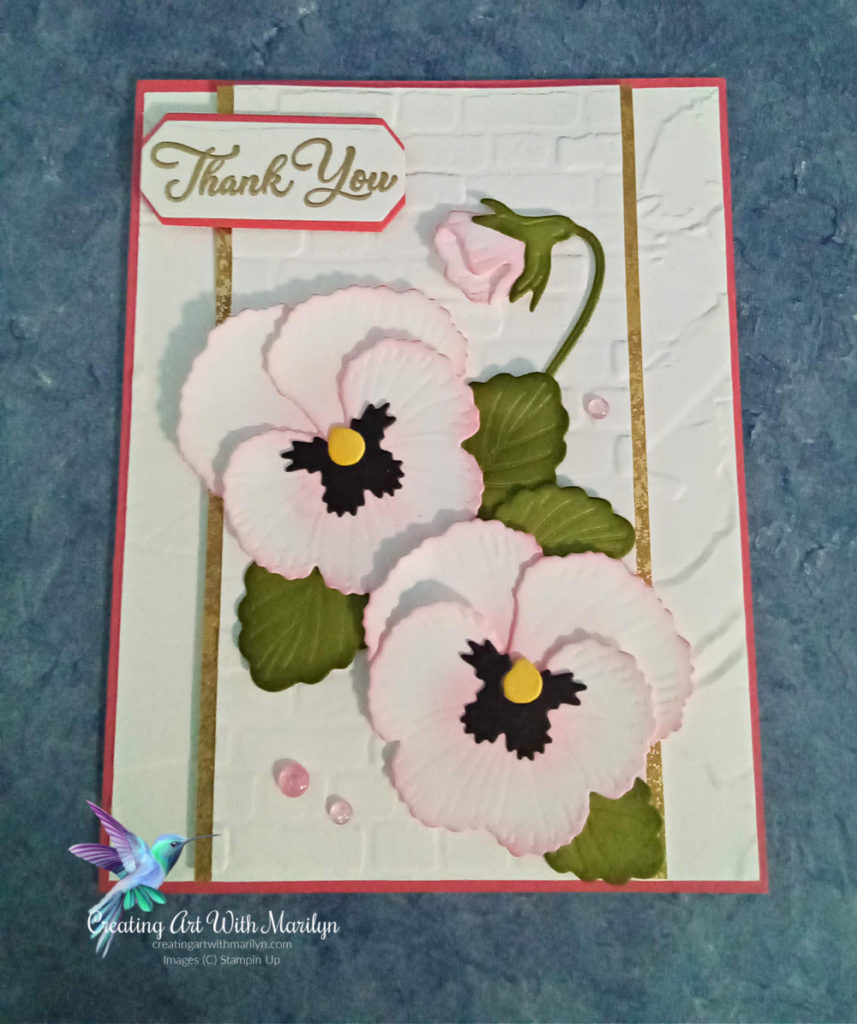
I am so pleased to once again be able to participate in Kylie’s International Blog Highlight Winners Hop. Thank you everyone that took the time and voted for my card. Your votes made me able to participate in this Blog Hop with the Top 10 Winners from all around the World. I decided to use the Pansy Patch stamp set and the Pansy dies to create this card. The dies cut out and emboss the flower petals and leaves, giving great details to the petals and leaves.
Details to cut and create this card:
- Card base is Sweet Sorbet card stock cut at 8 1/2″ x 5 1/2″, scored and folded at 4 1/4″
- Layer of Basic White card stock cut at 4 1/8″ x 5 3/8″
- Emboss this layer with the Painted Texture 3D embossing folder
- Cut the next layer of Basic White card stock at 2 3/4″ x 5 3/8″
- Emboss this layer of card stock with the Brick and Mortar embossing folder
- Cut 2 strips of the Distressed Gold Specialty paper that are 1/2″ x 5 3/8″and adhere to the edge of the embossed layer with Stampin Seal
- Attach this embossed layer to the card base with dimensionals
- Die cut the pansy petals and the pansy bud in Basic White card with the Pansy Dies
- The leaves and bud stem are die cut in Old Olive card stock
- Use a sponge dabber and the Sweet Sorbet ink and lightly sponge the centers of each petal and sponge the edges of each of the petals and bud as well. This brings out the embossed details in the petals
- Lightly sponge the edges of the leaves and bud stem with Old Olive ink
- The pansy face is die cut in Basic Black card stock and the center of the pansy is die cut in So Saffron card stock. Lightly sponge the edges of the pansy centers with So Saffron ink
- Lightly curl the petals and assemble the flowers with a glue dots
- Attach the black face and the yellow centers to the finished pansies
- Place the pansies on the card layer with dimensionals
- Add the leaves with glue dots
- Add the pansy bud with a dimensional and glue the stem in place on the card
- The sentiment is from the Go To Greeting stamp set embossed in Gold Embossing Powder
- Die cut the sentiment with the Harvest die set
- Die cut another layer with this die in Sweet Sorbet card stock
- Cut the Sweet Sorbet die in half and add it to the Gold Embossed layer to give it the layer look
- Attach the sentiment to the card with dimensionals
- Add some 2021-2023 In Color Opal Rounds in Polished Pink for some bling
Now that you have seen my card hop over and check the other Great Demonstrators and their creations.
Product List ") |  | ||
 |  | ||
 |  |  |  |
 |  |  |  |
 |  |  |  |
 |  | ") |  |
")

 Specialty Paper")


Gorgeous card! Love that bundle.
The die cut, embossed pansy petals are beautiful. Congrats Marilyn on making it to the Top Ten Blog Hop this month!
A beautiful card, Marilyn!!
Beautiful card Marilyn!
Very pretty Marilyn
wow, what a beautiful card!!! Thanks for sharing
Thanks Liane
Beautiful card! I love the sponging on the detailed dies to highlight them!
Thanks Julie.