Canada Inks Up Blog Hop August 2021

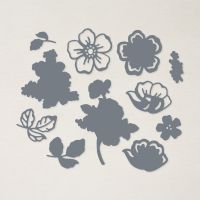
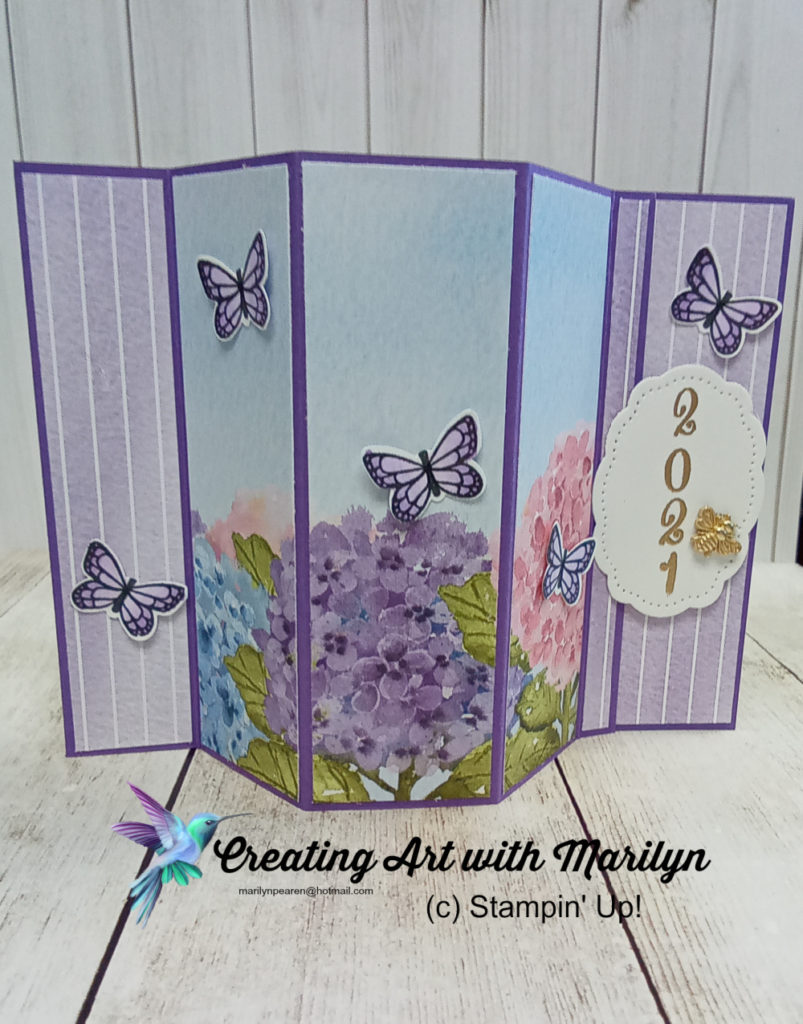
Hello Stamps. Thanks again for stopping by and checking out our Canada Inks Up Blog Hop for August. This month’s theme is something from Sale-A- Bration. I decided to use the Summer Shadows Dies. These dies coordinate with the Shaded Summer Stamp Set in the Annual catalogue.

Here are the Supplies I used.

Stamps: Shaded Summer from Annual Catalogue

Dies: Summer Shadow from Sale-A- Bration and Hippo and Friends Die

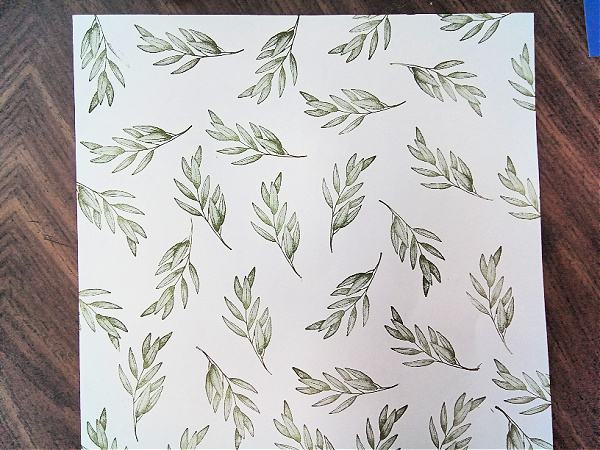
Paper Products: Hand Penned DSP, 6×6 Old Olive Designer Series Paper, Pale Papaya, Calypso Coral, Old Olive and Pear Pizzazz card stock

Other Products: Pale Papaya Ribbon, Very Vanilla Baker’s Twine Essential Pack, Champagne Rhinestones
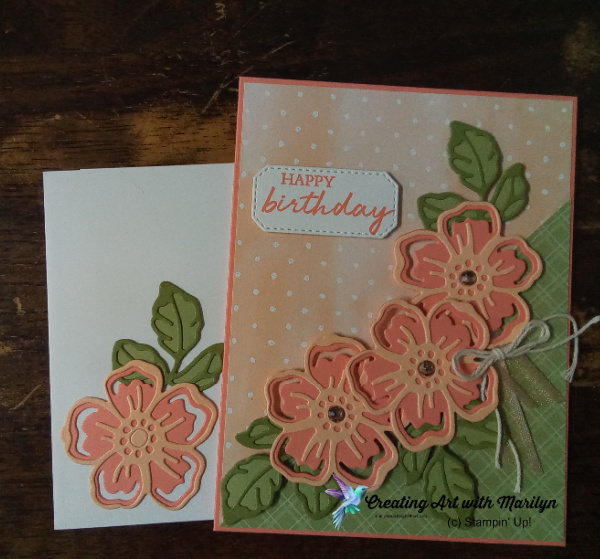
Card Instructions:

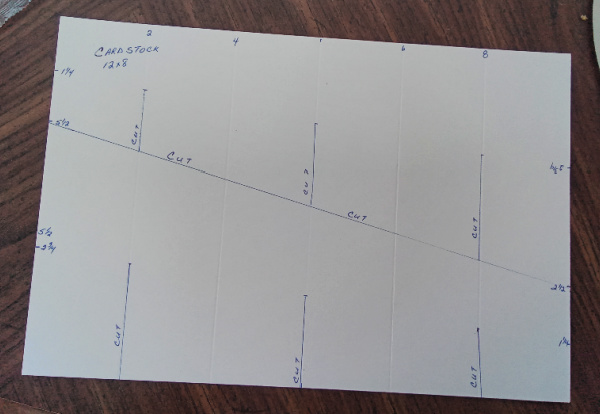
  • Card base is Calypso Coral card stock cut at 8-1/2 x 5-1/2 scored at 4-1/4
  • Cut a piece of DSP from Hand Penned 4-1/8 x 5-3/8 and adhere to card base using liquid glue
  • Cut a piece of Old Olive DSP 4″ square and cut in half diagonally, adhere one piece to the bottom corner of the card
  • Die cut three flower outlines in Pale Papaya and three bases in Calypso Coral and attacked the flowers together
  • Cut three leaf outlines in Old Olive and three backgrounds in Pear Pizzazz and attach the leaves together as well
  • Do a dry fit deciding where you would like the flowers placed along the diagonal seam and then attach the flowers using one dimensional in the center of the back so you are able to tuck the leaves behind the flowers.
  • Once flowers and leaves are attached put a large Champagne Rhinestone in the center of the flowers
  • Cut a piece of Pale Papaya ribbon about 3-1/2 inches and fold in half and tuck under a flower with a glue dot and then tie a double bow in the Very Vanilla Baker’s Twine and attach it on top of the ribbon with a glue dot
  • Stamp a sentiment from the Shaded Summer stamp set in Calypso Coral and die cut it out with the Hippo and Friends die set and attach it with dimensionals

Posted in Uncategorized | 10 Comments

Canada Inks Up Blog Hop July 2021

Hello Stampers, Welcome back to our Canada Inks Up Blog Hop for the month of July. The theme for this month’s Blog is Christmas in July. I decided to use a stamp set and dies from the New July to December Mini Holiday Catalogue called Peaceful Cabin.

Stamps: Peaceful Cabin, Mountain Air, Peaceful Deer (sentiment)

Dies: Cabin Dies

Inks: Balmy Blue, Mossy Meadow, Smoky Slate and Crumb Cake

Paper Products: Basic White and Smoky Slate Cardstock

Other Products: Blending Brushes, Dimensionals

Card Instructions

  • Card base is Basic White card stock cut at 8-1/2 x 5-1/2 scored at 4-1/4 and card is landscape
  • Stamp the mountains in Smoky Slate using the Mountain Air stamp set. Then stamp off the background mountains in Smoky Slate.
  • Using Balmy Blue ink and a Blending Brush lightly brush in a sky behind the mountains. Stamp a few clouds in the sky. Then stamp a sentiment in the sky using Memento Black ink.
  • On separate pieces of Basic White card stock, stamp the trees in Mossy Meadow and the cabin in Smoky Slate (leave lots of room on the bottom to die cut them out and attach to the card). Also stamp the fence twice in Smoky Slate and stamp off the fox in Crumb Cake and die cut these images out. I decided to fussy cut the fox out as I wanted a closer cut to the fox.
  • Do a dry fit as to where you want the trees and the cabin to fit on your card. When you are satisfied with the layout of your card stamp the fox. Add dimensionals to the trees and place them on your card.
  • Then add dimensionals to the cabin and place them on top of the trees. Then add the fence with dimensionals and place your cut out fox over the stamped image with a tiny dimensional.
  • Mount a piece of Smoky Slate card stock cut at 5-3/8 x 4-1/8 to your Basic White Card Base then glue the focal image to the Smoky Slate card stock.

Now hop over to see the other Demonstrators and their creation

Posted in Uncategorized | 8 Comments

Hydrangea Grad Card

I made this card for my Grand Daughter who was graduating from Elementary School this year. Unfortunately it was made with retired products.

Stamp sets: Make a Difference, Butterfly Gala

Dies and Punches: Butterfly Duet punch, small sentiment die

Cardstock and DSP: Gorgeous Grape, Hydrangea Hill DSP

Ink and Blends: Highland Heather light and dark blends, Purple Posy light and dark blends

Other Products: Versa Mark, Gold embossing powder

Instructions to make card

  • Card base is Gorgeous Grape, cut at 11 x 4-1/4, scored at 3/8, 1-3/4,  3-1/8,  4-1/2, and 5-1/2
  • Cut 2 pieces of different  DSP (1) 2-5/8 x 4-1/8, and (1) 3-3/4 x 4-1/8
  • Cut the 2-5/8 x 4-1/8 piece at 7/8, 1-1/4 and 1/4 (these are for the left and right ends of the card and also the inside panel)
  • Cut the 3-3/4 x 4-1/8  piece into 3 strips of 1-1/4 (if you are using a pattern as your focal point mark the order these pieces are cut in
  • Fold the card base in half and glue the 1 inch piece together making you bay window effect
  • Glue the 7/8 piece of DSP to the front of the glued piece then glue the three focal window panels on the  bay window (take note that they are in the proper order)
  • Glue the 1/4 inch piece to the thin strip at the end of the card base
  • On the inside glue the other strip that is 1-1/2 x 4-1/8 to the right edge of the card base
  • Cut and glue a piece of Basic White 2-7/8 x 4-1/8 to the inside of the card butting it right up to the edge of the 1-1/2 panel (this is for the sentiment)
  • Using Versa Mark, stamp the year on the punched out piece  with the numbers from Make a Difference stamp set and  heat emboss with Gold embossing powder.  Attach it to the edge of the inside of the card with dimensionals so that the front of the  card can be tucked into it forming the bay window
  • Stamp 5 of the small butterflies from the Butterfly Gala and color them with the Stampin  Blends and punch them out with the Butterfly Duet punch
  • Attach them to the card with liquid glue
  • For a little bling add a Bumblebee Trinket to your card.

Posted in Uncategorized | Comments Off on Hydrangea Grad Card

In Bloom Greenhouse Card

I wanted to play with the In Bloom Suite and after seeing a card that Patricia Burkhart made I decide I want to try and make a greenhouse card.

Stamp sets: Plentiful Plants, Retired Birch Background

Dies: Perfect Plants, Stitches Rectangle

Inks: Soft Suede, Garden Green, Cinnamon Cider

Cardstock and DSP: Basic White, Crumb Cake , Bloom Where You’re Planted

Other Products: Stamparatus, Window Sheet, Foam Adhesive Sheets

Instructions for the card:

  • Cut a piece of Basic White cardstock  5-1/2 x 4-1/4 (this will be cut down to size later)
  • Position the Birch background stamp in the Stamparatus  and ink it up with Soft Suede. You will need 2 pieces of the wood background for the greenhouse
  • Cut the wood stamped piece to 4-1/8 x 5-3/8
  • Use the #4 of the long narrow Stitched Rectangle dies and cut out 2 window panes
  • Glue at piece of 4 x 4-1/4 window sheet to the back of the wood panel cardstock to make the window panes
  • Cut a card base of Crumb Cake at 8-1/2 x 5-1/2 score at 4-1/4
  • Cut 2 small  pieces of the wood panel to make shelves for the plants to stand on and glue them to the front of the card base
  • Fuzzy cut several of the plants and planters from the DSP and place them on the wall of the greenhouse
  • For the hanging basket stamp the large plant pot in Cinnamon Cider and the foliage in Garden Green
  • Die cut the hanging basket in Basic White
  • Place the plant pot and the plant in the basket and tie a piece of twine in the hole of the basket
  • To attack the greenhouse front to the card base cut strips of foam adhesive sheets and place them on the front panel
  • For a finished look place a large plant in the front of the green house using dimensionals
Posted in Uncategorized | Comments Off on In Bloom Greenhouse Card

In Bloom 3D Greenhouse Card

The In Bloom Suite was a must have Suite from the new Annual Catalogue for me . I saw a card that Patricia Burkhart made and decided I had to try and CASE it. Thank you Patricia I think I came close to your card.

Stamp Set: Plentiful Plants, Retired Birch Cling background stamp

Dies: Plentiful Plants, Stitched Rectangles, Circle Dies

Cardstock and DSP: Basic White, Smokey Slate, Gray Granite, Bloom Where You’re Planted DSP

Inks: Gray Granite, Garden Green, Early Expresso, Memento Black

Other Products: Stamparatus, Silicone Sheet, Window sheet,

Instructions for card

  • Start with piece of Basic White cardstock cut at 5-1/2 x 4-1/4 (this will be cut down later)
  • Place the Birch background stamp in the Stamparatus to make the wood looking front of  the green house
  • Ink the stamp with Gray Granite and stamp on the Basic White. You will need 2 pieces of the wood background cardstock.
  • Cut the wood cardstock to 4-1/8 x 5-3/8
  • Use repositional tape and tape the background layer to the Smokey Slate cardstock that is cut at 8-1/2 x 5-1/5 scored at 4-1/4.
  • With the 4th longest Stitched Rectangle die (this is the narrower rectangle dies) cut 2 window panes in the front of the card (through both layers) leaving equal spacing between the panes.
  • Remove the wood background layer and place a piece of Window Sheet that is 4 x 4-1/4 and attach it with liquid glue and then glue the wood stamped layer.
  • For the greenhouse planting box cut a piece of Smokey Slate 8-3/8 x 1-1/4, fold this into 4 equal pieces.
  • Cut the wood background cardstock into 4 strips that are about 1-1/8 by 1 -15/16 leaving a narrow gap between the folds
  • Glue the left side of the strip to the left side of the card and the right side to the right side of the card leaving the center folds loose and fold the greenhouse box so the center of the box is pointing outwards
  • Make 2 shelves for the plants to stand on, from the background cardstock  and glue them to the back of the greenhouse
  • For the plants in the hanging basket and the large plant inside the card, you will need to do reverse stamping so the back of plants are seen as well when the card is closed. Also stamp 2 of the plants pots
  • Die cut a hanging basket in gray granite cardstock . I cut 2 baskets out and placed them as close to the same position so you could see the basket from all angles.
  • Position the plant pot and the foliage in the basket then put the other hanging basket on the back side of the pot.
  • Tie a small piece to twine in the hole at the top of the hanging basket
  • Cut a strip of window sheet about 3/8 x 4-1/4 and glue it to the inside of the planter box leaving it floating at the top and attach the hanging basket to the window sheet
  • Do the same reverse stamping for the large planter and place it on the box
  • Fussy cut out some of the planters and place them on the shelves
  • Add a large planter to the outside of the greenhouse. Use liquid glue and only glue where the leaves meet in contact with the greenhouse
  • Stamp a sentiment in Memento Black and attack it to the front of the greenhouse

Posted in Uncategorized | Comments Off on In Bloom 3D Greenhouse Card

Canada Inks Up Blog Hop-June 2021

Hello Stampers and welcome back to our Canada Inks Up! Blog Hop for the month of June. This month’s Blog Hop Theme is Birthday Celebrations. I decided I wanted to make a Cascading Card and use the new In Colour Shimmer Vellum papers and the In Color cardstock. I also used the Poppy Moment dies to create the flowers for my cascading card.

Cascading Poppy Card

Stamps: Peaceful Moments, Forever Evergreen

Dies: Poppy Moments, Hippo and Friends, Stitched Rectangle

Cardstock and DSP: Basic White, Garden Green, Granny Apple Green, In Color Shimmer Vellum and White Vellum

Ink: Mossy Meadow

Other Products: Bumble Bee Trinkets, Dimensionals, liquid glue, glue dots and Stampin Seal

I have stamped both sides of a 12 x 12 piece of cardstock so the leaf pattern shows up properly on both sides of the cascading base. I then cut it down to 12 x 8. This is a template of how the cardstock needs to be cut.

Instructions

  • Using a 12 x 12 piece of cardstock cut it down to 12 x 8.
  • If you decide to stamp and decorate the cardstock for the cascading vase now is the time as it will stamp without having the score line on the images. You will need to stamp both sides of the cardstock to make it work properly.
  • Score it on the long 12″ side at 2, 4, 8 and 10 and at the 6″ mark, make a pencil line at the top and bottom .
  • On the 8″ side measure up 5-1/2 ” and make a mark and on the other side of the cardstock make a mark at the 2-1/2″ mark.
  • Use your paper trimmer and cut diagonally from the 5-1/2 mark down to the 2-1/2 leaving you with two diagonal pieces.
  • On each of the diagonal pieces make a pencil mark at 2-3/4 and 1-1/4 and then use a ruler at these two marks to form another diagonal. Make a pencil mark where the ruler and the score line meet at the 2|”, 6″ and the 10″.
  • With scissors and on the one piece that is flat on the bottom cut up score line to the little pencil mark on the 2, 6, 10.
  • On the other piece of cardstock cut up on the diagonal edge on the 2, 6 and 10″ pencil marks.
  • Now interlock the two pieces of cardstock together and burnish the folds to form the cascade card.
  • Cut out several of the poppies from the Poppy Moment die set in the new Pale Papaya Shimmer Vellum and for the top layer of the poppy use Pale Papaya cardstock. The center of the poppy is Daffodil Delight.
  • The leaves are cut in Garden Green for the back layer of the leaves and the top layer is Granny Apple Green.
  • Place the poppies on the top edges of the cascading card using dimensionals and the leaves with liquid glue.
  • Stamp a Happy Birthday sentiment from the Peaceful Moments stamp set on a piece of vellum and attach among the flowers with a glue dot.
  • On the back of the card add a piece of cardstock die cut from the Happy Hippo die set. This gives you a place to write and also reinforces your card base.
  • Add a Bumblebee trinket to one of the poppies for a little bling.

How hop over and check out the other Demonstrators and their creations:


Powered by Linky Tools

Click here to enter your link and view this Linky Tools list…

Product List

Posted in Uncategorized | 7 Comments

Flowers of Friendship Thank You Card

  • Basic White card base is 8-1/2 x 5-1/2 scored at 4-1/4
  • Basic White layer is 4 x 5-1/4  and ran through the Painted Texture embossing folder
  • Bermuda Bay cardstock is cut at 1 x 5-1/4 and ran through the Dainty Diamond 3 D embossing folder and glued to the embossed layer
  • Stamp image from Flowers of Friendship on a piece of Basic White cut to 2-3/4  x 4 and color it with Stampin Blends
  • Stamp and color a couple of extra images of the large flower on a scrape of Basic White and fussy cut them out and layer them onto the base flower with a mini dimensional
  • With Stampin Write markers color the sentiment and stamp in onto a small piece of basic white and attach it to a layer of Bermuda Bay cardstock and attach it to the card with dimentsional
  • Glue three sequins into the card 
  • To color the piece of Polka Dot ribbon sponge it  with a dauber in Bermuda Bay ink. Then tie in a bow and attach it to the card with glue dots
Posted in Uncategorized | Comments Off on Flowers of Friendship Thank You Card

Stampin Up Pansy Petals

  • Card base is Balmy Blue cut a 8-1/2 x 5-1/2 scored and folded at 4-1/4
  • Top layer is 4 x 5-1/4 and embossed with the Brick and Mortar folder and glued to the card base
  • DSP is 1-1/4 x 5-1/4 from the In Color 6 x 6 Assorted DSP
  • Attack a piece of the Silver Mesh Ribbon on an diagonal to the card with Stampin Seal
  • Die cut two pansies and the pansy bud in Basic White and sponge centers with Balmy Blue and sponge edges in Misty Moonlight
  • Assemble pansies with dimensionals
  • Pansy face is die cut in Misty Moonlight cardstock and glued to the pansy
  • Attach the pansies to the card base with a single dimensional leaving room to add the leaves
  • The leaves and bud stem are die cut in Old Olive and attached under the pansy with a mini dimensional
  • Add a Genial Gem to the centers of the pansy face and Silver Metallic Pearls to the card and for a final touch add a Bumblebee Trinket to the card

Posted in Uncategorized | Comments Off on Stampin Up Pansy Petals

Hand Penned Card

  • Highland Heather card base cut at 8-1/2 x 5-1/2 scored at 4-1/4
  • Using Versamark stamp the images from the Hand Penned Petal stamp set on the card base
  • Cut a 3×4 layer of Basic White and run it through the Painted Texture Embossing folder
  • Cut a layer of Highland Heather 3-1/8 x 4-1/8 and attach it to the embossed layer
  • Cut a layer of Basic White 3-1/4 x 4-1/4 and attach it to the Highland Heather Layer
  • On a scrape of Basic White, stamp image from the Hand Penned Petal stamp set in Memento Black and color the image using the Stampin Blends and die cut the image out using the Penned Flower die
  • Attach a piece of the Highland Heather Grosgrain ribbon to the three layers and then attach the colored image to the card layer with dimensionals
  • Place three of the In Color Jewels to the card
Posted in Uncategorized | Comments Off on Hand Penned Card

Expression In Ink Thanks Card

  • Polish Pink card base 8-1/2 x 5-1/2 scored at 4-1/4
  • Expression in Ink DSP cut 2 x 5-1/4 glued to right edge of card base
  • Basic White layer cut at 4 x  5-1/4,  die cut edge using die from Scalloped Contour die. Stamp image from Elegantly Said and Thanks from Artistically Inked in Polished Pink ink. Trim to desired width to finish front of card
  • Attack a bow using the Polished Pink open weave ribbon and place a few In Color Jewels on the card
Posted in Uncategorized | Comments Off on Expression In Ink Thanks Card