Kylie’s Demonstrators Training Blog Hop for October

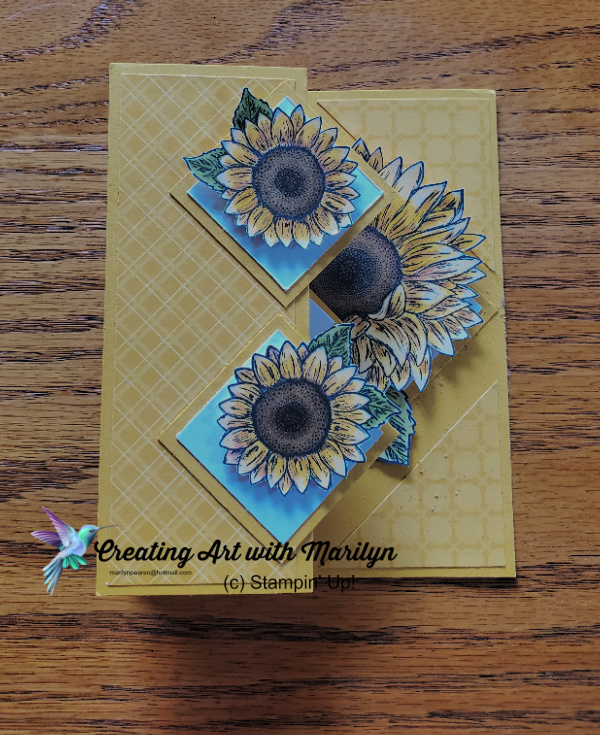
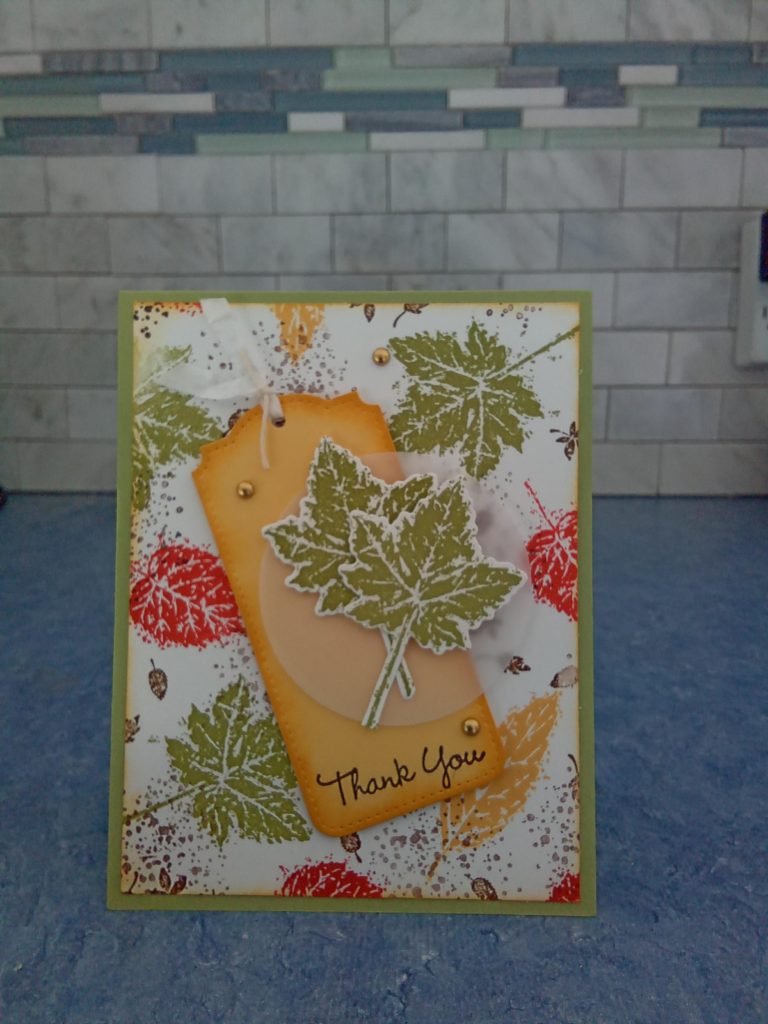
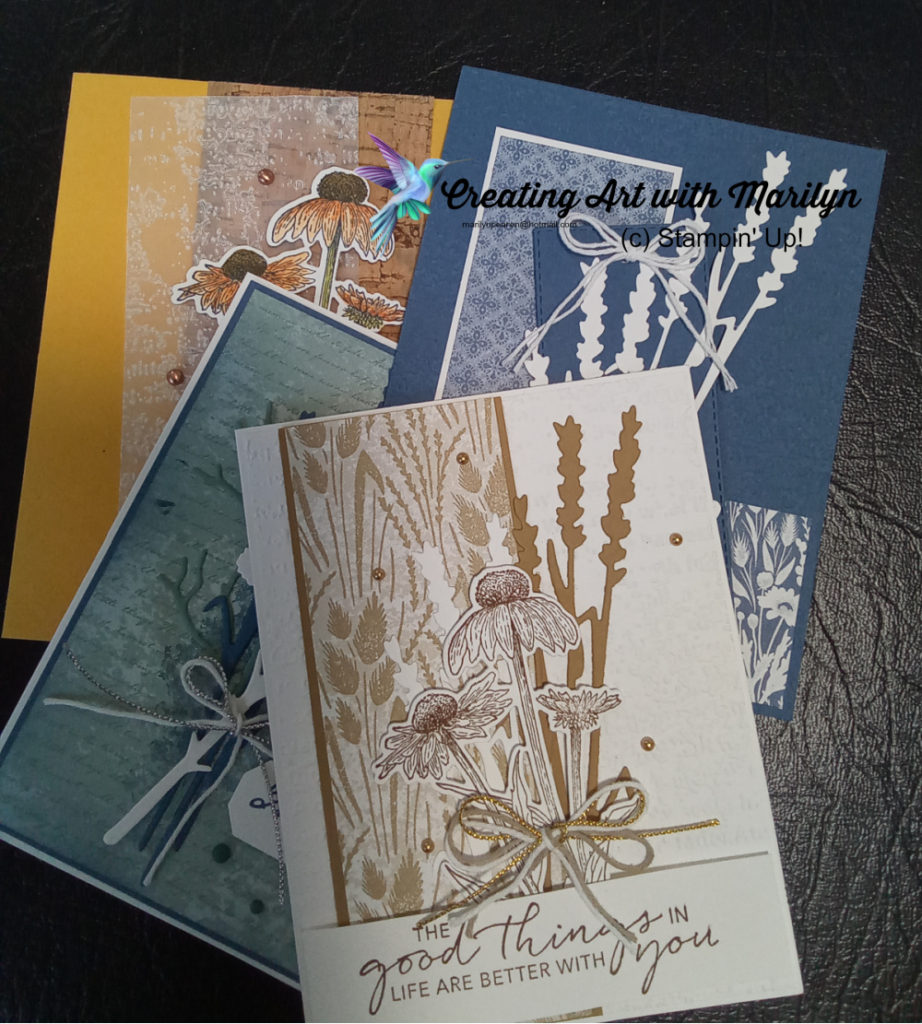
I am so please to be able to participate In Kylie and Bruno’s Demonstrator Training Program Blog Hop. The theme for October is a Thank you card. I decided to use the Nature’s Harvest Suite. I love this stamp set and can’t stop playing with it.

Instructions for the card:

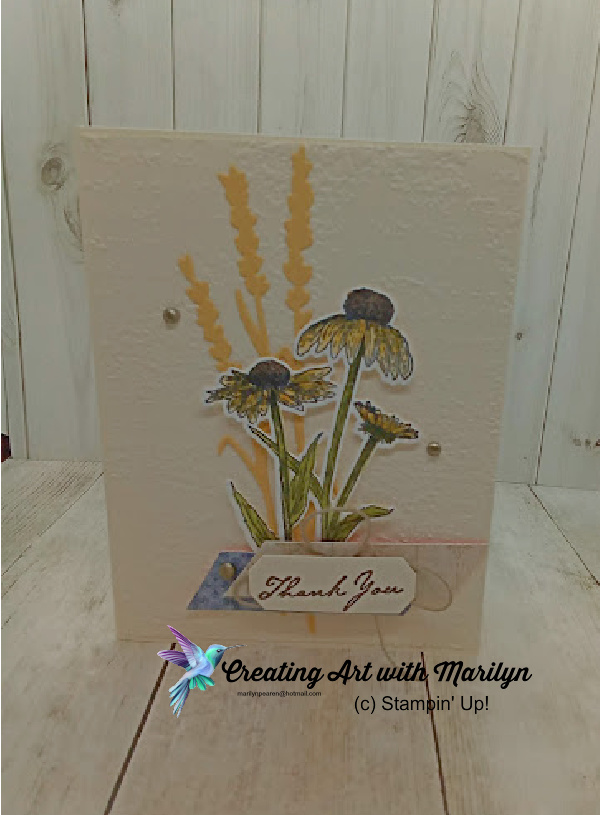
  1. Cut a card base of Very Vanilla 8 1/2″ x 5 1/2″ and score at 4 1/4″
  2. Cut another layer of Very Vanilla at 4 1/8″ x 5 3/8″ and emboss it using the Timeworn Type embossing folder
  3. Attach this layer to the card with liquid glue
  4. On a scrap of Basic White card stock stamp the flower image from the Nature’s Harvest Stamp set in Memento Black
  5. Color the flower with the Stampin Blends in Light So Saffron, Dark Daffodil Delight, Light and Dark Old Olive. and Bronze
  6. Die cut the flower out using the Harvest Die
  7. With So Saffron card stock die cut the wheat design and attach it to the card with liquid glue
  8. Pop the flower image up with dimensionals and place it on the card over the wheat image a little
  9. Cut two different pieces of the Harvest Meadow DSP that are 3/4″ x 3″ and cut the ends on an angle
  10. Pop these pieces with dimensionals on the bottom of the flower stems over lapping each other a little
  11. Make several loops using the Crumb Cake Bakers Twine on top of the pieces of DSP
  12. Stamp the Thank You from the Nature’s Harvest stamp set on Very Vanilla card stock with Early Espresso and die cut it out using the Harvest die
  13. Attach the sentiment to the card with dimensionals
  14. Place three of the Brushed Metallic Adhesive Backed Dots on the card

Thank you for checking out my card. Now grab a beverage and hop over and check all the other great Demonstrations and their cards.

Posted in Uncategorized | 23 Comments

Gorgeous Leaves Color Challenge

On World Card Making day we had to do a picture challenge where we had to look at a photograph and design a card with what we saw in the photograph whether if was colors or elements. I decided on the colors. I used Old Olive, So Saffron, Cajun Crazy Crumb Cake and Early Espresso. To see how I made this continue reading

Continue reading
Posted in Uncategorized | Comments Off on Gorgeous Leaves Color Challenge

Peaceful Place Bay Window Fun Fold

I made this card for the World Card Making Day Challenge. The Challenge was a Tic Tac Toe Card. I choice a Fun Fold, DSP and Ribbon. I made a Bay Window fun fold card. For instructions on how to make is card continue reading.

Continue reading
Posted in Uncategorized | Comments Off on Peaceful Place Bay Window Fun Fold

Art Gallery Color Challenge

I made this card for World Card Making Day Challenge. This challenge it was a Color Challenge using Night of Navy, Petal Pink and Soft Succulent inks. If you would like the card instructions continue reading

Continue reading
Posted in Uncategorized | Comments Off on Art Gallery Color Challenge

Nuts about Squirrels

I made this card for the World Card Making Day challenge. The Challenge was to CASE a card from a current catalogue. I choose the Nuts about Squirrels stamp set from the July to December Mini catalogue. For the instructions to make this card continue reading

Continue reading
Posted in Uncategorized | Comments Off on Nuts about Squirrels

Festive Friday Challenge Apple Day #FF0094

I am happy to be joining in the Festive Friday Challenges. This Friday’s challenge was Apple Day. We had to pick at least 3 items and make a card. I managed to do 4. My card consists of: red, green, gingham, and circle.

Continue reading
Posted in Uncategorized | 6 Comments

Nature’s Harvest Card Kit

I made is card kit using the wonderful Nature’s Harvest Suite. I love this suite and how versatile it is. Here are the measurements and instructions to made this card. read more

Soft Suede Card

Stamps: Nature’s Harvest and Tasteful Touches

Dies: Harvest dies

Embossing Folder: Timeworn Type 3D embossing folder

Inks: Soft Suede

Paper Products: Basic White, Soft Suede, Harvest Meadow DSP

Other Products: Gold Simply Elegant Trim, White and Crumb Cake Bakers Twine Essentials Pack, Gold Metallic Pearls, Dimensionals

Card Instructions:

  1. Basic White card stock cut 8-1/2 x 5-1/2 scored at 4-1/4
  2. Embossed layer 4-1/8 x 5-3/8 embossed with the Timeworn Type 3D embossing folder
  3. Soft Suede card stock layer is cut at 2-1/4 x 5-3/8
  4. Cut DSP layer at 2 x 5-3/8 and attach to Soft Suede layer with liquid glue
  5. Attach this layer to left side of card leaving 1/2″ from the edge
  6. Die cut the wheat dies in Basic White and Soft Suede and attach them to the card with liquid glue
  7. Stamp the Cornflower stamp in Soft Suede ink and die cut it out
  8. Attach it to the card using dimensionals
  9. Sentiment layer is 1 x 4-1/8 and stamp sentiment in Soft Suede and attack with dimensionals
  10. Tie a triple bow using the gold trim and the white and crumb cake bakers twine
  11. Attach the bow with glue dots
  12. Place some of the gold metallic pearls on the card

For instructions on the other cards continue reading

For instruction on the other cards continue reading

Continue reading
Posted in Uncategorized | Comments Off on Nature’s Harvest Card Kit

Sale a Bration is coming to an End

Sale A Bration is coming to an end! September 30th is the last day to place a $60 or more order and receive a free product from the Sale A Bration Brochure. I’m sure you are like me and have things you would like to get from the brochure.

It’s also the end of an amazing joining up special! If you join my amazing team by September 30th, your starter kit will include $165 in product PLUS your choice of one of the 12 amazing bundles from the Mini Catalogue, all for the amazing price of $135 (plus taxes in some provinces) – NO SHIPPING! Whether you just want to be a discount shopper and get the discount or you want to do this as a business, it’s a great time to join this amazing stamping community!

Product List

Posted in Uncategorized | Comments Off on Sale a Bration is coming to an End

Canada Inks Up Blog Hop! September 2021

Hello stampers. Welcome to our September Canada Inks Up Blog Hop. The theme for this month’s Blog Hop was ‘Everything But Christmas’. I decided to made a fun fold card that I saw Dawn Griffith demonstrating.

Here are the supplies I used:

Stamps: Celebrate Sunflowers and Peaceful Moments

Paper Products: Bumblebee and Basic White card stock, Bumblebee 6×6 Designer Series Paper Assortment pack

Other Products: Stampin Blend Markers in Dark So Saffron, Dark Daffodil Delight, Dark Cinnamon Cider, Light and Dark Old Olive, Light and Dark Soft Suede and Memento Black Ink

Instructions for cutting and making card:

  • Bumblebee card stock
  • Card base is 5-1/2 x 8-1/2
  • Two pieces cut at 2-3/4 x 2-3/4
  • Two pieces cut at 1-3/4 x 1-3/4
  • Basic White card stock
  • Two pieces cut at 2-1/2 x 2-1/2
  • Two pieces cut at 1-1/2 x 1-1/2
  • Bumblebee 6×6 Designer Series Assortment Pack
  • Three pieces cut at 1-7/8 x 5-1/4
  • One different design of 6×6 DSP assortment pack cut at 2 x 2

Instructions to make card

  1. Cut card base at 5-1/2 x 8-1/2 and score at 2-1/8, 4-1/4
  2. Fold card in half at the 4-1/4 mark and score and then fold the 2-1/8 score line to make a ‘Z’ fold
  3. Adhere the three pieces of 1-7/8 x 5-1/4 DSP to the folded panels and also the inside of the card
  4. Cut the 2 x 2 piece of DSP from corner to corner making two triangles
  5. Adhere one to the top and the other to the bottom of the right side of the inside of the card.
  6. Attach the Basic White 2-1/2 x 2-1/2 to the Bumblebee 2-3/4 x 2-3/4 piece of card stock and glue it to the center of the card
  7. Score the second piece of the 2-3/4 x 2-3/4 from corner to corner and then from the score line cut it at 1/2″ mark
  8. Score it on both sides to loosen the paper fibres
  9. Put liquid glue on the 1/2 inch piece and butt it up against the inside of the center of card and fold the card close. This will attach the flap to the middle of the card
  10. Glue the two pieces of Basic White 1-1/2 x 1-1/2 to the two pieces of 1-3/4 x 1-3/4 card stock
  11. Fold the card in the ‘Z” position and put a little glue to the attach these to the top and bottom of the front of the card
  12. Stamp and color the sunflowers. I stamped two small flowers and one of the large one for the inside of the card
  13. Color the flowers with Stampin Blends in Dark So Saffron, Dark Daffodil Delight, Dark Cinnamon Cider, Light and Dark Old Olive and Light and Dark Soft Suede
  14. Attach the small sunflowers to the front of the card with dimensionals and then the large sunflower to the inside of the card with dimensionals and the leaves with glue dots
  15. Stamp the sentiment on the white triangle and glue it to the center flap

Here is a video showing how to construct the card. This is my first time to add a video to my blog so it should be a good laugh, but they say practice makes perfect. Enjoy!

Now hop over to see the other demonstrators great cards

Posted in Uncategorized | 8 Comments

Christmas In July

I wanted to make a Christmas card In July using the Classic Cloche Stamp set and dies and also the Painted Christmas DSP. I love how this turned out.

Stamps: Classic Cloche, Evergreen Elegance

Dies: Cloche Dies

Embossing Folder: Timber 3D embossing folder

Cardstock and DSP: Basic White, Painted Christmas DSP, Silver Foil, Brushed Metallic Foil

Inks: Old Olive, Real Red, Misty Moonlight, Memento Black

Other Products: Subtle Shimmer sequins, Basic Pearls, Red Rhinestones, Gold and Silver Simply Elegant Trim

Instructions to make card

  1. Cut Basic White card stock at 8-1/2 x 5-1/2 scored at 4-1/4
  2. Run the front panel of the card through the Timber 3D embossing folder
  3. Cut a piece of DSP 4 x 4 and then cut it from corner to corner to make them into triangles
  4. Cut strips of gold foil 1/2 strips and attach to the long edge of the DSP
  5. Attach these panels to the card base with liquid glue leaving about an 1″ space between the 2 triangle pieces
  6. Use Versa Mark and stamp the Cloche glass image and heat emboss with gold embossing power
  7. Stamp the bird image inside the Cloche dome image in Memento black and stamp extra birds on scraps so you can color them and die cut them out. Color the branch in Old Olive Blends and the extra Birds in Real Red ink
  8. Attach the colored, die cut birds to the stamped image of the birds with mini dimensionals
  9. Place some of the Basic Pearls and the Red Rhinestones to the little bubbles in the image
  10. Tie a little Gold bow using the Simply Elegant Trim and attach it to the top of the Cloche Dome with a glue dot
  11. Attach the finished dome to the card using dimensionals
  12. Stamp the Merry Christmas sentiment from the Evergreen Elegance Stamp set in Versa Mark and heat emboss in Gold embossing powder
  13. Fussy cut the sentiment out and attach with dimensionals
Posted in Uncategorized | Comments Off on Christmas In July