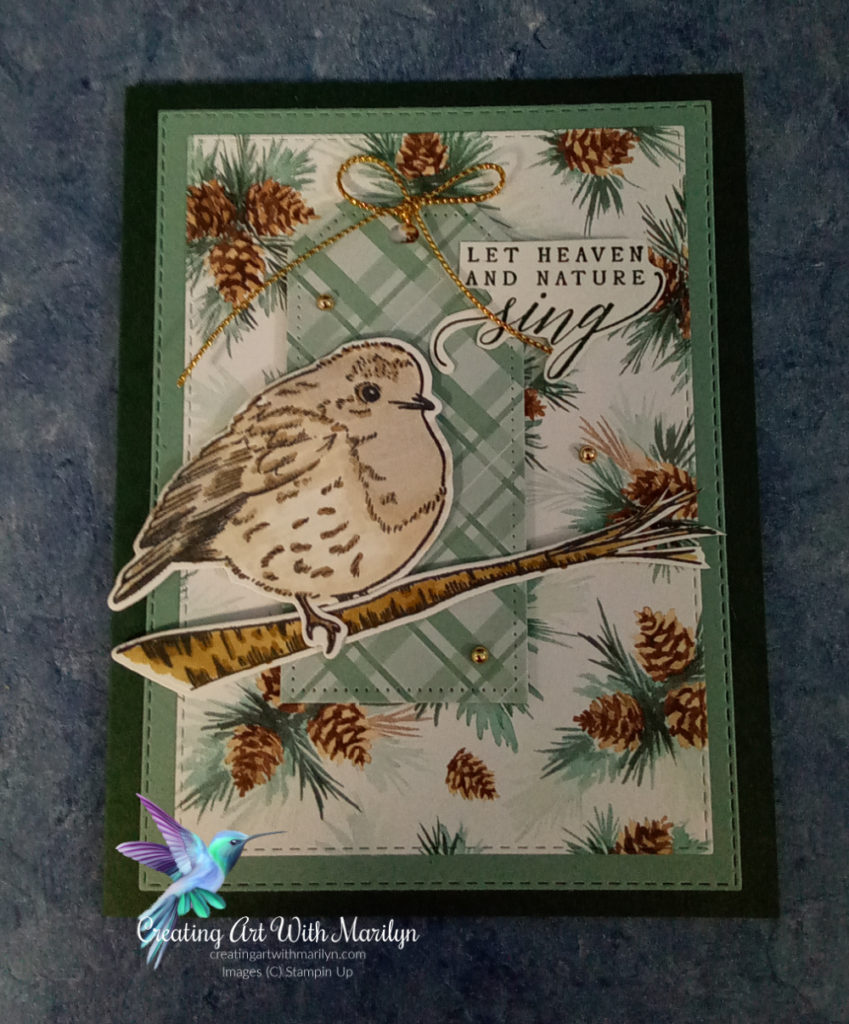
Festive Friday Challenge #FF0114-International Owl Awareness Day

It’s time once again for another Festive Friday Challenge. This Challenge is designed by several very talented Demonstrators from all around the world. They give us an Inspiration list of 10 items to pick from and we must pick at least 3 to create our cards. This weeks Challenge is International Owl Awareness Day #FF0114.

The inspiration items I used for my card were Feathers, Woodland and Texture

Here are the cutting and details for my card:

  1. Card base is Balmy Blue card stock cut at 8 1/2″ x 5 1/2″ scored and folded at 4 1/4″
  2. Basic White layer is cut at 4″ x 5 1/4″
  3. Using the Basic Border die, create a template that look like clouds then lightly sponge clouds in Balmy Blue all over the Basic White layer
  4. Stamp some branches directly on the Basic White card stock from the Sweet Songbird stamp set in Early Espresso ink
  5. Using the Ring of Nature Hybrid dies, die cut some leaves and branches out in Early Espresso and Old Olive card stock
  6. Cut the Old Olive leaves off and attach them to the matching leaves on the Early Espresso branch
  7. Adhere the finished branches to the stamped Early Espresso branches with liquid glue
  8. Stamp the birds in Starry Sky ink from the Sweet Songbirds stamp set. I used the Stamparatus to get a good coverage
  9. For the eyes I used the negative pieces from the reinforcement die from the Tailored Tag die. I used the Black Stampin Write marker to put a little black in the eyes
  10. Do a dry fit of the birds and then stamp the song notes in Memento Black
  11. Pop up the birds on the card with dimensionals
  12. Add some of the Loose Flower Flourishes to the tree branches with a glue dot
  13. Put a drop of liquid glue in the center of the flower and add a Basic Rhinestone
  14. Die cut a cloud from the Wave dies in Basic White card stock
  15. Stamp a sentiment on the cloud in Starry Sky and attach it to the card with dimensionals
Product List
Waves Dies
[158840]
$47.00
Stamparatus
[146276]
$67.00
Posted in Uncategorized | 2 Comments

Canada Inks up July Blog Hop – Christmas in July

I am happy to be participating once again in the Canada Inks U[p Blog Hop for July 2022. This months theme is Christmas in July. I decided to use the new Sweetest Christmas Suite from the July to December Mini Catalogue and I’m also using one of Diane Evans card sketches.

Details to create this card:

  1. Card base is Basic White card stock cut at 8 1/2″ x 5 1/2 ” scored and folded at 4 1/4″
  2. Cut a piece of Real Red card stock 4 1/4″ x 5″
  3. Using the Basic Border Dies, made a chevron edge on the Real Red card stock
  4. Emboss it with the Timeworn 3D embossing folder and attach it directly to the card base
  5. Cut a piece of Designer Series Paper 2 5/8″ x 3 7/8″ and attach directly to the embossed layer
  6. Die cut a piece of Basic White using the Scalloped Contour Die that measures 2 1/2″ x 3 3/4″ and attach it with dimensionals
  7. For the image on the card, I cut out several of the elements from the Christmas Banner Die set in Garden Green, Soft Succulent and Crumb Cake card stock and also used the Real Red Glimmer Paper to make the berries on the holly branch
  8. Using the Gold Simply Elegant Trim, I made a couple of loops and then assembled the pine branch and the berries on the gold trim
  9. With Real Red Ink I stamped the Christmas Banner and the sentiment from the Christmas Banner Stamp set and then die cut it using the Christmas Banner Die
  10. The banner is popped up with dimensionals
Product List
Posted in Uncategorized | 3 Comments

Festive Friday Challenge-Global Tiger Day-#FF0113

It’s time for another Festive Friday Challenge. This Challenge has been created by several Demonstrators from all around the world. They give us an Inspiration list of 10 items to pick from and we must pick at least 3 to create our cards. This weeks Challenge is Global Tiger Day #FF0113.

For my card I’m using Paper Piecing, Black, Frame and Embellishments

Details to create my card:

  1. Card base is Basic White cut at 8 1/2″ x 5 1/2″ scored and folded at 4 1/4″
  2. The front of the card was embossed with the Timeworn 3D Embossing Folder
  3. Cut a strip of the 6″ x 6″ Calypso Coral Subtle Assortment Pack at 1 1/2″ x 5 1/4 ” and adhere to the edge of the card with liquid glue
  4. Stamp the image from the In The Moment stamp set in Memento Black Ink on a piece of Basic White card stock that is cut at 3″ x 3″
  5. Color the stamped image with Stampin Blends omitting the parts that you want to paper piece
  6. Stamp the image again onto pieces of Designer Series Paper to create the clothes she is wearing. I pieced her shirt, pants and the pillows
  7. Fussy cut out the pieces of the shirt, pants and pillows and glue them in place on the stamped image
  8. Attach the finished focal image to a piece of Basic Black card stock that is 3 1/4″ x 3 1/4″
  9. Add the image to the card with dimensionals
  10. Stamp a sentiment from the Go To Greetings in Basic Black
  11. Die cut the image out with the smallest Tailored Tag die
  12. Attach it to the card with dimensionals
  13. Color a piece of the white Baker’s Twine Essential pack of twine in light Calypso Coral Stampin Blends and tie it in a bow and add it to the tag with a glue dot
  14. Add some of the 2022-2024 In Color Matte Decorative Dots to add some bling
Posted in Uncategorized | 4 Comments

Abigail Rose Suite-Just for you card

I love the New Abigail Rose Bundle! The Abigail Rose Designer Series Paper is so pretty and it isso much fun to color. I colored this image using Stampin Blends, I used Flirty Flamingo, Pool Party, Fresh Freesia, Old Olive and Mossy Meadow. I die cut some of the images from the Cottage Flowers Die set in Gold Foil paper. I randomly stamped flowers on a piece of Vellum with Soft Suede and then tagged the bottom of it. The sentiment is from the Ranunculus Romance stamp set and is heat embossed in Gold Embossing Powder. The gems are the Iridescent Rhinestones. For the complete details click here

Posted in Uncategorized | 4 Comments

Garden Grandeur Stamp-Triple Stamped Card

Once again it’s time to participate in Kylie’s Monthly International Blog Hop for July. This challenge is a gallery of Demonstrators’ projects from all over the world and then our cards are voted on. The theme of this challenge is ‘Thank You’. I decided I wanted to play with the Host Stamp Set from the Annual Catalogue called the Garden Grandeur. I decided to make a Triple Stamped Card.

Details to create this card:

  1. Card Base is Tahitian Tide card stock cut at 8 1/2″ x 5 1/2″ scored and folded at 4 1/4″
  2. Cut three pieces of Basic White card stock 4 x 5 1/4, 2 1/4 x 3 1/2 and 1 3/4 x 2 1/2
  3. Cut 2 piece of Tahitian Tide card stock 2 1/2 x 3 3/4, 2 x 2 3/4
  4. Position the Basic White pieces on the larger Basic White Layer with repositional tape , over laping the layers
  5. Stamp your images on all the layers
  6. While the layers are still all together color the images
  7. Remove the layer and adhere the Basic White layer to the coordinating Tahitian Tide layer
  8. Attach the correct layer to the larger Basic White layer with dimensional
  9. Attach the Basic White layer to the card base with liquid glue
  10. Stamp a sentiment from the Go To Greeting stamp set in Versa Mark ink and heat emboss with Gold Embossing powder
  11. Fussy cut the sentiment out and attach it to the card with dimensionals
  12. Place some Iridescent Gems to the finished card for some bling
Product List
Posted in Uncategorized | 3 Comments

Festive Friday FF#0112-Alice in Wonderland Day

It is once again time for another Festive Friday Challenge. This Challenge is designed by several very talented Demonstrators from all around the world. We are give an inspiration list consisting of 10 items to pick from. We must create a card using at least 3 of the items from this list. This weeks challenge is called Alice In Wonderland #FF0112.

For my card I’m using Teacup, Hearts and Book (Book Fold)

Details to create my card:

  1. Card base is Flirty Flamingo card stock cut at 8 1/2″ x 4 1/4″ scored at 4 1/4″ and 5 1/2″
  2. Fold the card in half at the 5 1/2 fold line and then fold the card back to the left to make the book fold
  3. Cut a piece of Basic White card stock 1 x 4 1/8″ and adhere to 1 1/4 folded area
  4. Cut a piece of the Laying Design 12 x 12 Vellum at 1 x 4 1/8 and attach it directly to the basic white layer with glue dots
  5. Tie a piece of the white twine from the Baker’s Twine Essential Pack around the 1 1/4 fold part of the card
  6. Glue the 1 1/4 fold directly to the card forming the book fold
  7. Cut a piece of Basic White card stock at 3 3/4 x 3 3/4 and stamp a image from the In The Moment stamp set in Memento Ink
  8. Stamp a sentiment from the Go To Greeting in Memento Black ink onto the Basic White card stock as well
  9. Color the image using Stampin Blends
  10. Cut another piece of Basic White Card stock at 4 1/8 x 4 1/8
  11. Cut a piece of the Laying Design 12 x 12 Vellum at 4 1/8 x 4 1/8 and attack it directly to the Basic white layer and attack directly to the card with liquid glue
  12. Adhere the stamped and colored image on top of the vellum with Stampin Seal
  13. Color three of the Heart Pearls in Dark Real Red Blends and attach to the card
Product List
Heart Pearls
[159190]
$11.00
Posted in Uncategorized | 4 Comments

Pansy Patch

I am so pleased to once again be able to participate in Kylie’s International Blog Highlight Winners Hop. Thank you everyone that took the time and voted for my card. Your votes made me able to participate in this Blog Hop with the Top 10 Winners from all around the World. I decided to use the Pansy Patch stamp set and the Pansy dies to create this card. The dies cut out and emboss the flower petals and leaves, giving great details to the petals and leaves.

Details to cut and create this card:

  1. Card base is Sweet Sorbet card stock cut at 8 1/2″ x 5 1/2″, scored and folded at 4 1/4″
  2. Layer of Basic White card stock cut at 4 1/8″ x 5 3/8″
  3. Emboss this layer with the Painted Texture 3D embossing folder
  4. Cut the next layer of Basic White card stock at 2 3/4″ x 5 3/8″
  5. Emboss this layer of card stock with the Brick and Mortar embossing folder
  6. Cut 2 strips of the Distressed Gold Specialty paper that are 1/2″ x 5 3/8″and adhere to the edge of the embossed layer with Stampin Seal
  7. Attach this embossed layer to the card base with dimensionals
  8. Die cut the pansy petals and the pansy bud in Basic White card with the Pansy Dies
  9. The leaves and bud stem are die cut in Old Olive card stock
  10. Use a sponge dabber and the Sweet Sorbet ink and lightly sponge the centers of each petal and sponge the edges of each of the petals and bud as well. This brings out the embossed details in the petals
  11. Lightly sponge the edges of the leaves and bud stem with Old Olive ink
  12. The pansy face is die cut in Basic Black card stock and the center of the pansy is die cut in So Saffron card stock. Lightly sponge the edges of the pansy centers with So Saffron ink
  13. Lightly curl the petals and assemble the flowers with a glue dots
  14. Attach the black face and the yellow centers to the finished pansies
  15. Place the pansies on the card layer with dimensionals
  16. Add the leaves with glue dots
  17. Add the pansy bud with a dimensional and glue the stem in place on the card
  18. The sentiment is from the Go To Greeting stamp set embossed in Gold Embossing Powder
  19. Die cut the sentiment with the Harvest die set
  20. Die cut another layer with this die in Sweet Sorbet card stock
  21. Cut the Sweet Sorbet die in half and add it to the Gold Embossed layer to give it the layer look
  22. Attach the sentiment to the card with dimensionals
  23. Add some 2021-2023 In Color Opal Rounds in Polished Pink for some bling

Now that you have seen my card hop over and check the other Great Demonstrators and their creations.

Product List
Harvest Dies
[156504]
$52.00
Posted in Uncategorized | 9 Comments

Pansy Patch Congratulations Card

I think the Pansy Patch Bundle is one of my favorite flower sets in the Annual Catalogue. I love how the dies emboss each petal. I took advantage of the embossing and lightly sponged the centers of each of the petals and sponged around the edge of the petals giving the pansy a darker highlight to the petals. For details on this card…..

Posted in Uncategorized | Comments Off on Pansy Patch Congratulations Card

Canada Inks Up! Blog Hop June 2022-Sneak Peek 2022 July to December Mini Catalogue

I am so happy to be participating in another Canada Inks Up! Blog Hop for June 2022. The theme for this month’s Blog Hop is a Sneak Peek of the 2022 July to December Mini Catalogue. There are some really great stamps, Bundles and Suites in this Mini Catalogue that it was hard to pick from. The All Bundled Up stamp set was so cute and a must have for me that I decided to use it and create a card using the cute raccoon from the set.

Cutting and details to create this card:

  1. Card base is Basic White card stock cut at 8 1/2″ x 5 1/2″ scored and folded at 4 1/4″
  2. Layer 2 is Real Red card stock cut a 4″ x 5 1/4″
  3. Emboss the Real Red card stock layer with the Wintry 3D Embossing Folder. This folder is only 3″ wide, so run it thought the Large Cut and Embossing machine twice, making the seam in the center so it will be mostly covered up with the other layers
  4. Use the White Craft Ink and a dabber and brush lightly over the embossed images to give them a little highlights
  5. Tie a piece of the red ribbon from the Real Red and Garden Green 3/8″ ribbon combo pack around the Real Red layer
  6. Cut a piece of the Sweetest Christmas 12×12 Designer Series paper at 2 x 3 1/2, attach this layer dircectly to the Real Red Layer on an angle
  7. Cut another piece of the Sweetest Christmas Designer Series Paper at 1 5/8 x 2 3/4 and layer it onto a piece of Basic White that is 1 3/4 x 2 7/8 and apply it to the Real Red layer
  8. Stamp the cute Racoon onto a piece of Basic White in Memento Black and color it using Stampin Blends. I used Light and Dark Gray Granite, Dark Smokey Slate, Light and Dark Real Red
  9. Die cut the image with the Stylish Shaped dies
  10. Pop the Stamped image onto the card with dimensionals
  11. Stamp a sentiment in Memento Black on a scrape of Basic White card stock and die cut it using the die from the Stylish Shape die set
  12. Tuck it under the stamped image and pop it up with dimensionals
  13. Fussy cut one of the tiny candy canes and glue it to the raccoons hand
  14. Add some Sparkle and Shine Sequins to the finished card
Posted in Uncategorized | 3 Comments

Free Shipping One Day Only!

For ONE DAY ONLY! Stampin Up is offering FREE SHIPPING on orders over $100. This is a great time to take advantage of the Last Chance Sale and the BOGO Kit Sale

This is just a sample of what is available in the last Chance Sale

Product List
Product List
Posted in Uncategorized | Comments Off on Free Shipping One Day Only!