
I made this card for the World Card Making Day Challenge. The Challenge was a Tic Tac Toe Card. I choice a Fun Fold, DSP and Ribbon. I made a Bay Window fun fold card. For instructions on how to make is card continue reading.
Continue reading")

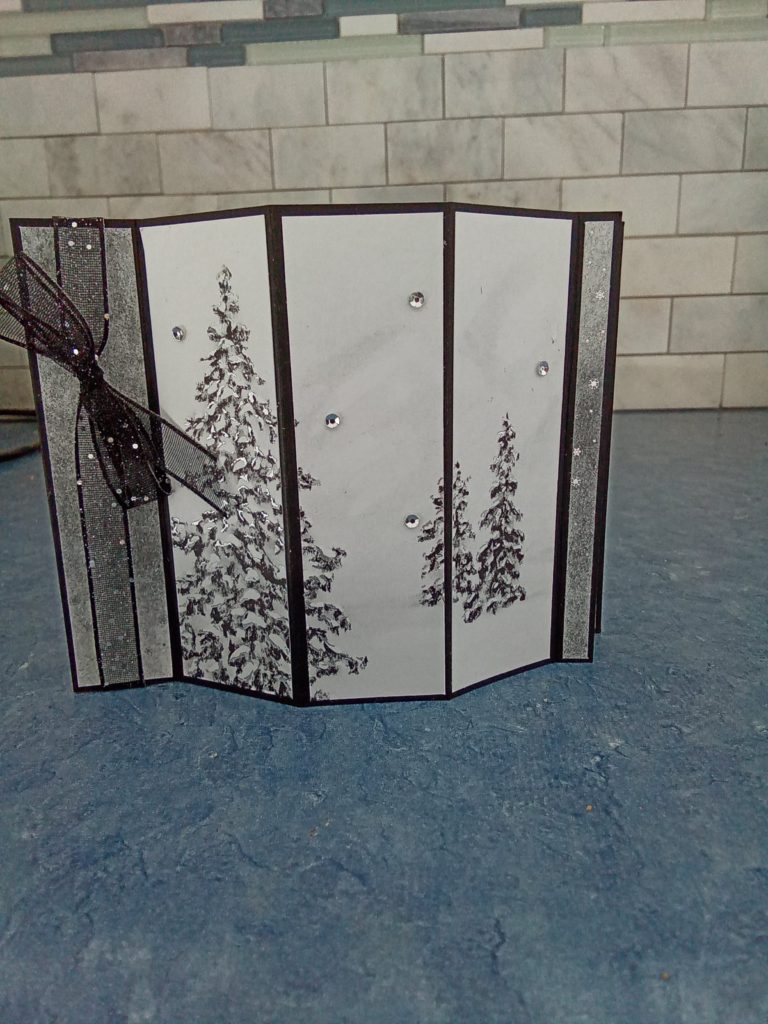
I made this card for the World Card Making Day Challenge. The Challenge was a Tic Tac Toe Card. I choice a Fun Fold, DSP and Ribbon. I made a Bay Window fun fold card. For instructions on how to make is card continue reading.
Continue reading
I made this card for World Card Making Day Challenge. This challenge it was a Color Challenge using Night of Navy, Petal Pink and Soft Succulent inks. If you would like the card instructions continue reading
Continue reading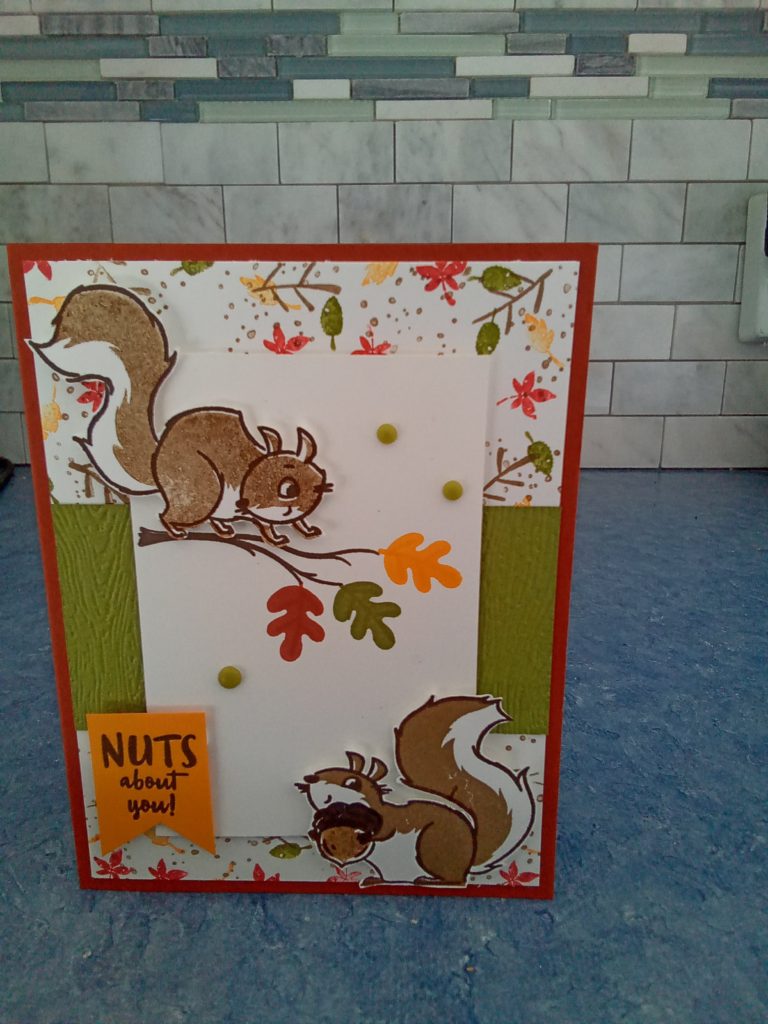
I made this card for the World Card Making Day challenge. The Challenge was to CASE a card from a current catalogue. I choose the Nuts about Squirrels stamp set from the July to December Mini catalogue. For the instructions to make this card continue reading
Continue reading
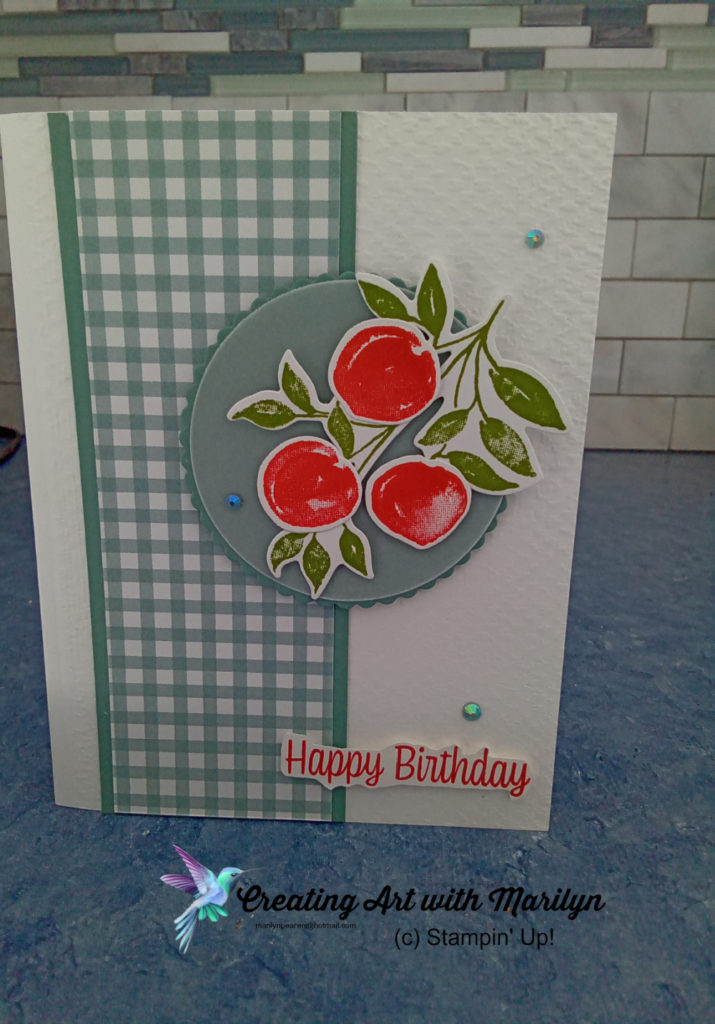
I am happy to be joining in the Festive Friday Challenges. This Friday’s challenge was Apple Day. We had to pick at least 3 items and make a card. I managed to do 4. My card consists of: red, green, gingham, and circle.
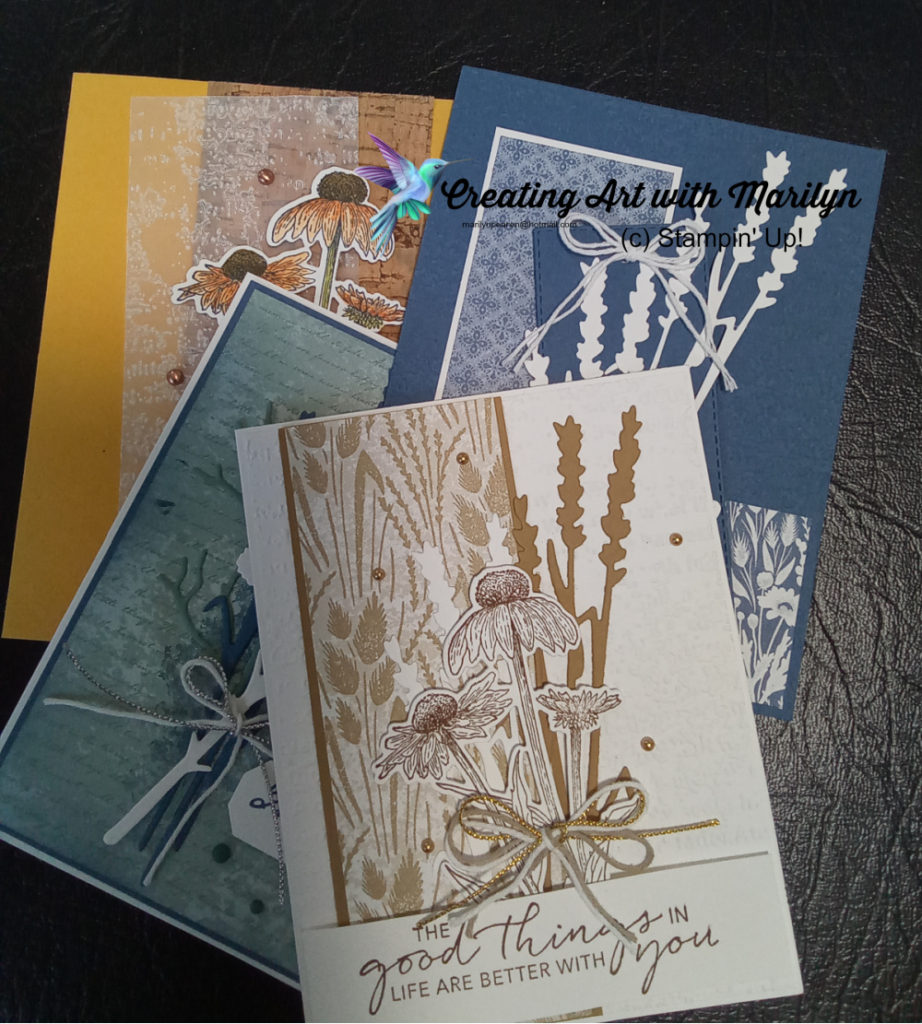
I made is card kit using the wonderful Nature’s Harvest Suite. I love this suite and how versatile it is. Here are the measurements and instructions to made this card. read more
Soft Suede Card
Stamps: Nature’s Harvest and Tasteful Touches
Dies: Harvest dies
Embossing Folder: Timeworn Type 3D embossing folder
Inks: Soft Suede
Paper Products: Basic White, Soft Suede, Harvest Meadow DSP
Other Products: Gold Simply Elegant Trim, White and Crumb Cake Bakers Twine Essentials Pack, Gold Metallic Pearls, Dimensionals
Card Instructions:
For instructions on the other cards continue reading
For instruction on the other cards continue reading
Continue reading

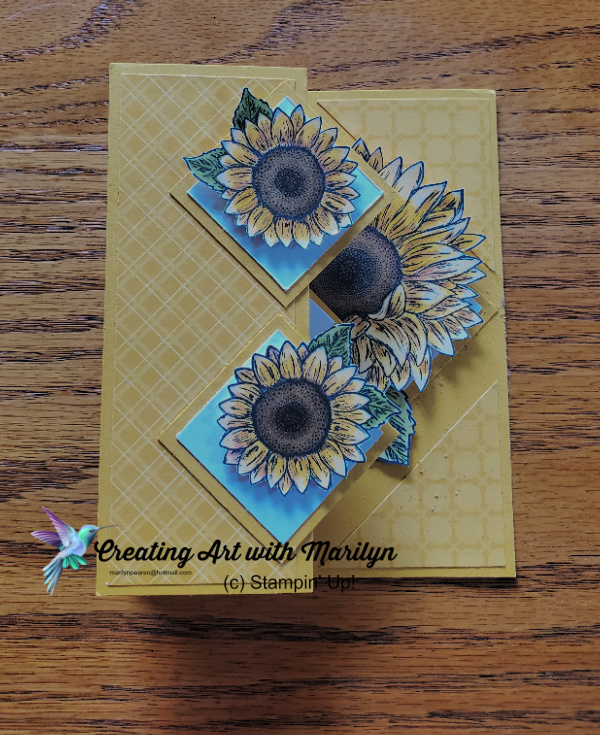

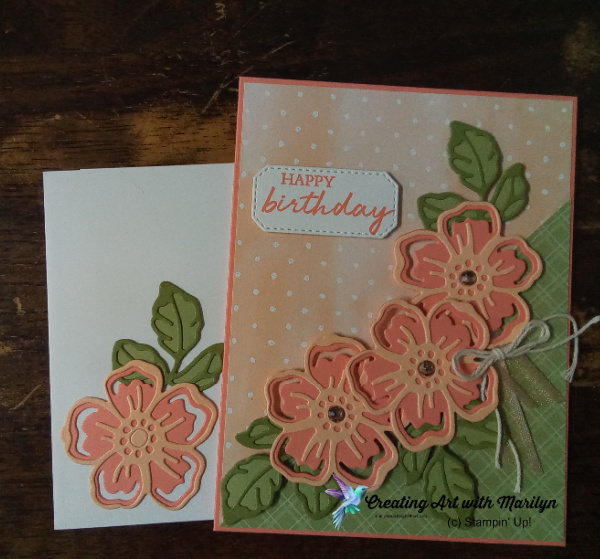
Here are the supplies I used:
Stamps: Celebrate Sunflowers and Peaceful Moments
Paper Products: Bumblebee and Basic White card stock, Bumblebee 6×6 Designer Series Paper Assortment pack
Other Products: Stampin Blend Markers in Dark So Saffron, Dark Daffodil Delight, Dark Cinnamon Cider, Light and Dark Old Olive, Light and Dark Soft Suede and Memento Black Ink
Instructions for cutting and making card:
Instructions to make card
Here is a video showing how to construct the card. This is my first time to add a video to my blog so it should be a good laugh, but they say practice makes perfect. Enjoy!
Now hop over to see the other demonstrators great cards
I wanted to make a Christmas card In July using the Classic Cloche Stamp set and dies and also the Painted Christmas DSP. I love how this turned out.
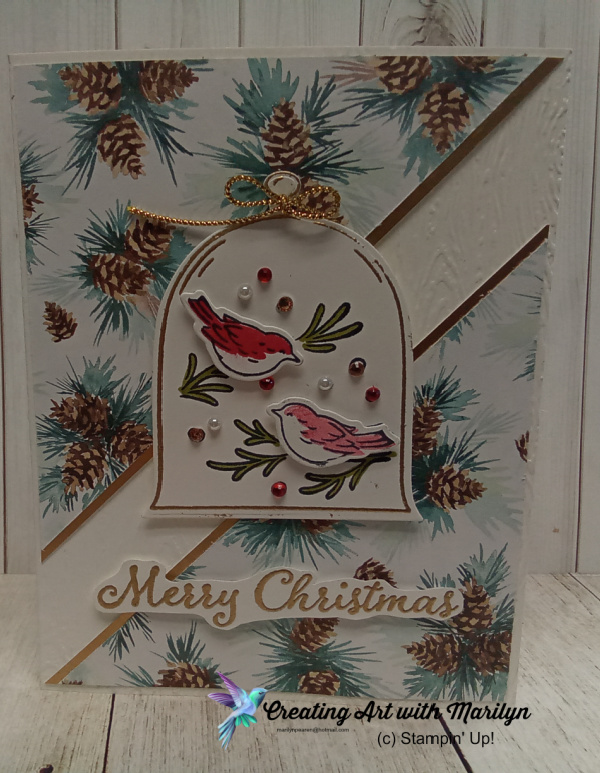
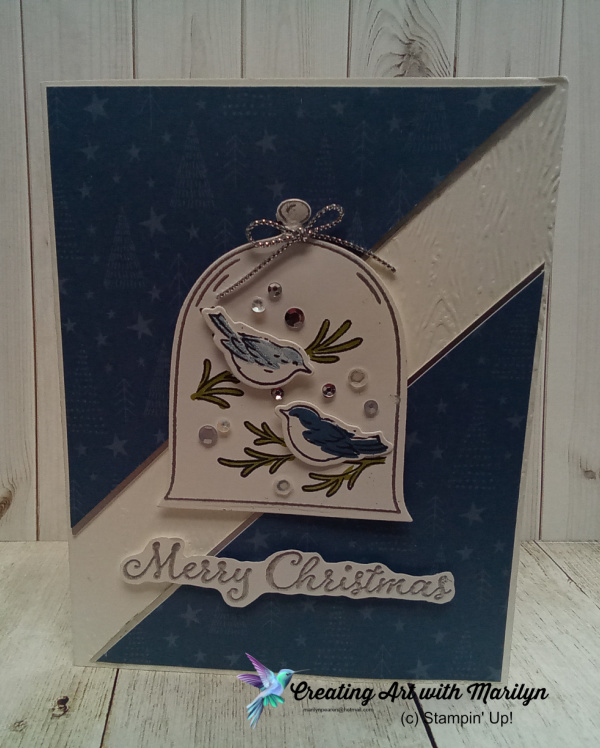
Stamps: Classic Cloche, Evergreen Elegance
Dies: Cloche Dies
Embossing Folder: Timber 3D embossing folder
Cardstock and DSP: Basic White, Painted Christmas DSP, Silver Foil, Brushed Metallic Foil
Inks: Old Olive, Real Red, Misty Moonlight, Memento Black
Other Products: Subtle Shimmer sequins, Basic Pearls, Red Rhinestones, Gold and Silver Simply Elegant Trim
Instructions to make card
Hello Stamps. Thanks again for stopping by and checking out our Canada Inks Up Blog Hop for August. This month’s theme is something from Sale-A- Bration. I decided to use the Summer Shadows Dies. These dies coordinate with the Shaded Summer Stamp Set in the Annual catalogue.

Here are the Supplies I used.
Stamps: Shaded Summer from Annual Catalogue
Dies: Summer Shadow from Sale-A- Bration and Hippo and Friends Die
Paper Products: Hand Penned DSP, 6×6 Old Olive Designer Series Paper, Pale Papaya, Calypso Coral, Old Olive and Pear Pizzazz card stock
Other Products: Pale Papaya Ribbon, Very Vanilla Baker’s Twine Essential Pack, Champagne Rhinestones
Card Instructions:

Hello Stampers, Welcome back to our Canada Inks Up Blog Hop for the month of July. The theme for this month’s Blog is Christmas in July. I decided to use a stamp set and dies from the New July to December Mini Holiday Catalogue called Peaceful Cabin.
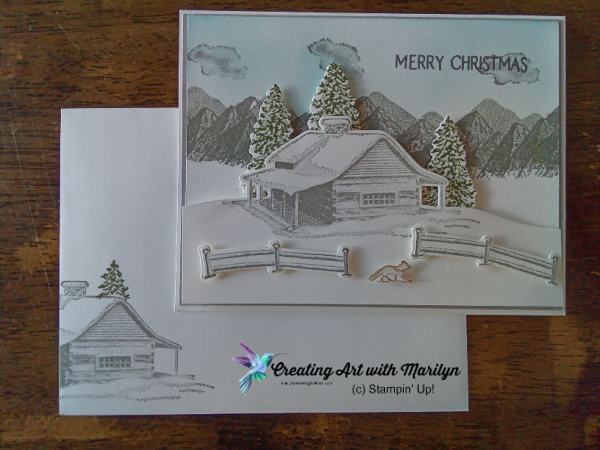
Stamps: Peaceful Cabin, Mountain Air, Peaceful Deer (sentiment)
Dies: Cabin Dies
Inks: Balmy Blue, Mossy Meadow, Smoky Slate and Crumb Cake
Paper Products: Basic White and Smoky Slate Cardstock
Other Products: Blending Brushes, Dimensionals
Card Instructions
Now hop over to see the other Demonstrators and their creation


")
")
")
")
")
")
")
")
")
")
